SET YOUR VEHICLE
TALK TO A PARTS EXPERT TODAY!
FREE SHIPPING ON ORDERS OVER $70 in the contiguous US lower 48 states

SPECIALS!
The ARB Air Locker Bulkhead Fitting kit can look a little daunting when you first see one, but it doesn’t need to be. They really are quite simple and quite easy to install them once you have a good close-up of whats going on and what you need to do.
This article covers the installation of the 170111 ARB bulkhead fitting kit which has been used in Air Lockers for the past decade and is the most common bulkhead you’ll run into if you are working on an installed Air Locker.
There is a newer ARB bulkhead kit that is coming with the Air Lockers, we’ll cover that in a future article. This article is for those wanting to repair or replace their current bulkhead fitting.
Parts Needed:
ARB Bulkhead Fitting Kit pn# 170111
Tools Needed:
3/8″, 7/16″/ 9/16″ wrench
Small flat blade screwdriver
Parts Diagram:
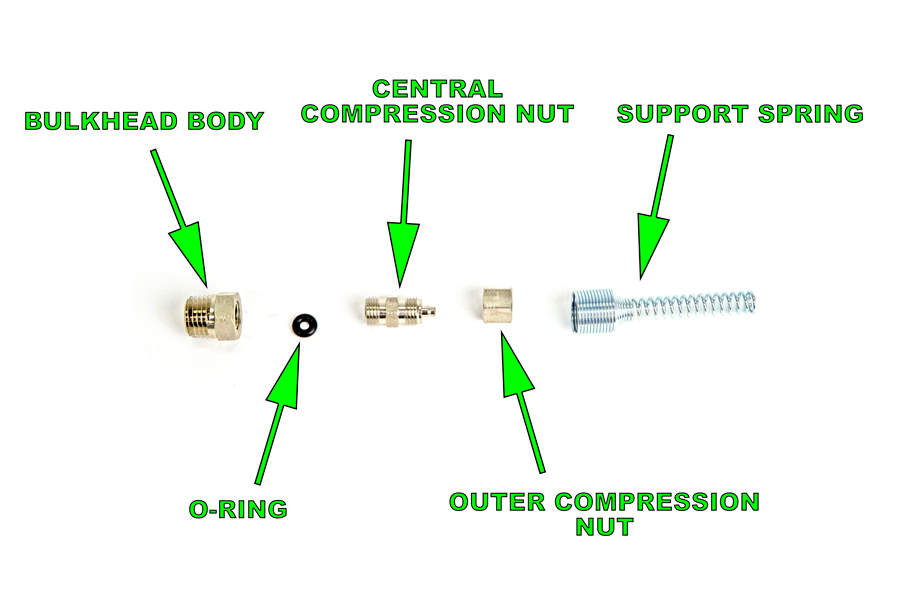
Here are the parts that make up the ARB #170111 Bulkhead Fitting Kit. ARB #170111 Bulkhead Parts Breakdown: Bulkhead Body #170611 O-ring #160234 Central Compression Nut. #170660 Outer Compression Nut #170661 Airline Support Spring. #170701
The Air Locker Bulkhead Fitting Kit How To:

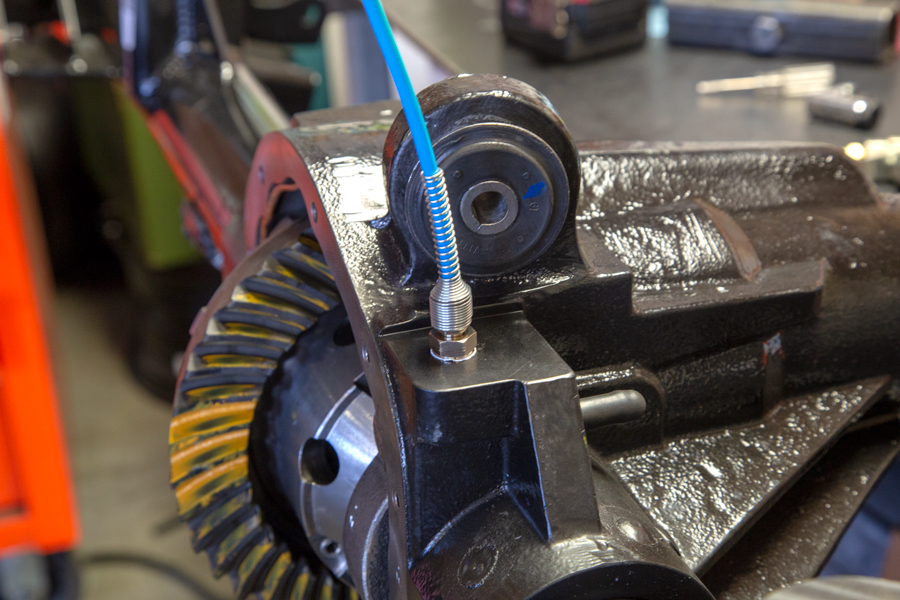
The ARB Bulkhead fittings can be separated into two groups, the copper line fittings and the blue airline fittings. The first group anchors and seals the copper airline coming up through the housing. The second group secures the blue air line to the fittings coming through the axle housing.
The bulkhead body screws down into the threaded hole, we like to use a liquid pipe sealant on the threads of the bulkhead body (Loctite 567) to seal it to the tapped hole in the housing. Push the copper line up through the bulkhead body until it is flush with the top of the bulkhead body.
Hold the copper airline with one hand and push the black o-ring down over the end of the copper line.
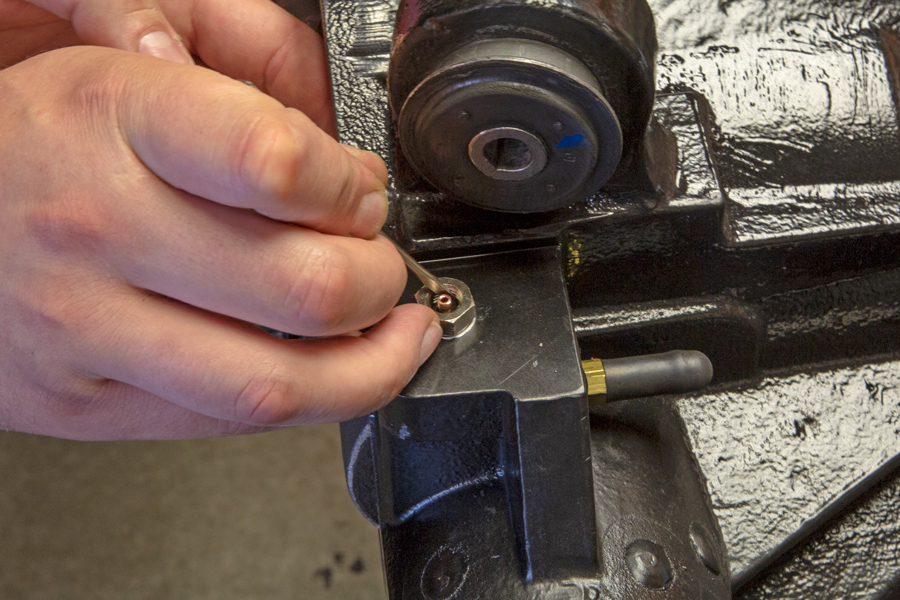
Use a small flat blade screwdriver to push the o-ring down into the bulkhead body. Keep your other hand on the copper air line to help keep it in place.
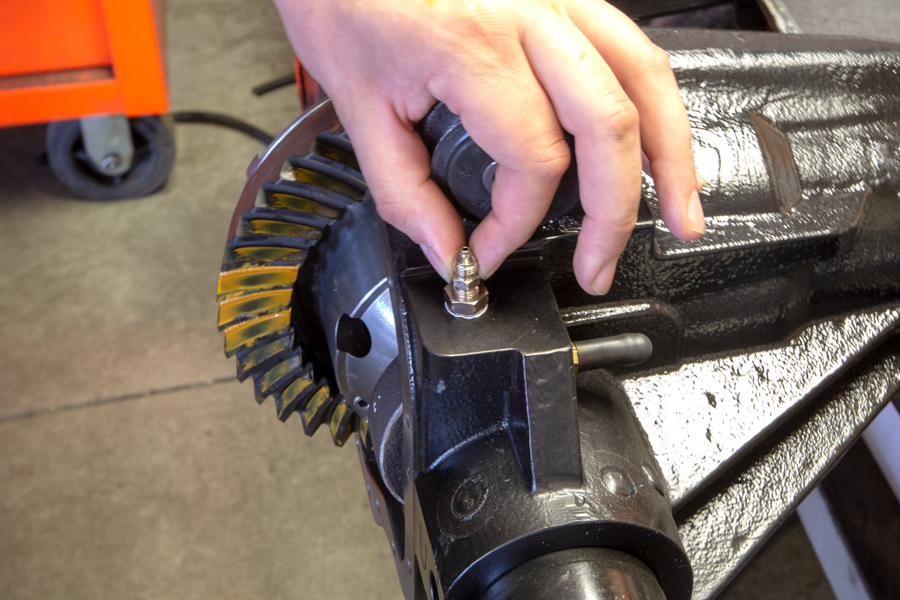
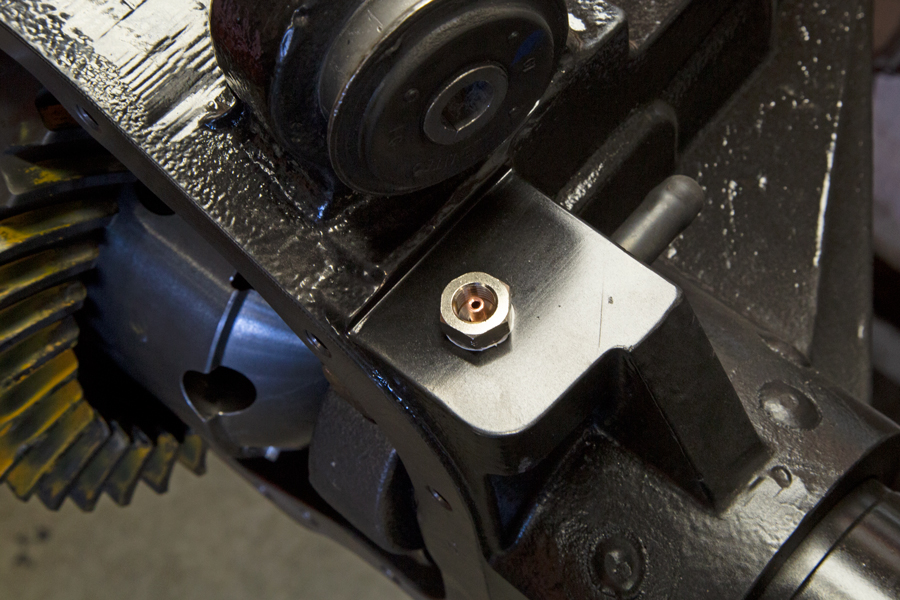
Screw the central compression nut down into the bulkhead body by hand until it stops.
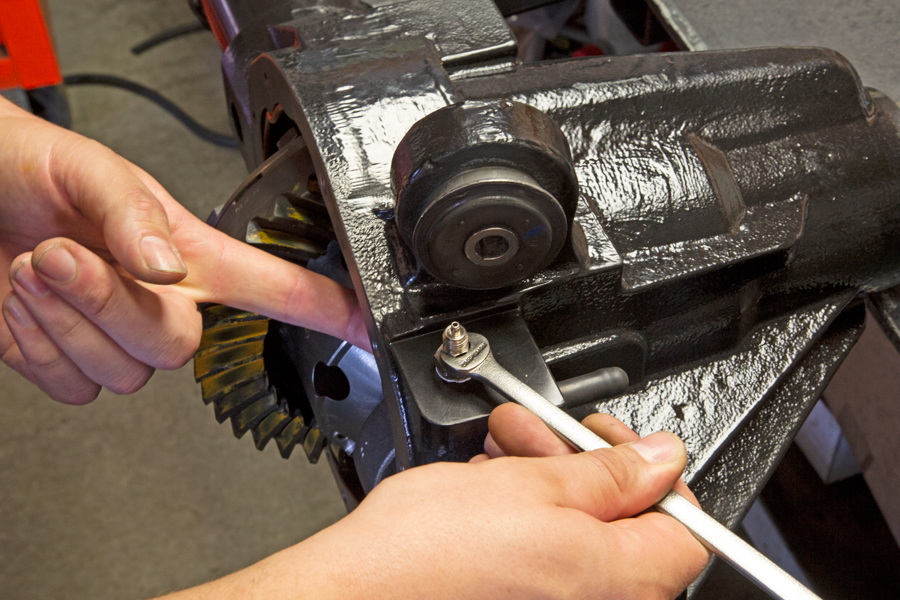
Use a 3/8″ wrench to lightly tighten the central compression nut. Once you feel it stop, give it a 1/4 turn to lock the o-ring onto the copper airline. *Do Not over tighten, you could cut off the air flow to the Air Locker causing issues with locking speed and engagement.
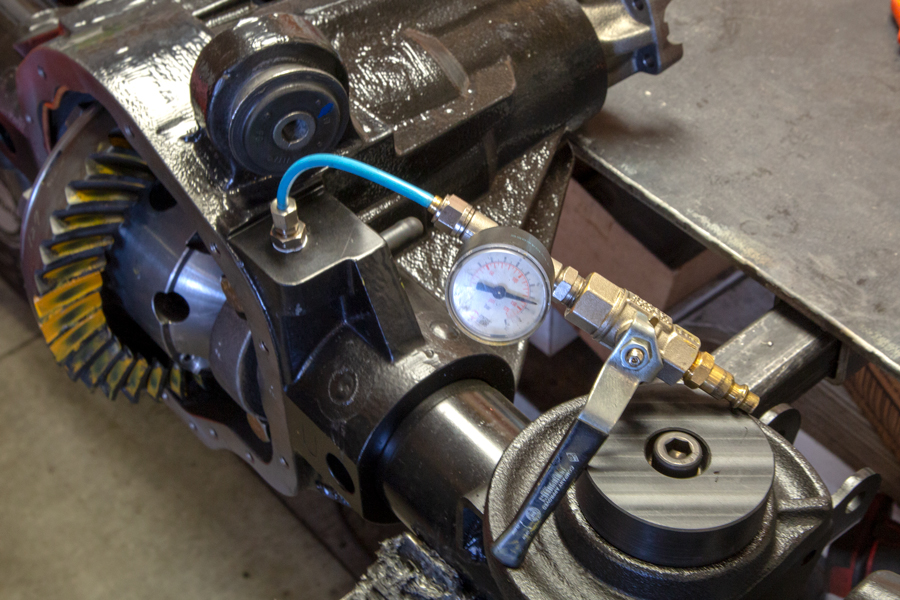
If you have one, use an air locker test tool to apply air pressure to the Air Locker and hold for five minutes.
Installing the ARB blue air line:
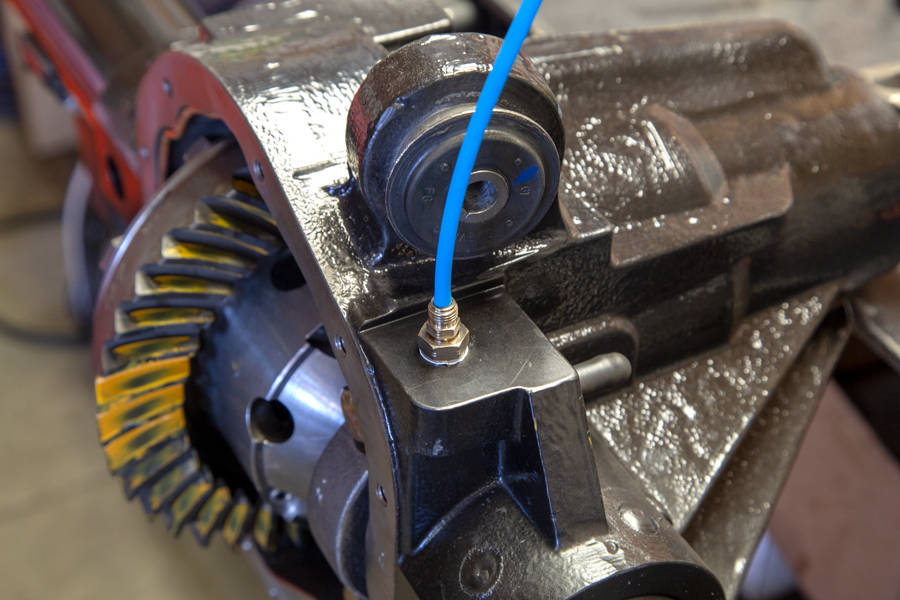
Push the ARB blue airline down over the nipple until it sits flush against the top seat of the central compression nut.

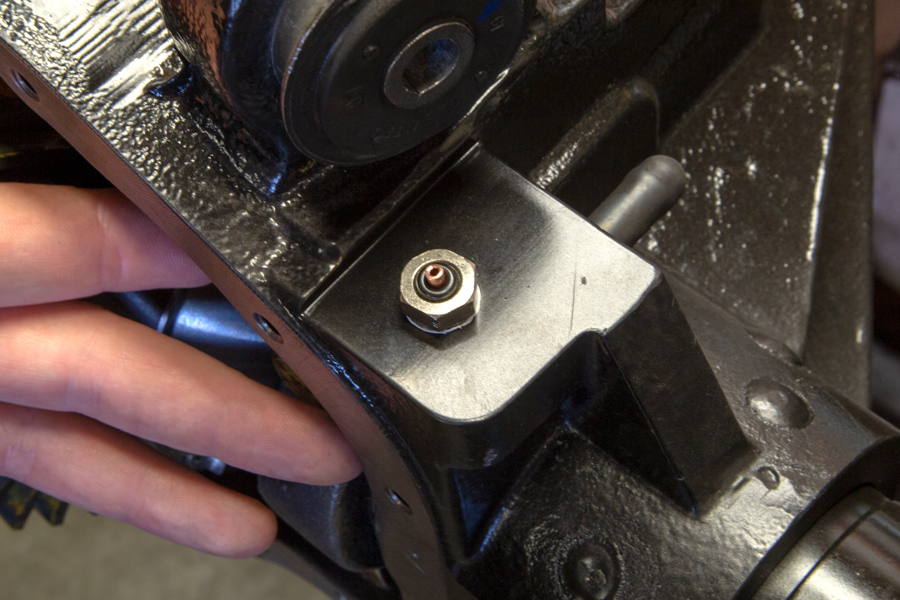
Install the ARB outer compression nut on the central compression nut and tighten by hand.
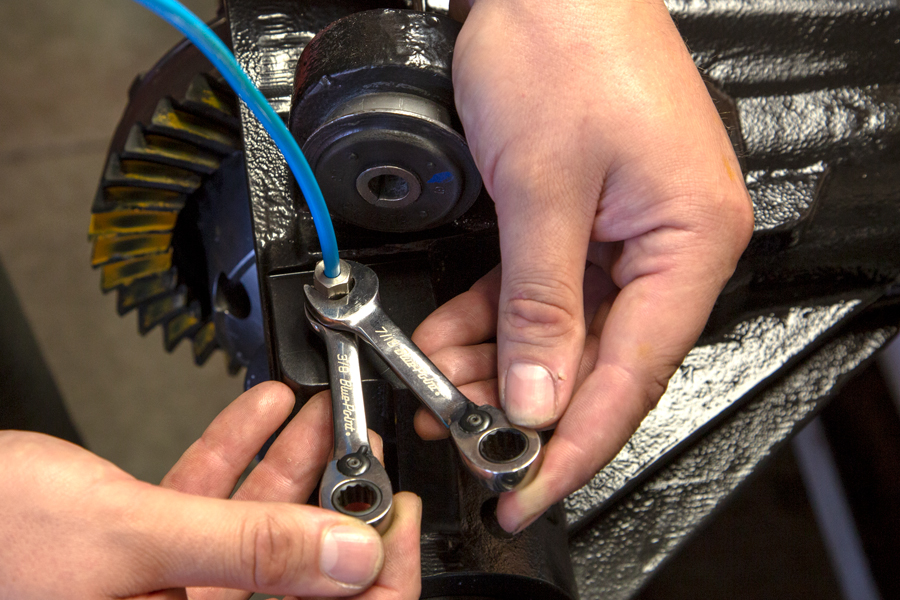
Use a 3/8″ wrench on the central compression nut (to keep it from turning) and a 7/16″ wrench on the top compression nut and tighten the top nut. These are brass fittings, so be very careful to not over-tighten. **Be very careful to not let the central compression turn any tighter or it could pinch the copper airline down too tight and cause Air Locker engagement problems.

Install the ARB air line support tube by pushing it down onto the top nut and slowly turn counter-clockwise. Once you feel the spring start to expand, turn the spring clockwise and push the spring down into place.