1995 Jeep Cherokee XJ
Country 4.0
TALK TO A PARTS EXPERT TODAY!
FREE SHIPPING ON ORDERS OVER $70 in the contiguous US lower 48 states

SPECIALS!
Sooner or later you gotta do it… Change the oil in your Jeep JL/JT with the 3.6 V6 engine.
The miles are racking up on your new JL and you’re starting to wonder when should you change the oil in your JL?
In general, FCA USA LLC recommends that engine oil and oil filter be changed every 5,000 miles. However that can change according to usage, light duty to severe duty, you’ll have different change intervals according to lubrication and filtration needs. But how do you know when you should change your oil and oil filter?
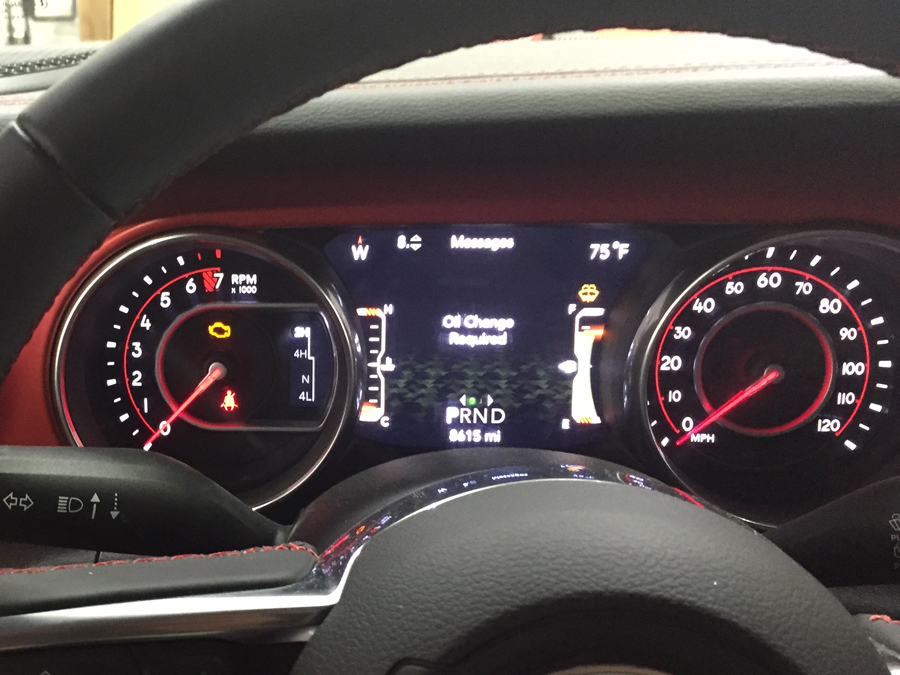
Like the later model JKs, Your JL is equipped with what the factory is calling an Automatic Oil Change Indicator System. This AOCIS is designed to give you a warning message on the instrument cluster display when it is time to change your oil. The computer examines the engine use parameters, like extreme hot or cold temps, towing, and frequent short trips, to warn you when the engine oil and filter may need to be changed. This can happen as early as 3500 miles and when the single chime and warning light does come on in your instrument cluster, FCA recommends that the oil and filter is changed within the next 500 miles.
TECH NOTE: Under no circumstances should oil change intervals exceed 10,000 miles, twelve months or 350 hours of engine run time, whichever comes first.
For SEVERE USE: Change the engine oil at 4,000 or 350 hours run time if the vehicle is operated in dusty and off road environment or is operated at idle or only very low engine RPMs.
So when should you change your oil in your Jeep JL? As long as you fall within the normal use range, we would say to wait until you get the “OIL Change Required” message on your dash display. However if you spend a lot of time off road or in the dust or crawling along at slow speeds (on trail or in traffic), you would want to change your oil every 4,000 miles, if not sooner. And never let your oil change go for more than 10,000 miles.
When it is time to change the oil, many people take their vehicles into the local dealership or service center to have their vehicles serviced. It’s easy, relatively quick and if the shop is one their toes, they will often spot other issues that may need more attention.
For those of you who are more of the Do-It-Yourself type or those who want to become more DIY, this write-up is for you. How tough is it to change the oil and filter in your JL? Not hard at all, follow along and we’ll show you how to get it done.
What do you need to change the oil in your 3.6 JL?
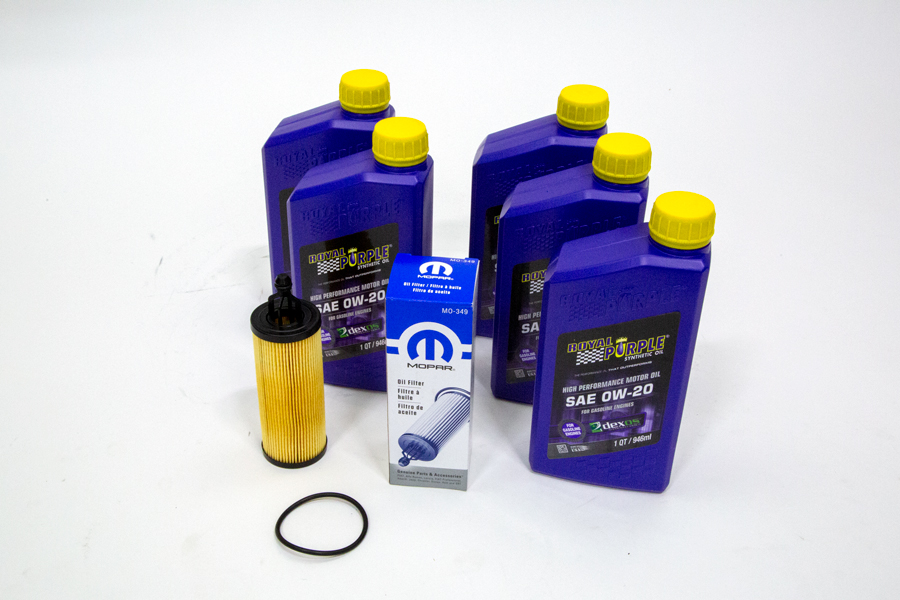
Genuine Mopar Oil Filter #MO-349 – At under $12.00 per filter, there is no reason not to use a genuine Mopar oil Filter. The filter cap o-ring is included too.
5 Qts. – Royal Purple MultiGrade Synthetic 0W20 Oil – Royal Purple is one of the few brands that formulate their oil to meet the MS-6395 certification recommended by FCA. Plus, we have always had great results from the Royal Purple line and use it in our company JL & JK.
**Yes, only 5 qts. of oil for the JL. Do not use 6 qts. like you would for a JK.***
What about other oils?
There are other good brands of oil to choose from, just keep in mind that FCA (Fiat Chrylser Automotive) recommends the use of oils that meet the MS-6395 certification put out by Chrysler. To keep the engine running its best and to avoid any potential warranty void issues, make sure whatever oil you do use has the MS-6395 certification. The MS-6395 Material Standards code is usually found on the back of the bottle.
Extra Goodies you can install:
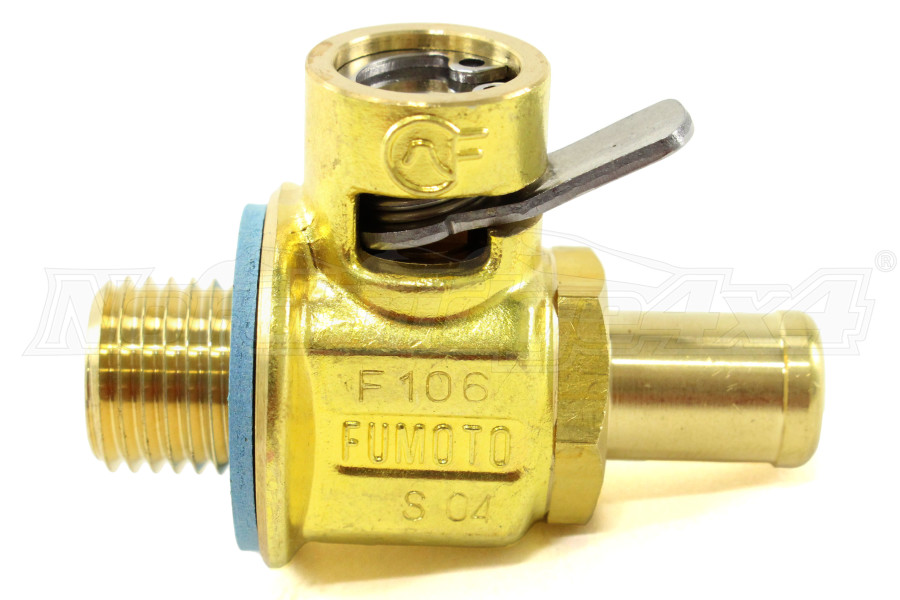
The Fumoto Engine Oil Drains have a spring assisted ball valve that replaces your standard issue oil drain plug and makes oil changes easier, cleaner, and less time consuming.
Fumoto F106S M14-1.5 Drain Valve – Has a short nipple.
Fumoto F106N M14-1.5 Drain Valve – Has a long nipple, perfect for adding a drain hose.
Though we’re not using them on this oil change, they are pretty slick and super easy to replace, just swap out your OE Jeep oil drain plug with the Fumoto Oil Drain Valve.
What tools do you need to change the oil in your JL?
-
13mm wrench or 13mm socket
-
24mm socket
-
Ratchet Extension
-
Seal pick
Extras needed:
Shop towels or rags
Oil drain pan
Funnel
An extra quart of the same oil to have on hand for future top-ups.
How to change the oil in your JL/JT:
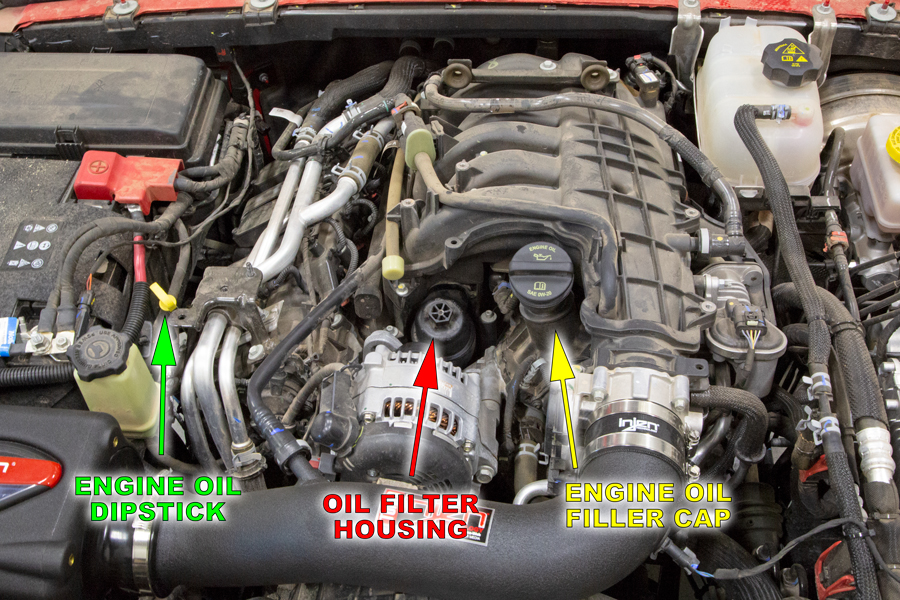
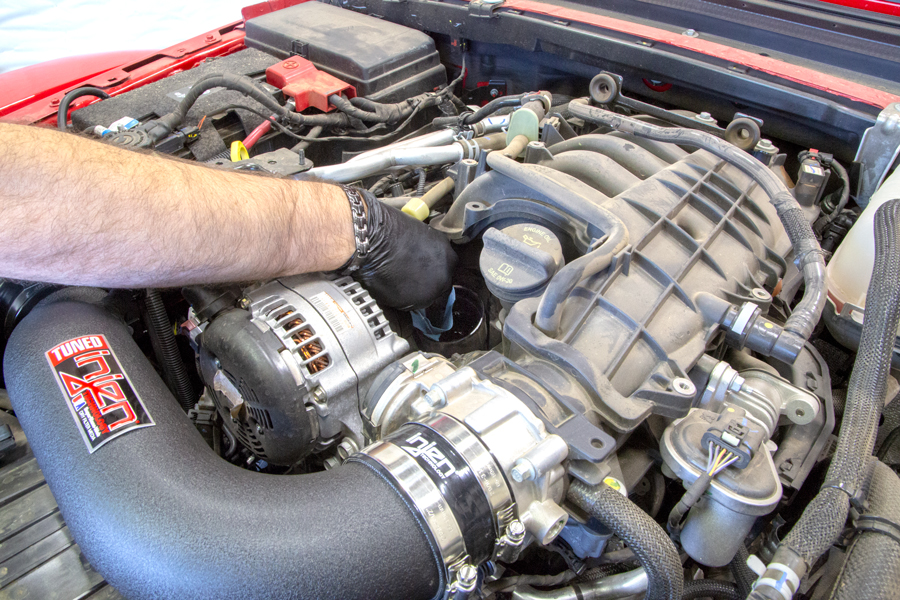
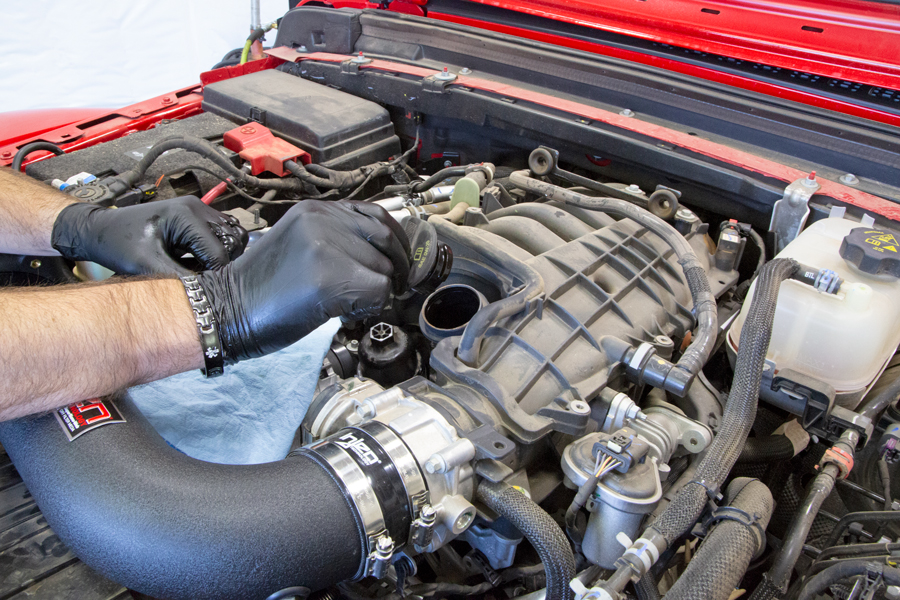
Start by popping your hood and familiarize yourself with the engine.
-
The Green arrow is the engine oil dipstick
-
The Red arrow is the oil filter cap.
-
The Yellow arrow is the oil filler cap.
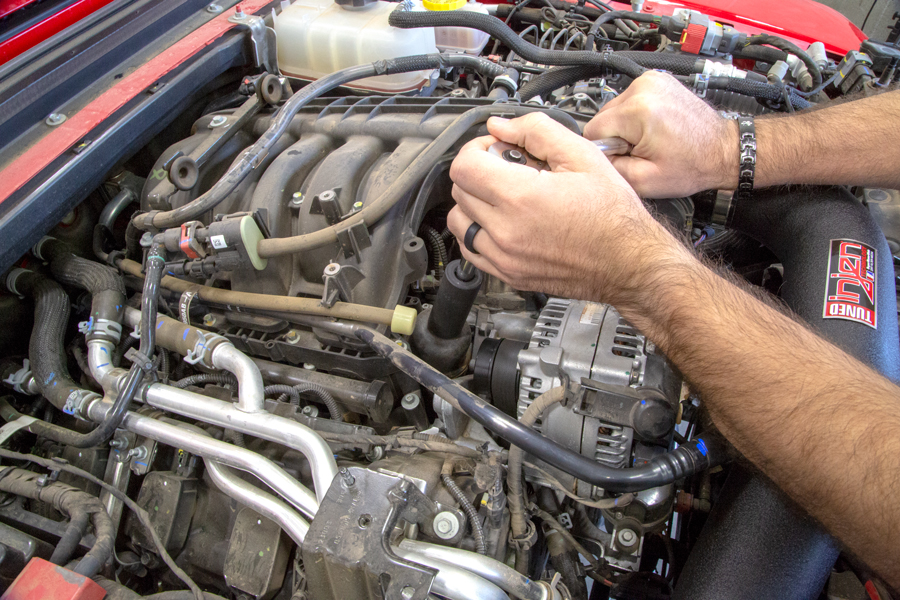
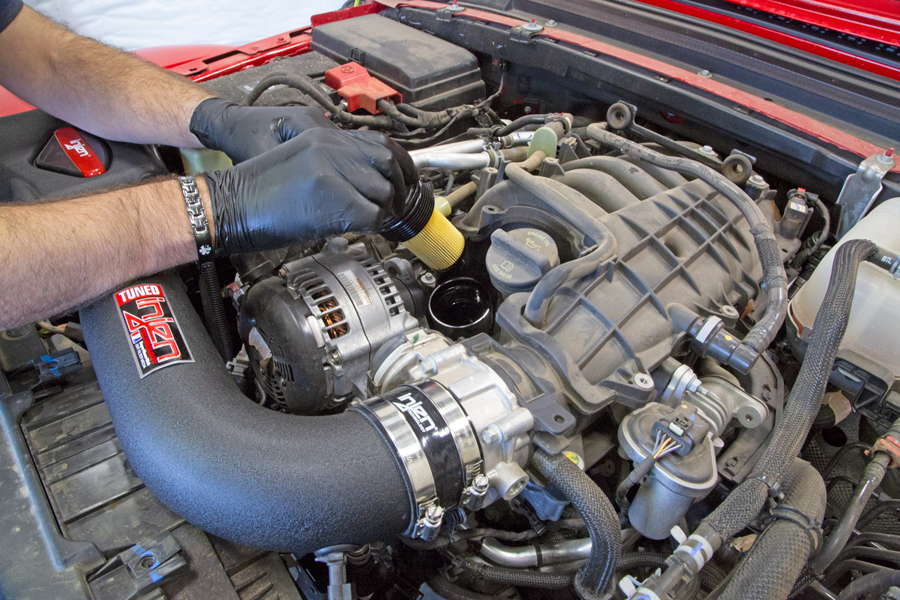
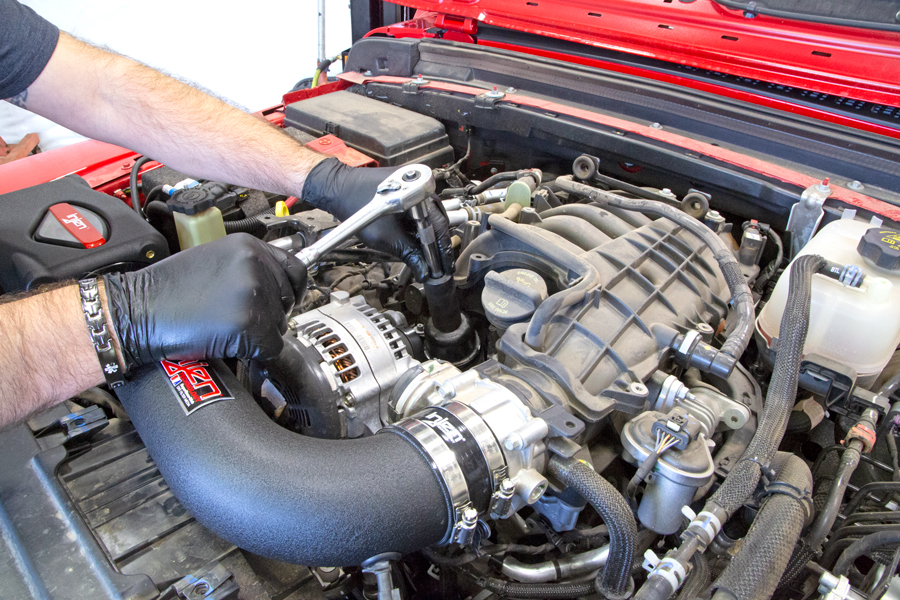
Use a 24mm socket to break loose the oil filter housing cap. You don’t need to completely remove it, just break it loose and unscrew it a couple turns. This will break the vacuum and allow the oil to drain more efficiently.
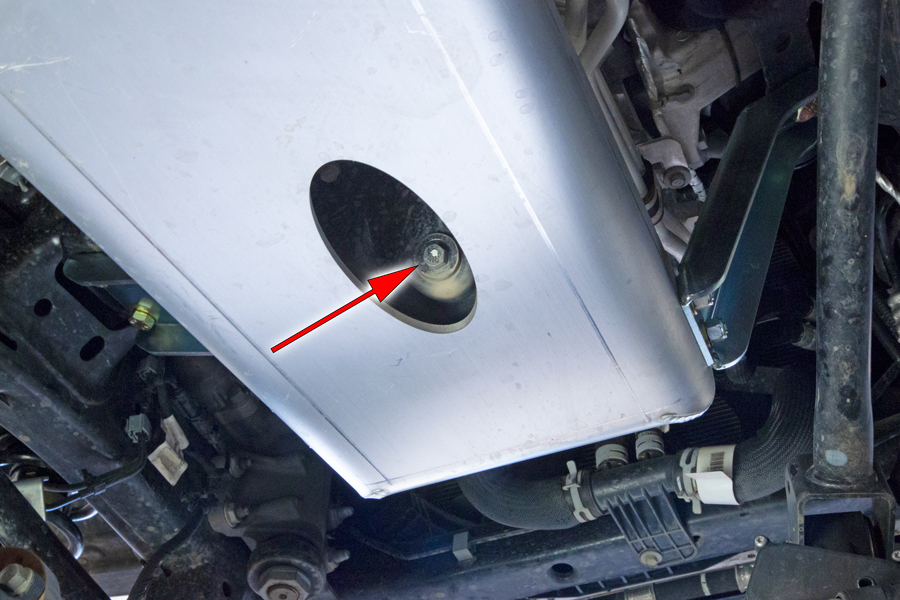
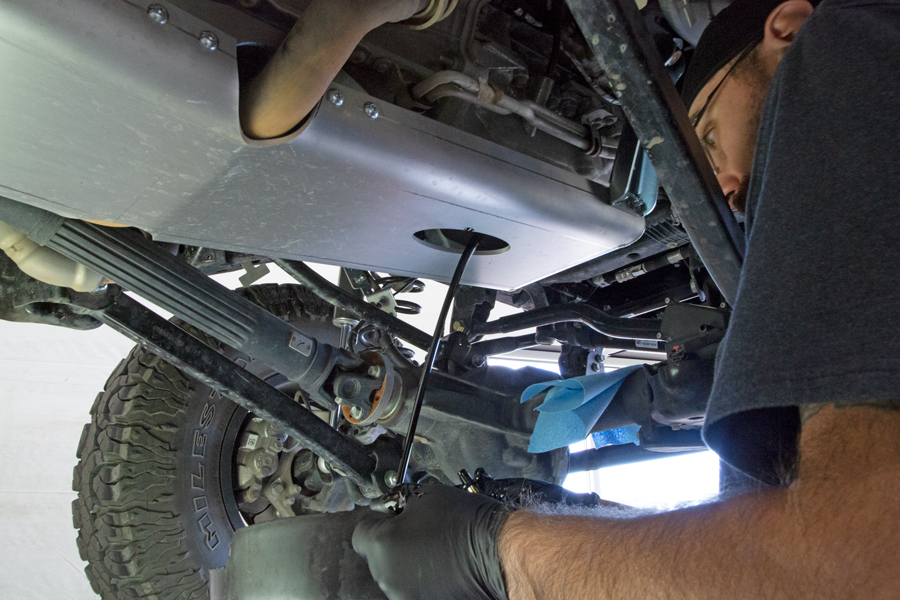
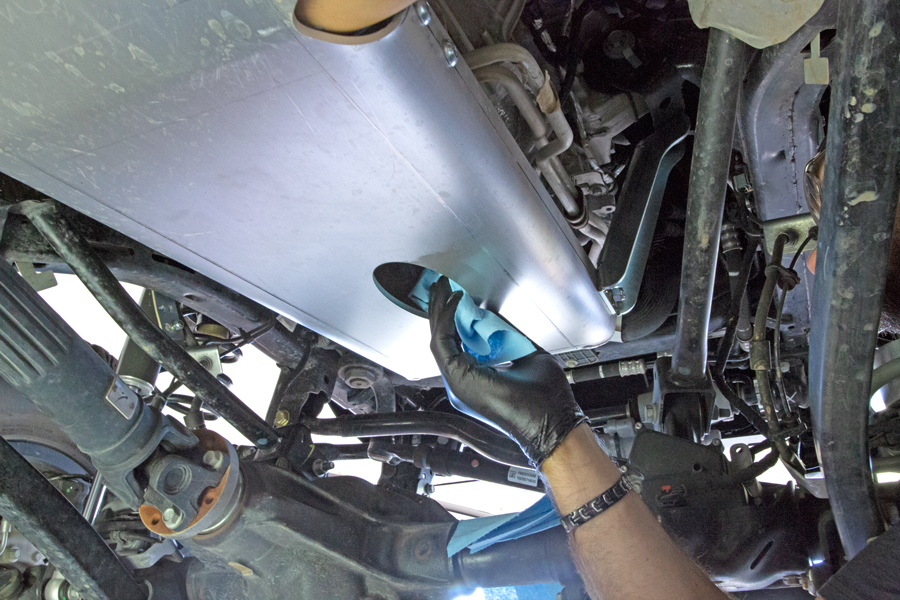
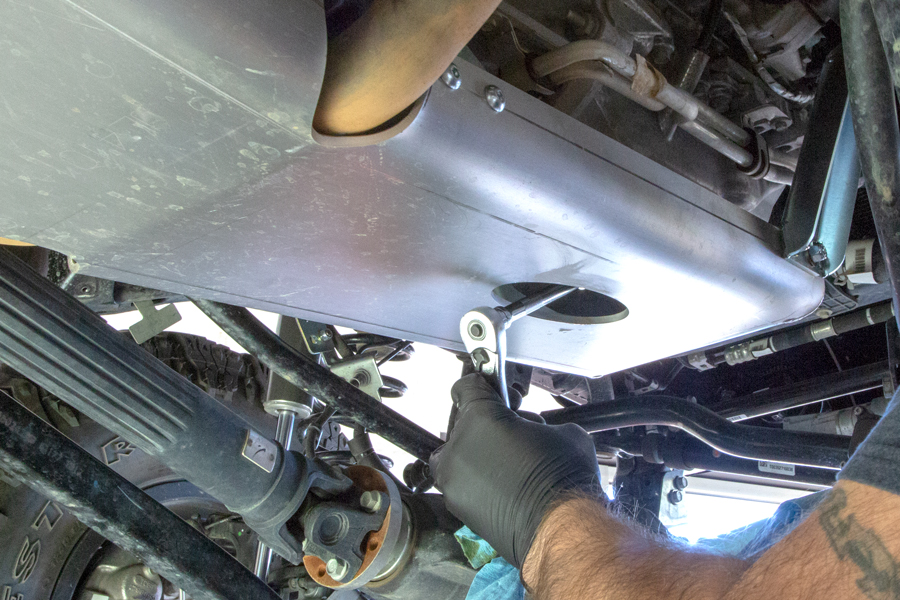
The oil drain plug is located at the bottom of the engine on the backside of the oil pan. Our JLUR was recently outfitted with an Artec Aluminum Full Bellypan Skidplate assembly so our engine oil pan is well protected from off road debris. As you can see Artec Industries added a large access port to help make oil changes easy.
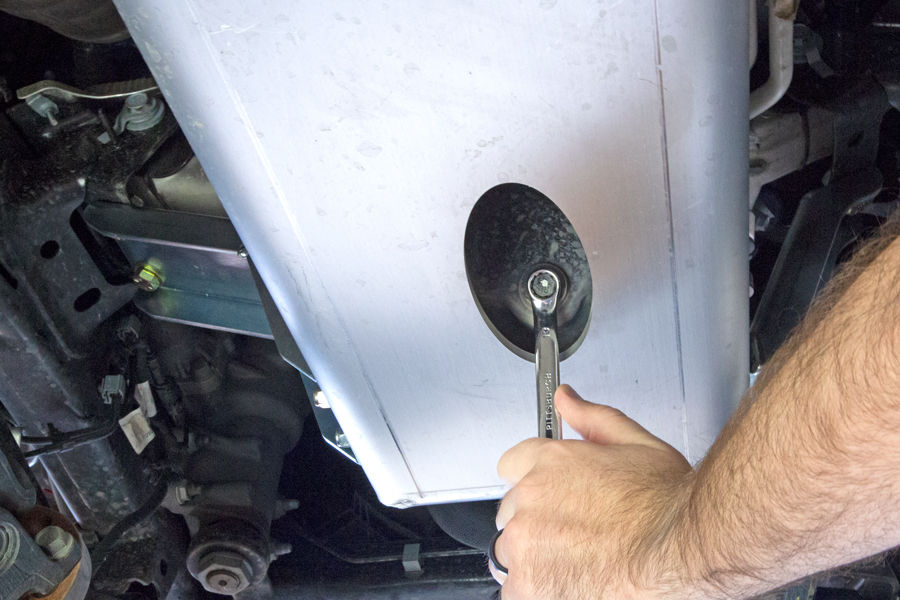
Use a 13mm wrench to break loose the oil drain plug and then set an oil catch pan under the oil pan to catch the 5 quarts of dirty oil that will be soon draining out.
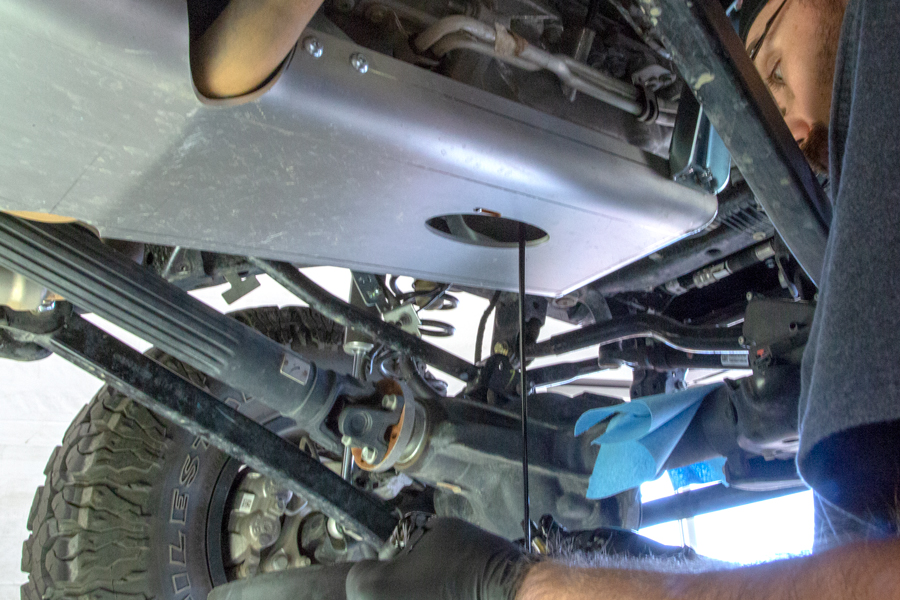
One trick to help keep your fingers from getting oily is to use a 13mm sock and extension to unscrew the drain plug. Start turning it counter-clockwise until it is complete loose, then pull the extension, socket and drain plug back in one smooth motion.
Make sure you set the catch pan back a little to catch the oil stream as it will come out in an arc back from the drain hole.
As the stream of oil starts to lessen and drain straight down it’s time to move up to the engine bay to change out the filter. Leave the drain hole open to continue draining while you work up above.
Depending on the size of your catch pan you may need to move it back under the oil pan as the oil starts draining straight down.
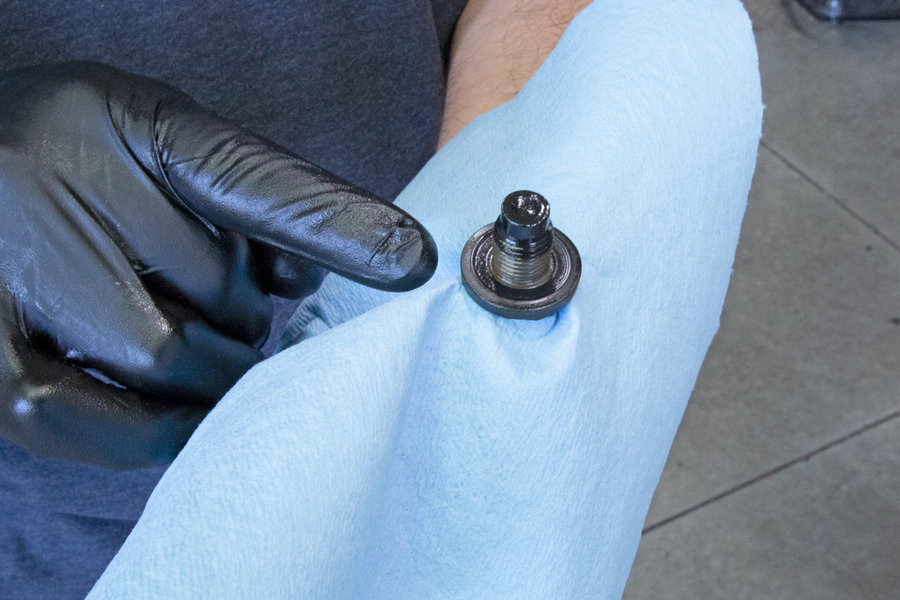
Take a closer look at the JL’s oil drain plug, the bottom of the flange has a rubber coating on it to seal up against the oil drain pan. If this rubber face gets heavily scratched or damaged, you will need to replace it as it will not seal correctly.
Clean the oil drain plug with a fresh shop towel and set it aside.
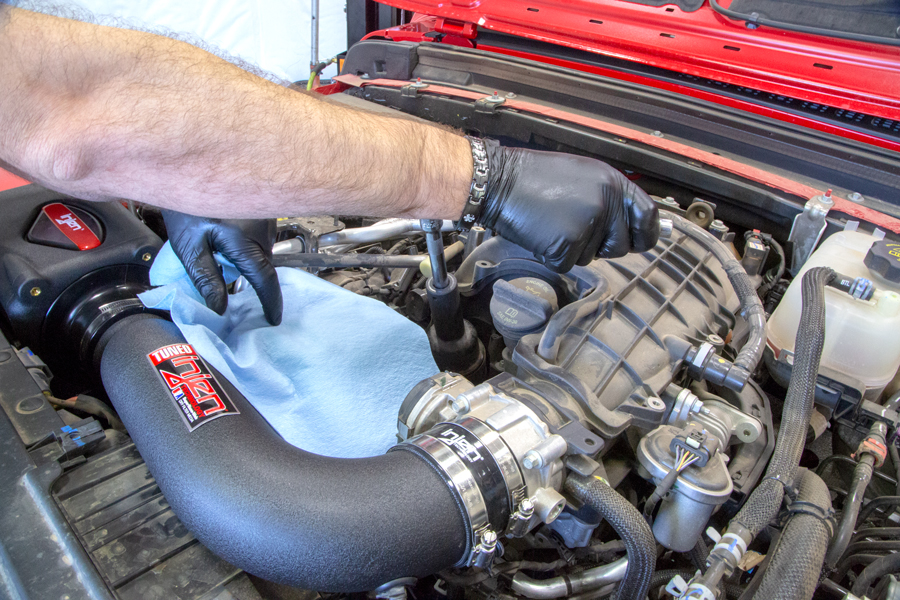
Now back up to the engine compartment and use the 24mm socket to unscrew the filter housing cap the rest of the way.
Have a couple shop towels on hand to catch any dripping oil. Notice how we have some shop towels covering the alternator to help keep it clean and oil-less.
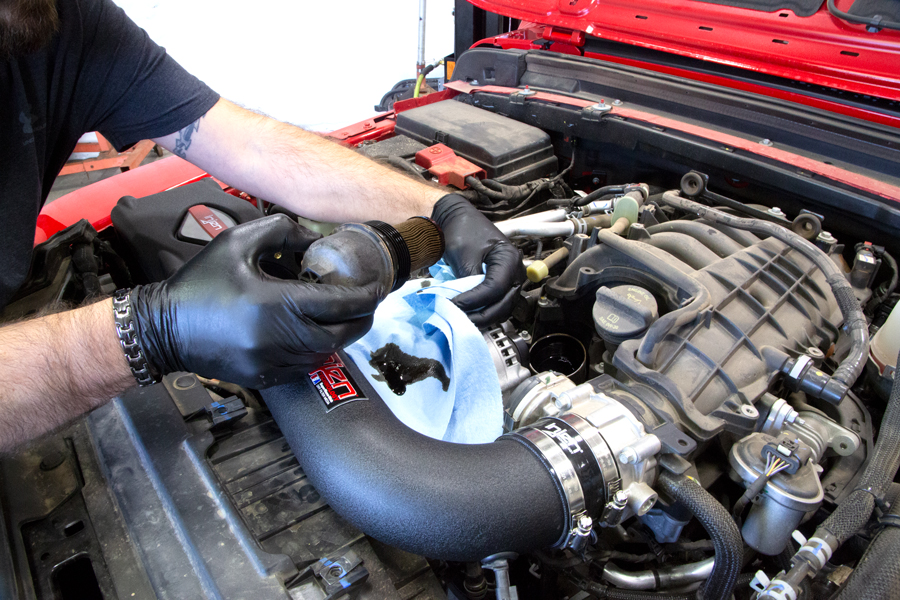
Using a couple shop towels to catch drips, pull the oil filter out of the housing and move it over to your work place.
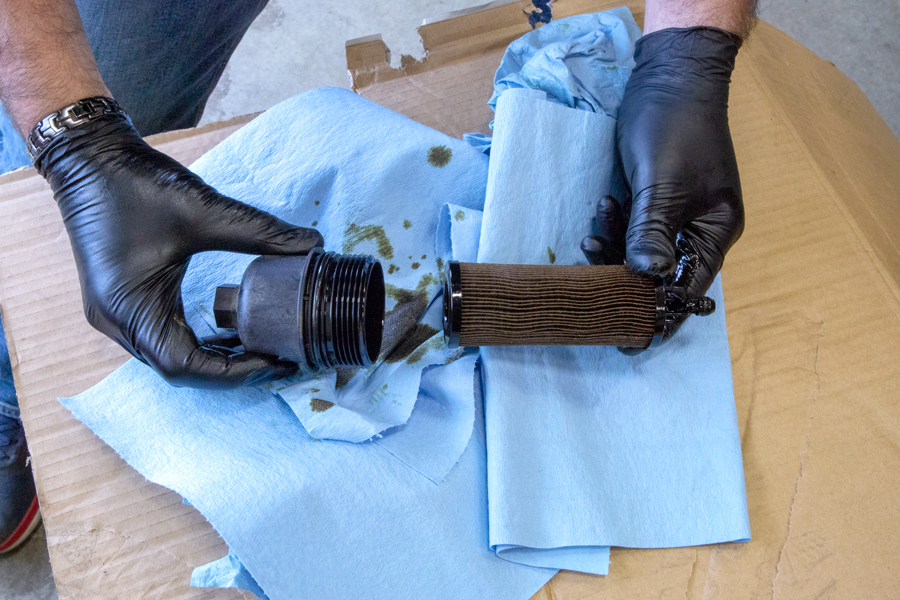
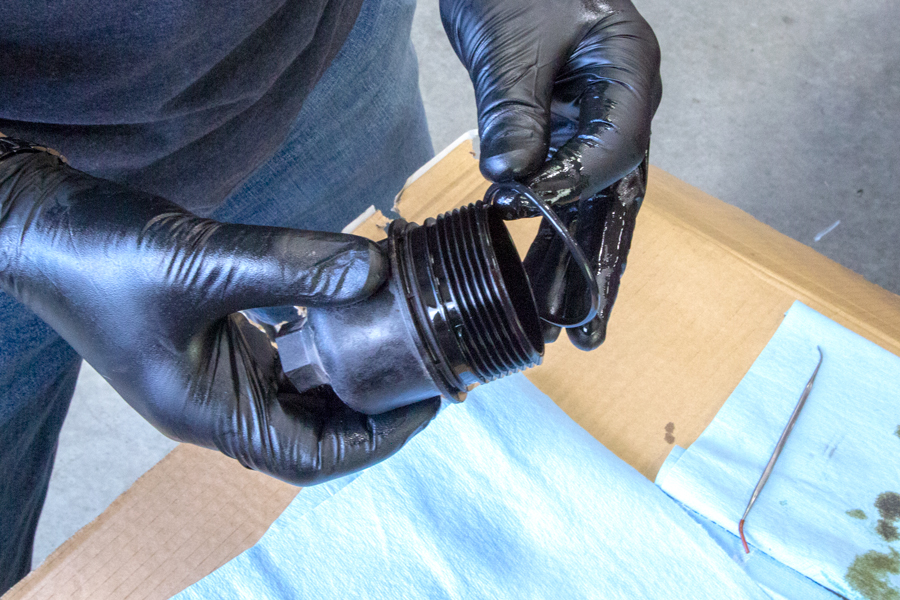
Grab the filter firmly and pull the filter from the filter housing cap.
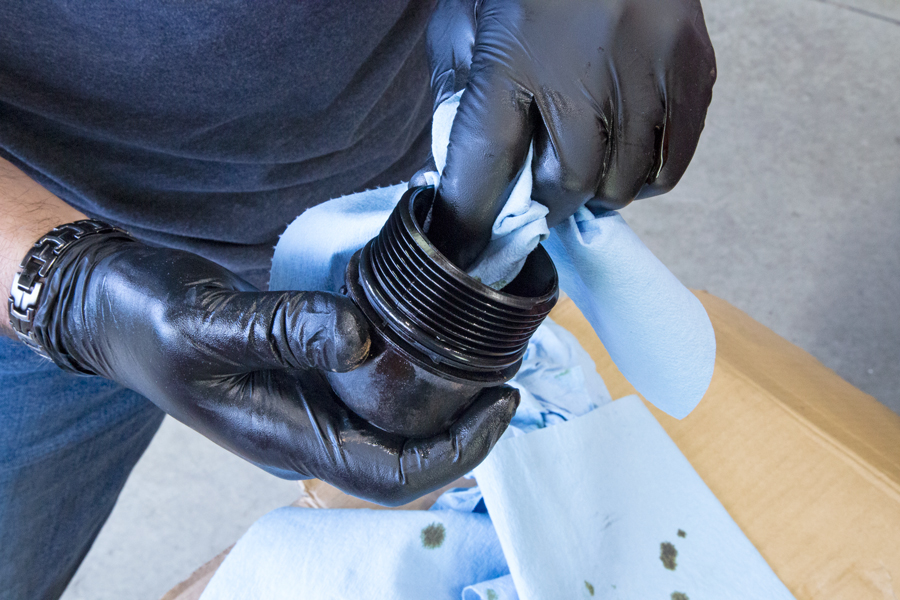
Use a shop towel and wipe all the old oil from the filter cap.
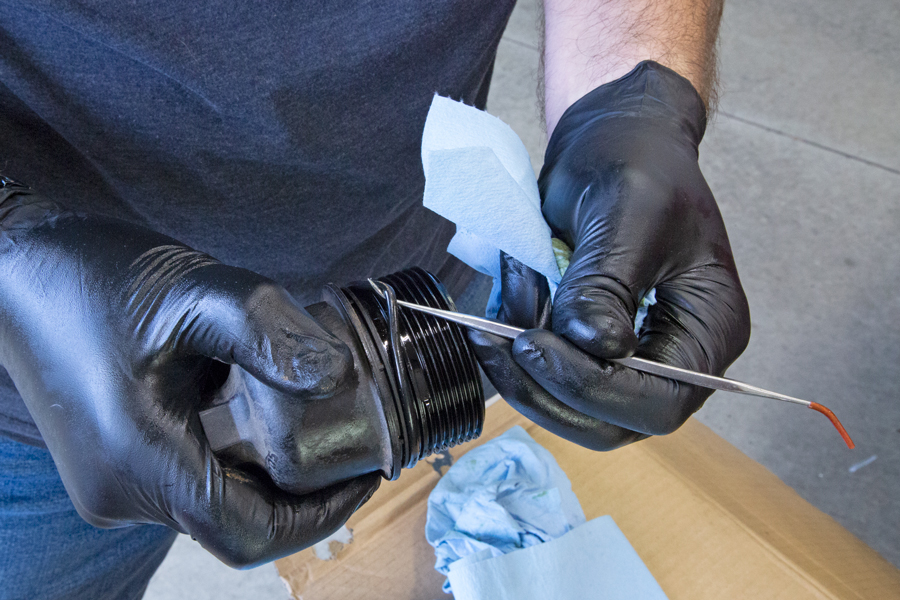
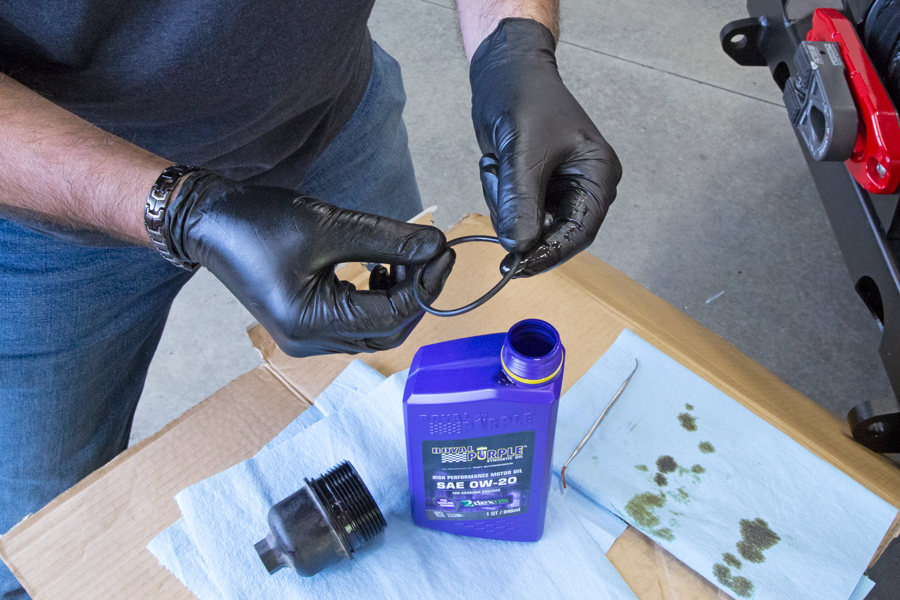
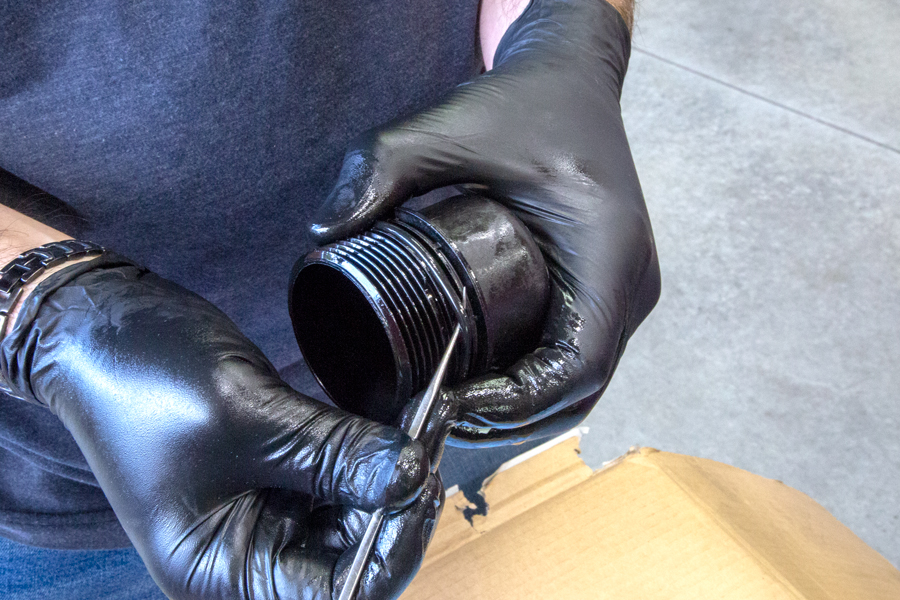
Use a mechanics or 0-ring pick to remove the o-ring from the filter cap. Hook the edge underneath the o-ring, lift up and pull the o-ring off. Be very careful not to damage the o-ring seat.
Once the o-ring is removed, wipe any oil and debris from the groove.
If you don’t have a pick, a small flat blade screw driver will also work.
Take the new o-ring that came in the filter box and lube it up with a little of the engine oil. We just open one of the quarts and stick a clean, gloved finger down into the container and pull up a little oil to lubricate with.
Hook one edge of the o-ring onto the filter cap and carefully stretch/roll the ring down past the threads and into the o-ring groove.
Carefully slide the o-ring pick (or small flat screwdriver) under the new o-ring, lift up slightly and run the pick all the way around the cap. This will align the o-ring and take any twist out of it; which could potentially cause a leak.

Push the new filter into the oil filter cap until it locks into place.
Move back over to the engine and wipe out the filter housing with a clean shop towel.
Add a little more lube to the o-ring and install the new filter into the filter housing and screw the oil filter cap into place.
Grab the 24mm socket and tighten the oil filter cap down. Do Not Overtighten!!
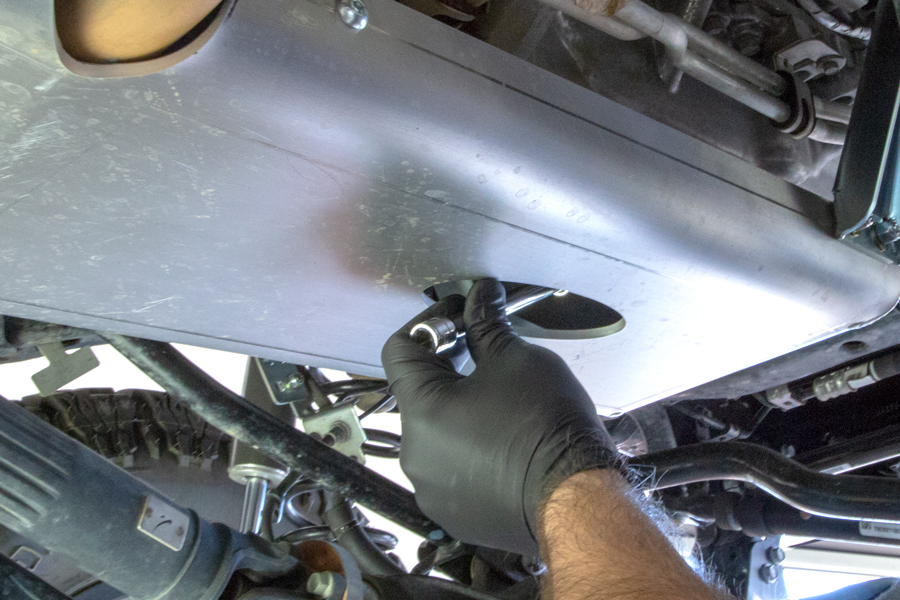
By now the oil should have drained from the engine, so slide back under the JL and wipe up any oil from the oil pan and skid plate (if you have one).
Add a little oil to the rubber sealing face on the oil drain plug and screw it into the oil pan and tighten firmly. This would be the time to install the Fumoto Oil Drain Valve, if you upgraded to one. Installation is the same as the drain plug, add a little oil to the seal, screw the Fumoto valve into the oil pan and tighten firmly.
Remove the oil fill cap (710 cap). It is a simple counter-clockwise twist and lifts right out.

Set your funnel into the oil filler hole and add in 5 quarts of 0W20 synthetic oil to the engine.
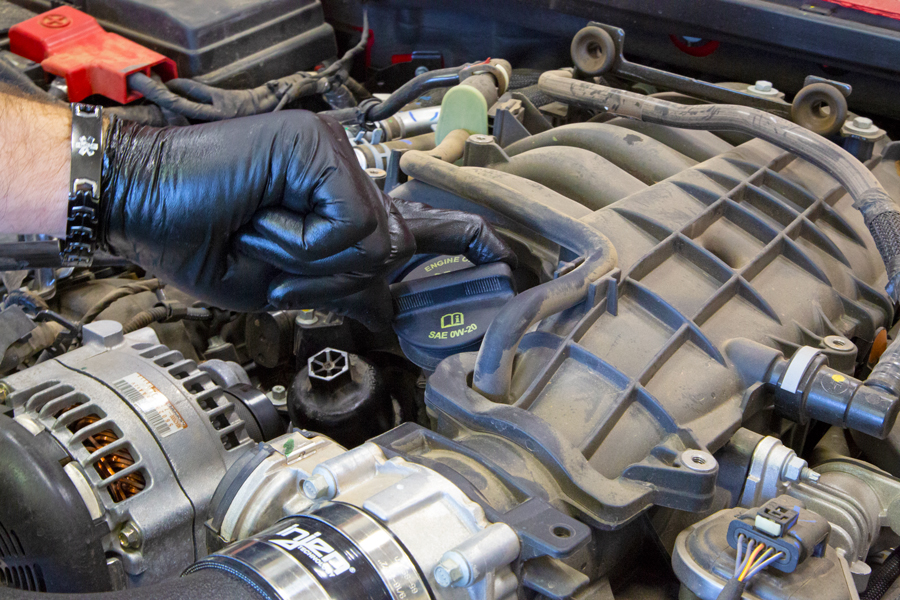
Wipe the oil fill cap and reinstall making sure it is tight.
Circulate the OIL!
Make sure you have all tools and shop towels removed from the engine bay and start up the engine. Let it run for a full minute to circulate the oil through the engine. Wait a couple minutes for the oil to drain back to the pan and check the oil level. Grab a shop towel, pull the dipstick out from the engine, wipe it clean, reinstall in all the way into the dipstick tube, pull it out and check it.
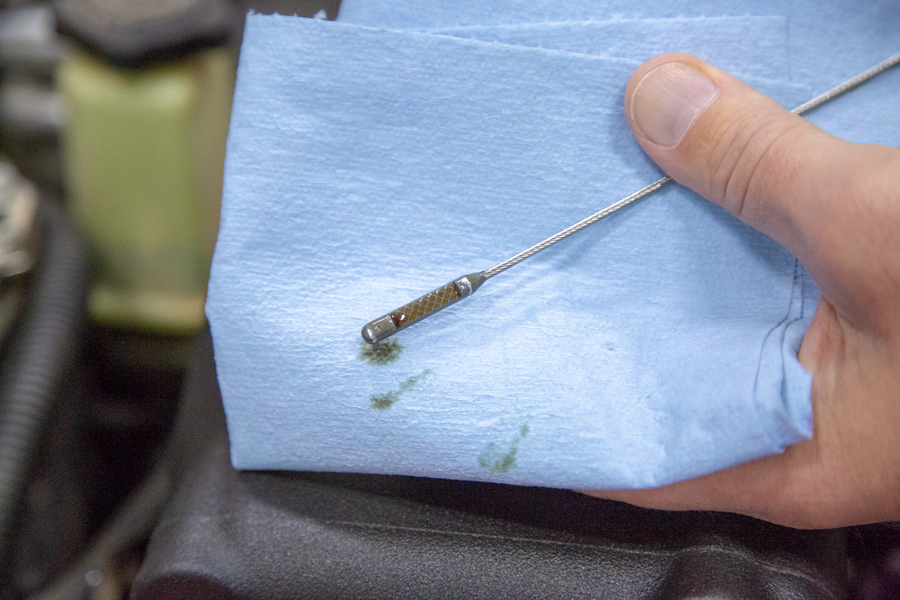
The five quarts we added filled the engine right up to the full mark on our dipstick. If you are a little low, add a little more.
What about the CHANGE OIL message on my JL’s display cluster?
With the oil change completed, you need to get rid of the OIL CHANGE REQUIRED message that is on your digital display. It is pretty easy to do and there are two different ways to do it:
Oil Life Reset
1. Without pushing the brake pedal, place the ignition in the ON/RUN mode (do not start the engine).
2. Navigate to Oil Life submenu in Vehicle Info in the instrument cluster display.
3. Push and hold the OK button until the gauge resets to 100%.
Secondary Method For Oil Change Reset Procedure
1. Without pushing the brake pedal, place the ignition in the ON/RUN position (do not start the engine).
2. Fully press the accelerator pedal, slowly, three times within ten seconds.
3. Without pushing the brake pedal, place the ignition in the OFF/LOCK position.
NOTE: If the Oil Change Required message illuminates when you start the vehicle, the system did not reset. If necessary, repeat this procedure.