SET YOUR VEHICLE
TALK TO A PARTS EXPERT TODAY!
FREE SHIPPING ON ORDERS OVER $70 in the contiguous US lower 48 states

SPECIALS!
Rocker-ing out with LoD:
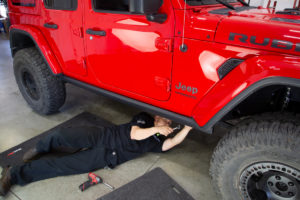
One of the first mods for any rig you plan on taking off road should be a set of sliders. Sure, a lift and bigger tires are important, but you all know that no matter how high you lift it, if you are going off road, sooner or later you’re going to get into the rockers. The question is will they be protected or not?
We did have the factory rock rails on our Rubicon and they protected our rockers on the few off road trips we’ve had the JL on (including a week in Moab). We also know that they do not stick very far out from the side of the body, so sooner or later we knew something was going to get past the OE rail and get into the body.

We’ve been selling LoD products for a number of years, so when they released their sliders for the new JL we had to try a set out on the boss’ JLUR. We raided the warehouse and grabbed a set of the black LoD Signature Series frame mounted Rocksliders. They are also available in bare steel for those wanting to paint their own for a different color combo: Bare Steel LoD Signature Series frame mounted Rocksliders.
These turned out to be quick and easy to install and if you don’t plan on beating your JL off road, there is no drilling involved, it can be a pure bolt on set-up. If you do plan on using your JL/JLU off road, we’d definitely recommend drilling out the three holes and use the extra hardware to help keep the sliders solid under your Wrangler.
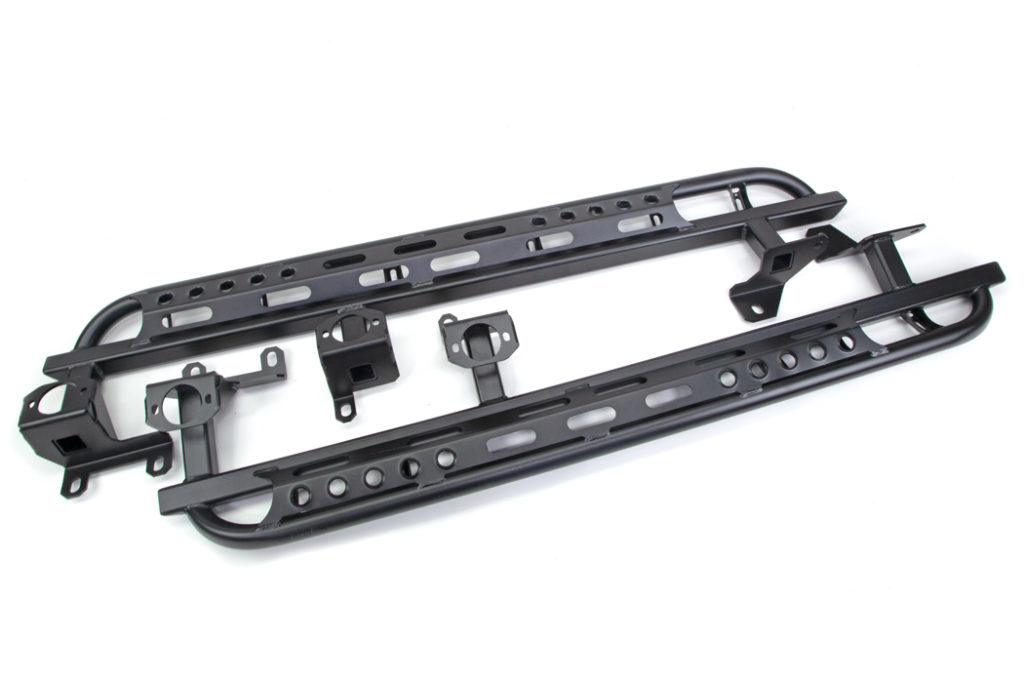
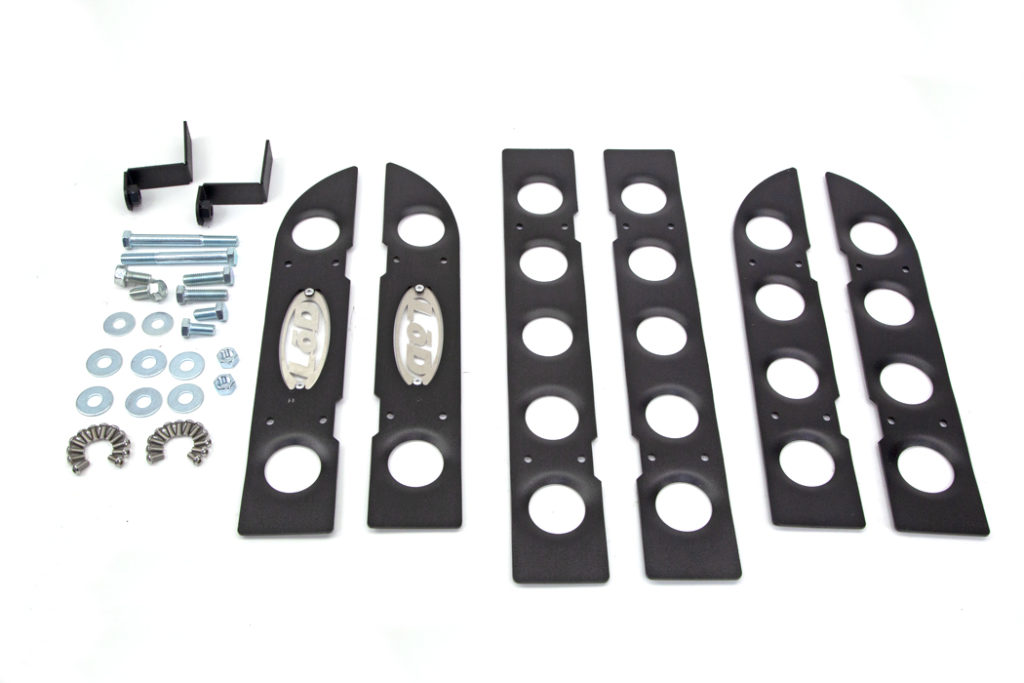
What comes in the box:
Tools needed:
10mm, 13mm, 16mm, 18mm, 19mm sockets
Ratchet
Extension
Optional Bolt installation:
Drill 7/16″, 9/16″ Drill bits
Extras needed:
Use Blue Loctite (or other medium strength thread lock) on the mounting bolts.
Benefits:
Protects your rockers from off road debris and be better protected against potential door dings from careless drivers! Doubles as side steps to help get in and out of your JL.
The How-To:
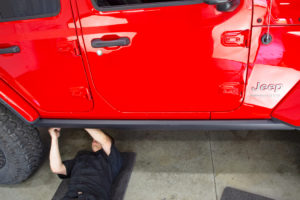
Work your way across the backside of the OE rails and remove the hardware holding them in place.
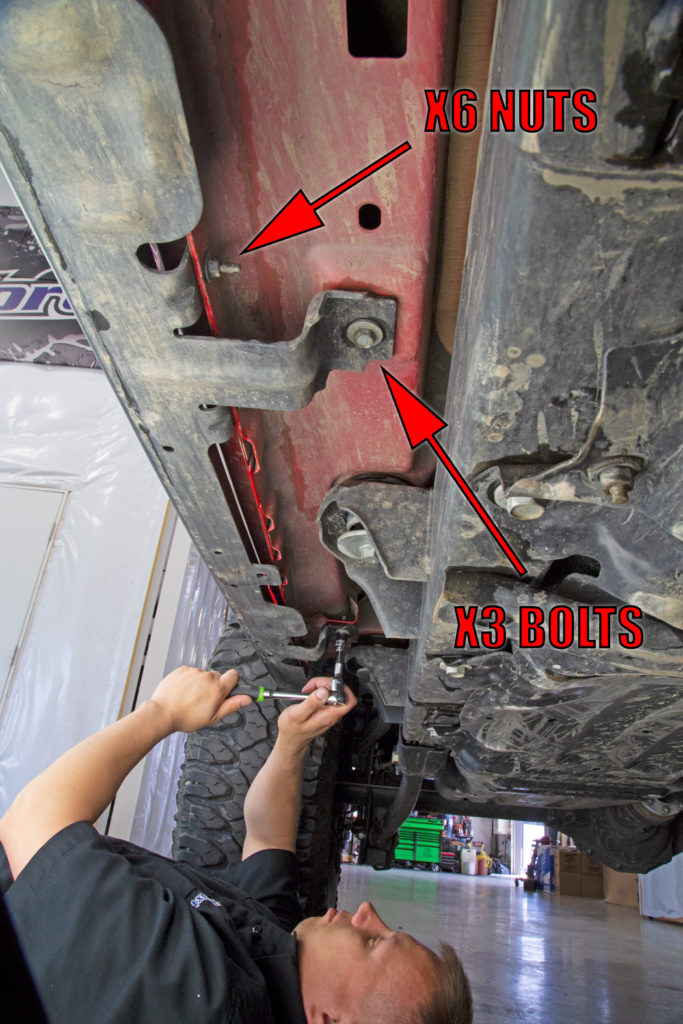
There are three bolts and six nuts (one on either side of each bolt). Don’t worry about the OE rail falling on you, it will be held in place by the six studs sticking through the rocker seam. The bolts need a 13mm socket and the nuts need a 10mm socket to remove them.
With the hardware removed, the factory rock rail pulls right off.
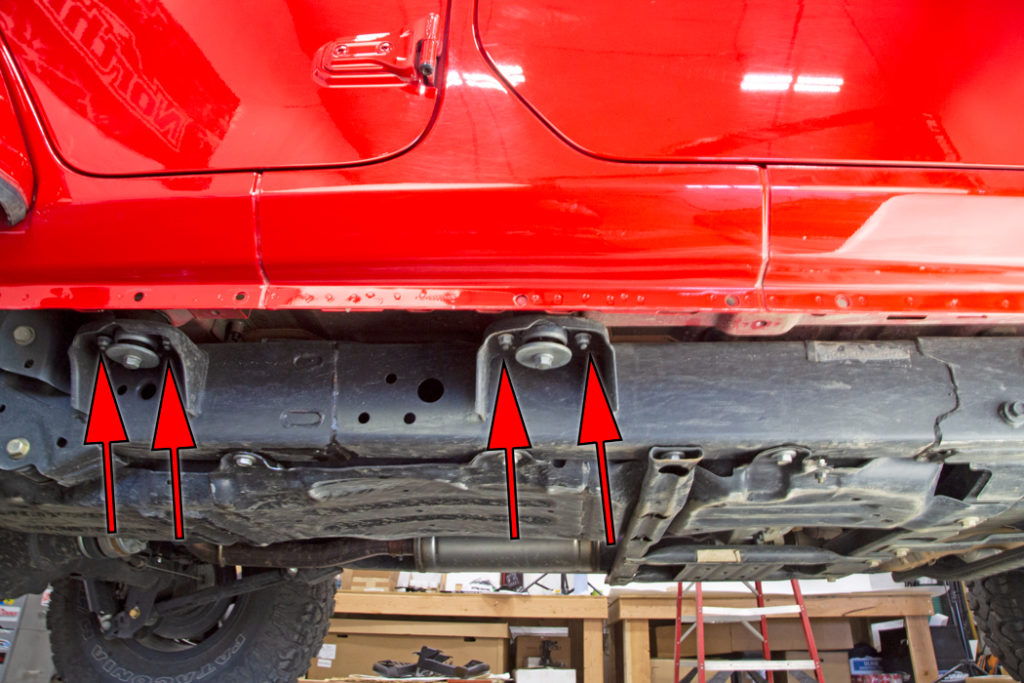
You’ll also need to remove the two nuts on either side of the two rear body mounts. Indicated by the red arrows. Use a 16mm socket with extension to remove the body mount nuts. **DO NOT REMOVE the center body mount bolt.**
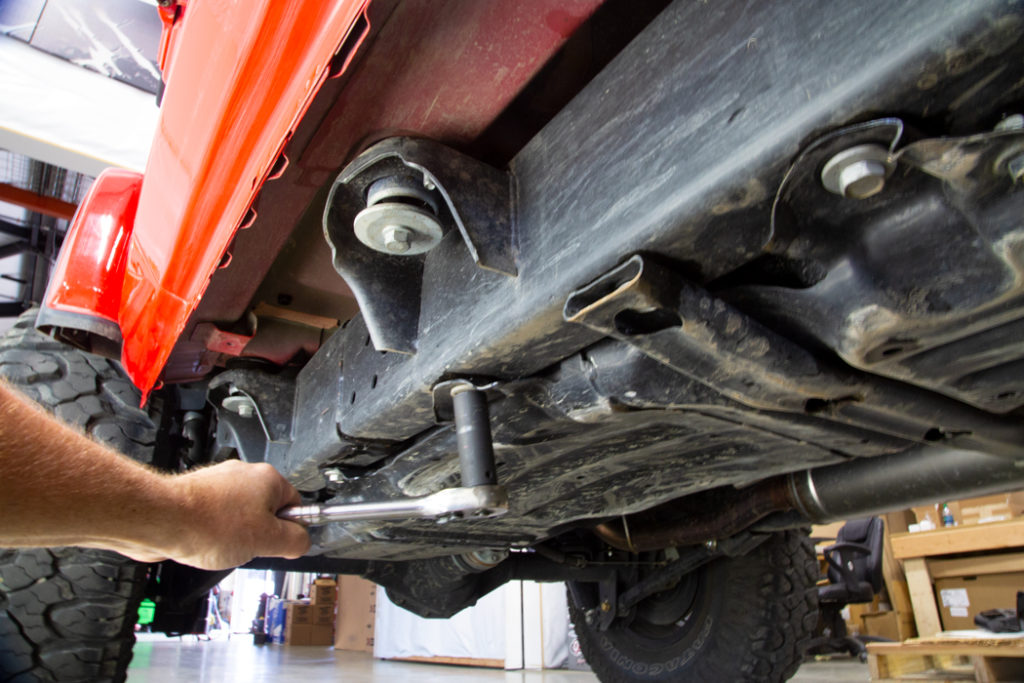
On the RH side, use a 18mm socket to remove the skid plate bolts that line up with the LoD brackets. Set the bolts aside, they will be used with the new LoD Rocksliders. As you can see our skid plates got pretty bashed up during Easter Jeep Safari, we’ll soon have a set of HD skid plates in place for a little more protection.
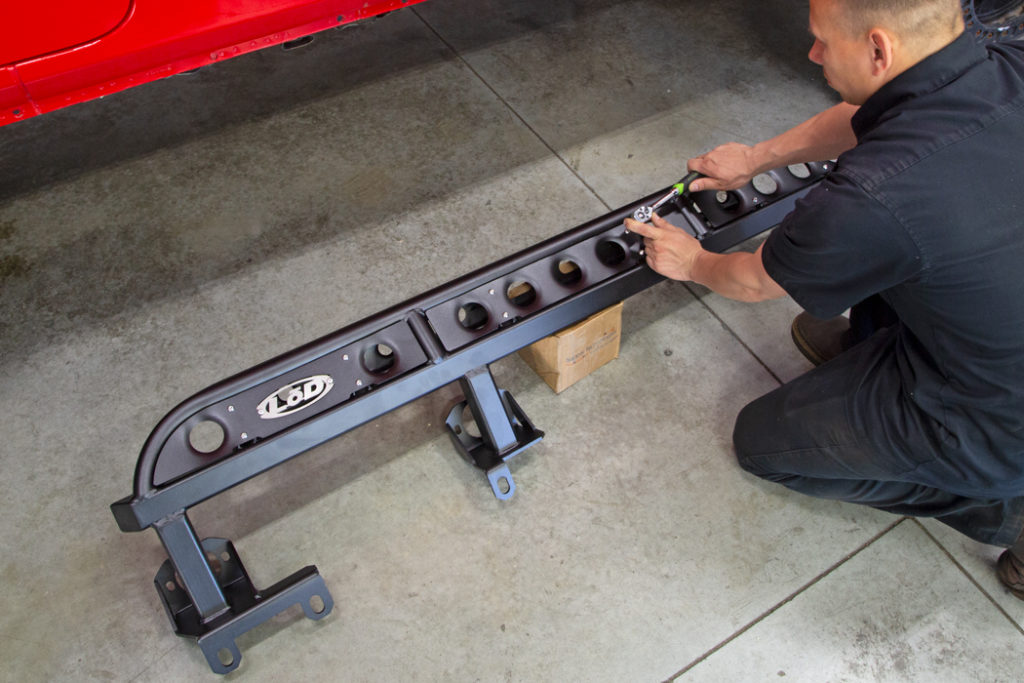
We turned the sliders on their side and installed the cover panels using a 5/32″ hex key (Allen wrench).

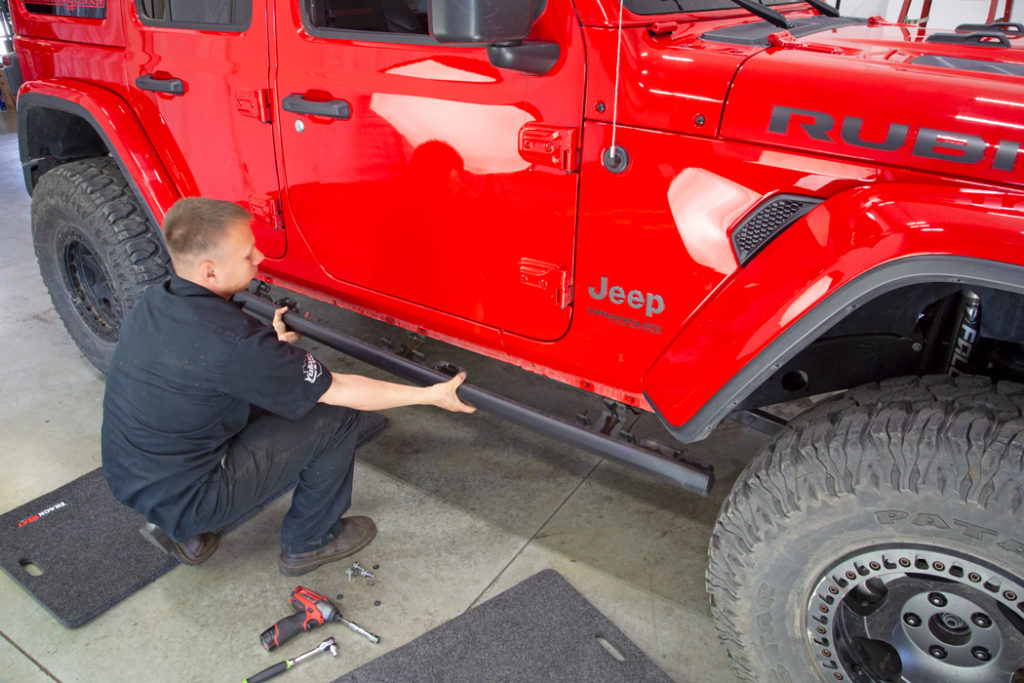
Set the LoD slider on a floor jack and roll it up under the rocker and jack it up into the place. The sliders are side specific, if you look at the pic closely you’ll see the two frame mounts closer together go towards the rear of the JL.
The body mounts fit into the large round holes in the LoD slider mounting brackets and align with the body mount studs. Reinstall the OE 13mm nuts and run them up far enough to grab a few threads and help support the sliders.
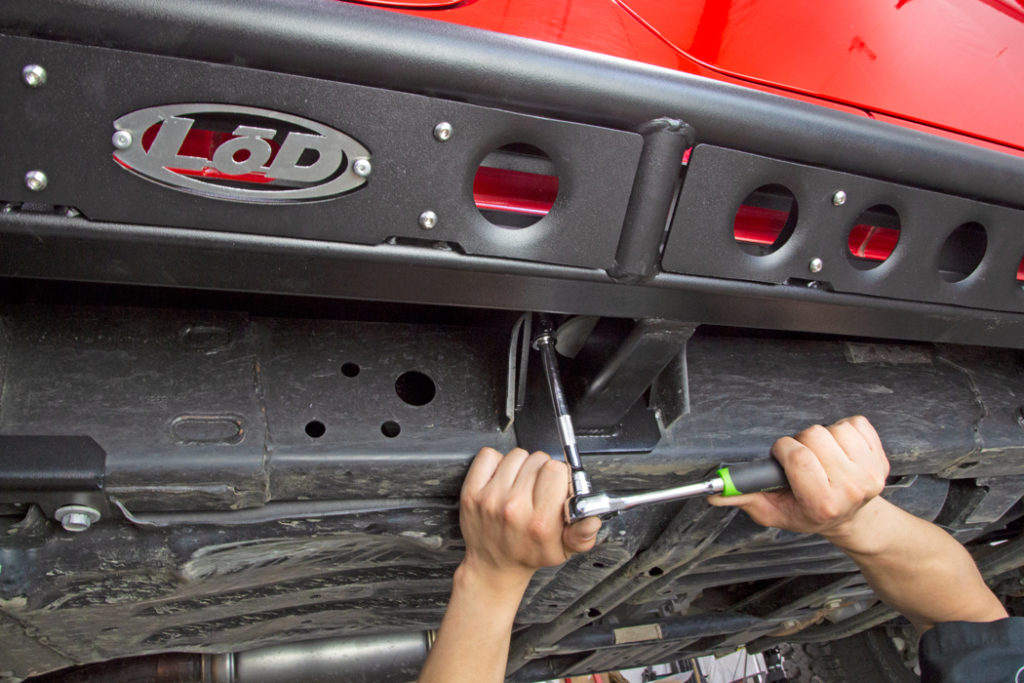
Reinstall the rear OE skid plate bolts in through the LoD brackets up into the threaded holes in the frame. Sandwich the skid plate tabs between the LoD sliders and the frame.
Red arrow shows where the rear optional bolt goes. If you want/need the extra hardware on the rear, use the hole in the LoD bracket as a guide, drill a 7/16″ hole and install the supplied self-tapping bolts.
**Make sure to use a bit of blue Loctite on all mounting bolts to help keep them tight caused by road vibrations and off road abuse**
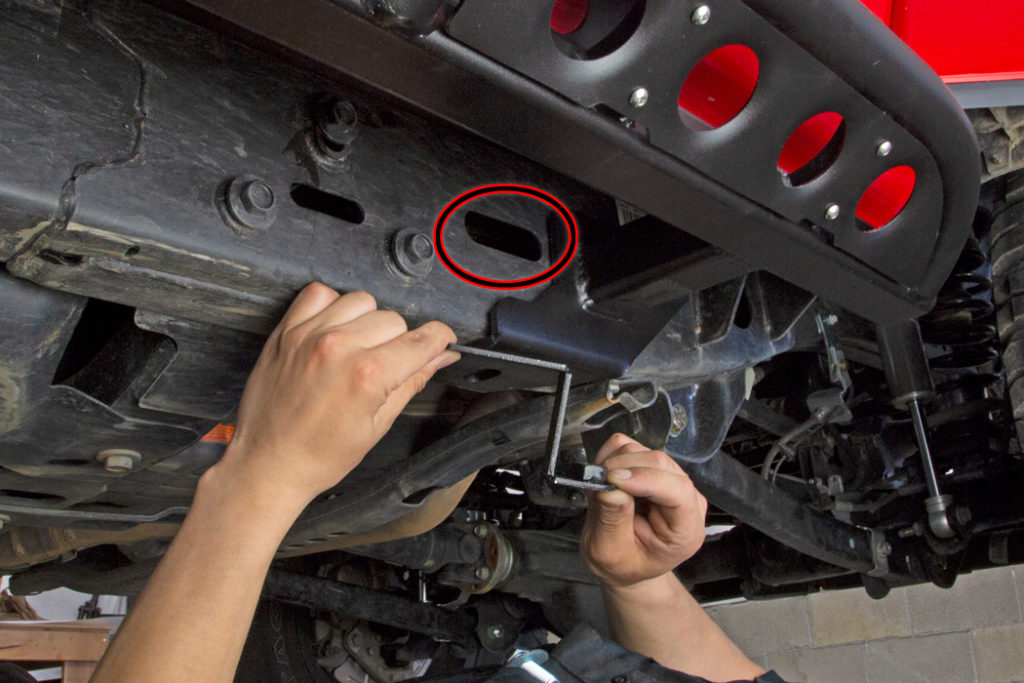
The front bolts use a captured nut to inserted through an existing hole in the frame (circled in red).
Insert the captured nut (captive nut) into the hole and align it up with the hole coming up through the LoD bracket into the bottom of the frame. Install the LoD supplied 1/2″ bolt and flat washer.
Tighten the bolt using a 3/4″ or 19mm socket.
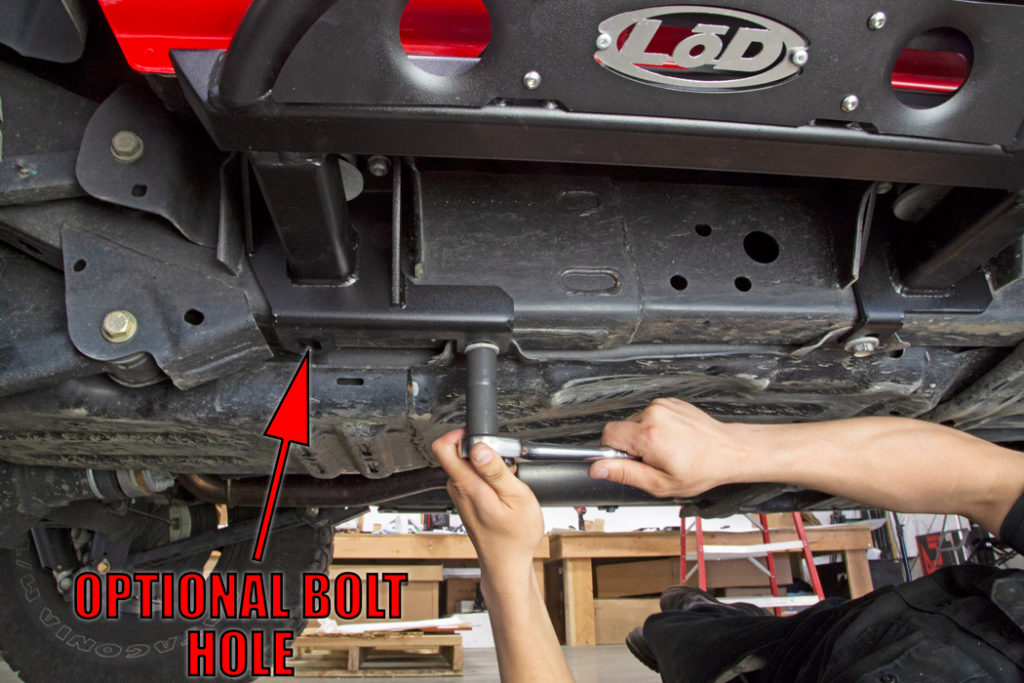
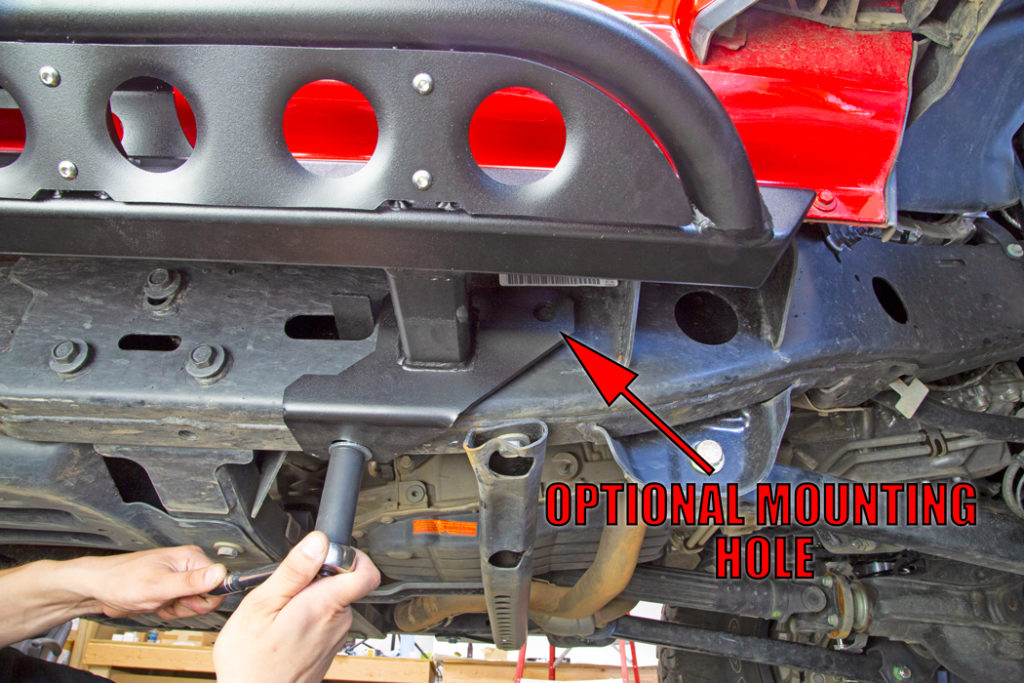
The red arrow shows where the optional bolt goes through the front passenger side frame rail. If you want/need the extra hardware in the front, use the hole as a guide and drill out to 9/16″ all the way through the frame. Use the supplied 1/2″ – 13 x 4.5″ long hex bolts, flat washers and hex nuts and tighten securely.
**The front LH (Driver) side already has the optional bolt hole from the factory, though you may need to slot the hole just a bit to line up with the hole in the LoD bracket.**
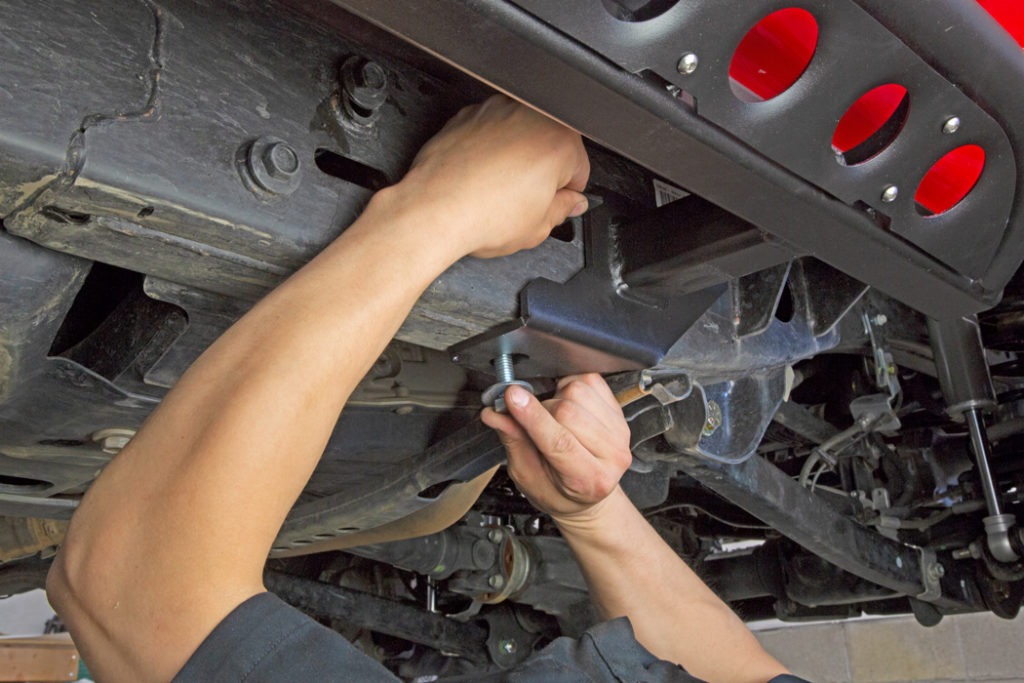
Once you have all the frame bolts and the body mounts nuts in place, evenly tighten them back up.
On the other side:
It’s pretty much wash, rinse and repeat for the LH (drivers) side of the JL/JLU with the exception that you will use the LoD supplied hardware as there are no skid plate bolts on the drivers side. Lod Signature Series Rocksliders done:
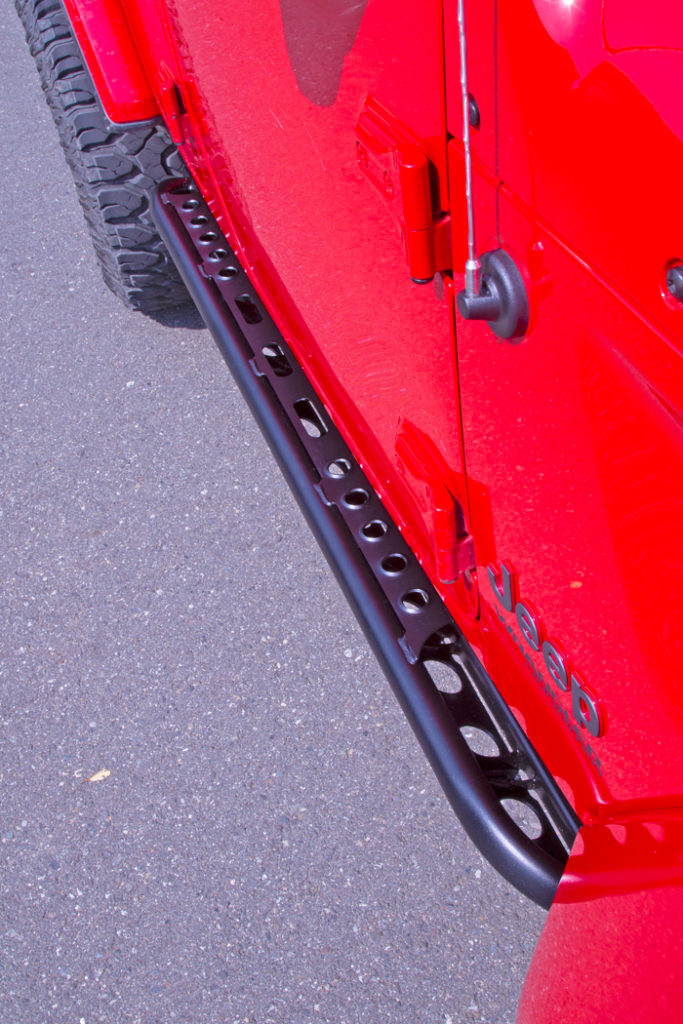
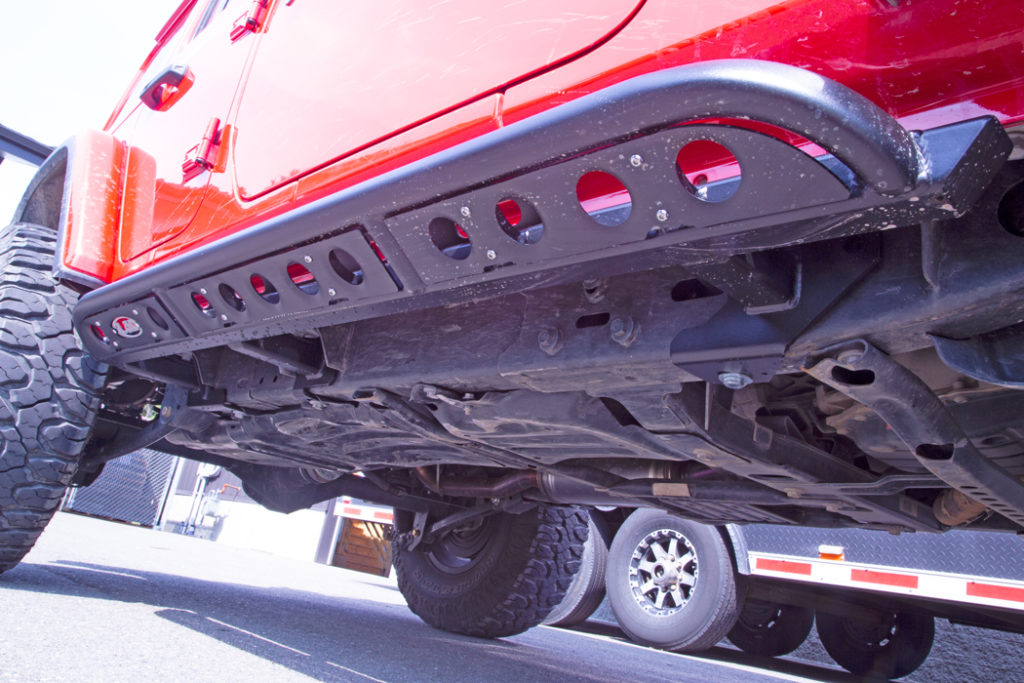
The newly installed LoD Rockslider stick out from the body a few more inches than the low profile OE Rubicon rock sliders. Which will help keep the rocks and trees a little farther off the body and hopefully spare us some body damage.
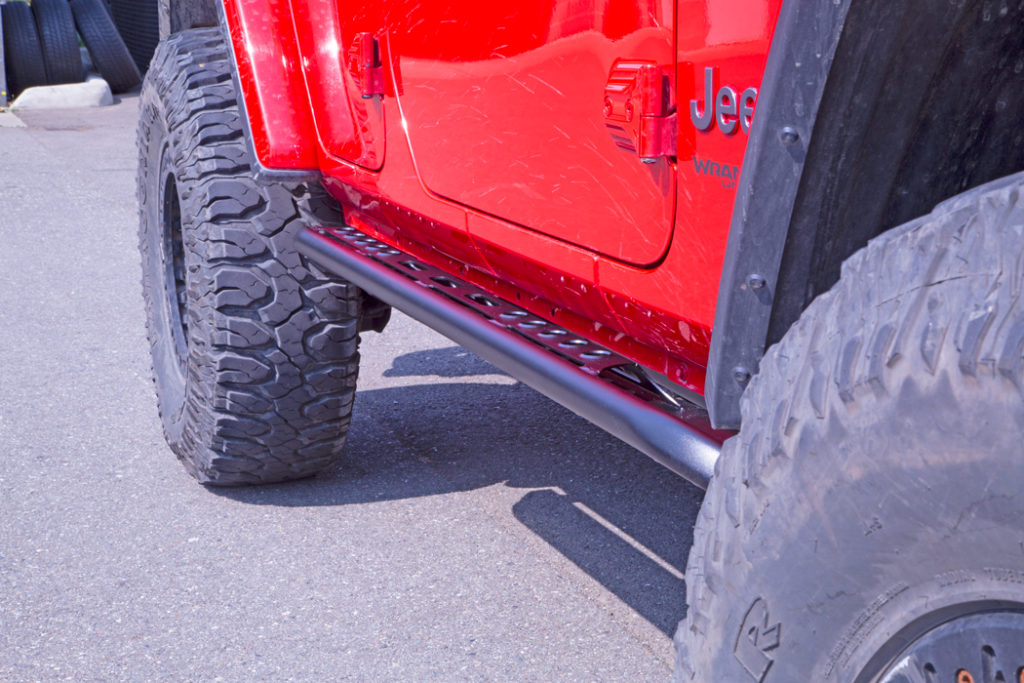
Another angle of the LoD Signature Series Rockslider on our JLU Rubicon. Quick and easy install, good looks and more protection than the OE Rubicon rock sliders, give these a big thumbs up from the crew here at Northridge4x4.