SET YOUR VEHICLE
TALK TO A PARTS EXPERT TODAY!
FREE SHIPPING ON ORDERS OVER $70 in the contiguous US lower 48 states

SPECIALS!
Want On-Demand Air for your JK?
Tired of holding up your buddies at the end of a trail… Tired of waiting to fill your tires with the little plug-in cheapo compressor? Tired of asking your trail buddies if they can fill your tires when they’re finished filling their own? Tired of filling inner tubes and floats at the fuel station and jamming them in your Jeep for that trip to the river?
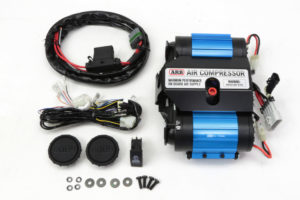
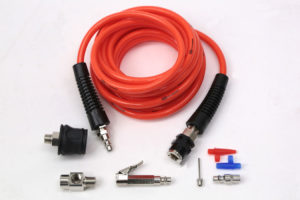
Stop waiting…. the ARB Twin Compressor can supply big air and with the Grimm Off Road twin compressor bracket , it all fits under the hood of your JK/JKU Wrangler. Add in the ARB hose kit and Manifold kit and you’ll have all you need to hook-up your air lockers and to fill tires, air mattresses, floatation devices or any other item you want or need to fill. Of course we also have it in a package deal which will save you a few dollars.
How big is big air you ask? How about 4.68 CFM at 29 PSI? That’s big enough to fill a 35″ tire from 0-32 PSI in less than 90 seconds! This beast of an under-the-hood compressor is even big enough to run air tools (up to 3CFM). Add in an auxiliary air tank and you can use air tools over 3CFM.
Ease of installation:
Three wrenches out of five wrenches. The compressor and compressor bracket are pretty easy to install. You will have to do some wiring to bring it all together.
Tools Needed:
Wrench: 10mm, 13mm, 14mm – 11/16″
Sockets: 10mm, 13mm 14mm
Ratchet
Drill
17/32″ Drill Bit
9/64th Hex Key Bit (Allen Wrench)
What comes in the boxes:

Extra Parts Needed:
Ring Terminals
Shrink Wrap
Other parts we used:
The HOW-TO:
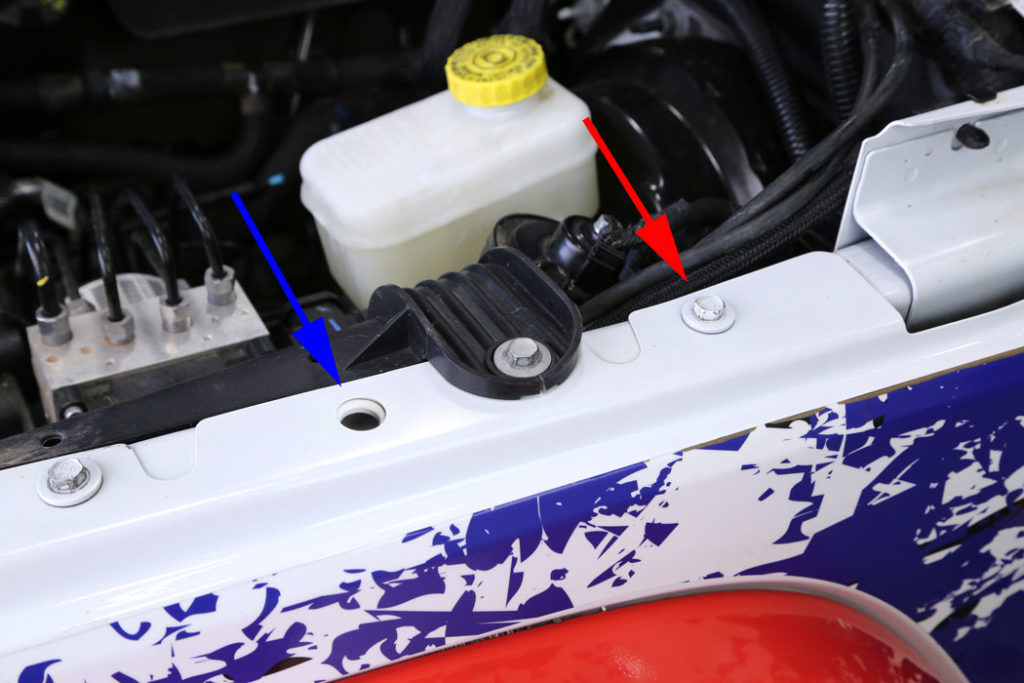
The first step is to locate these two points on the LH fender. The hole indicated by the blue arrow needs to be drilled out to 17/32″. The bolt indicated by the red arrow needs to be removed and set aside. Use a 10mm wrench or socket to remove it.
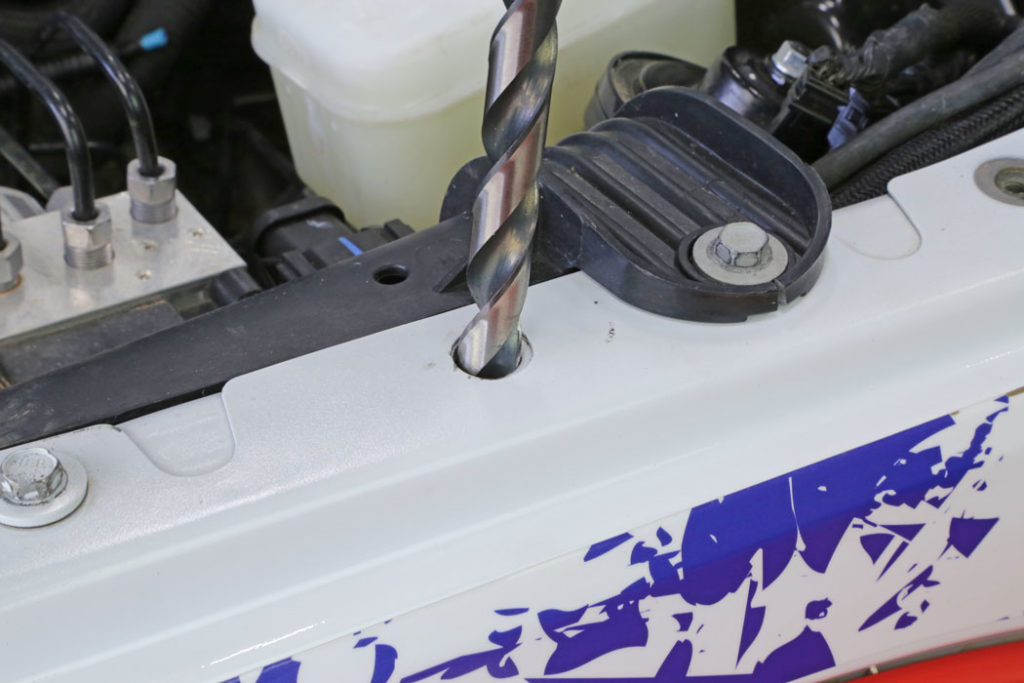
Drill out the forward hole with a 17/32″ drill bit.
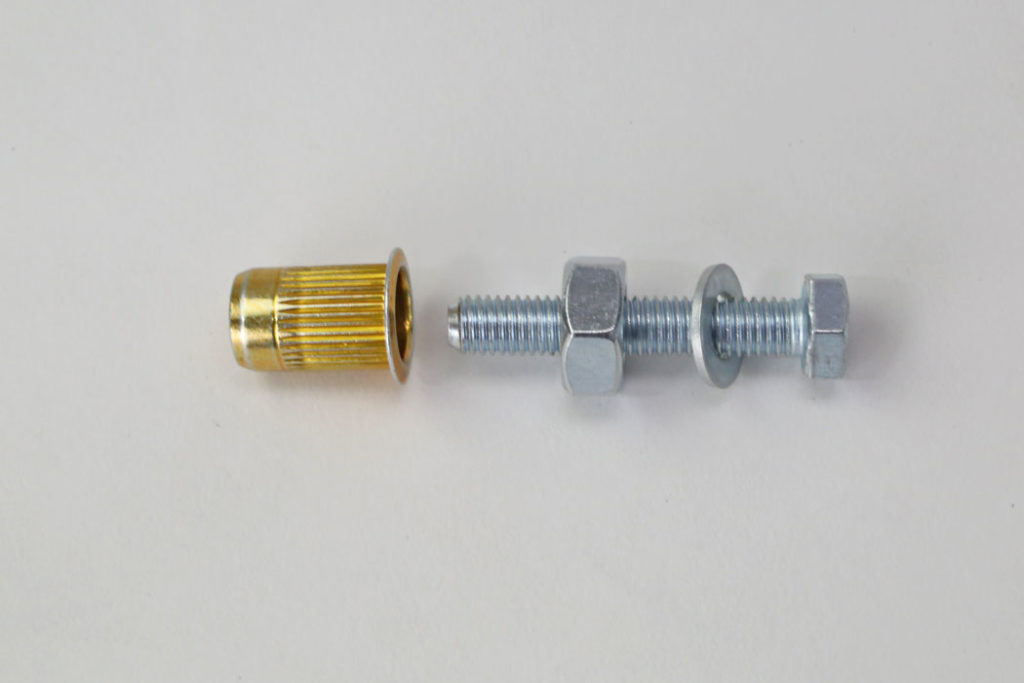
Assemble the rivet nut as shown and insert it into the hole.
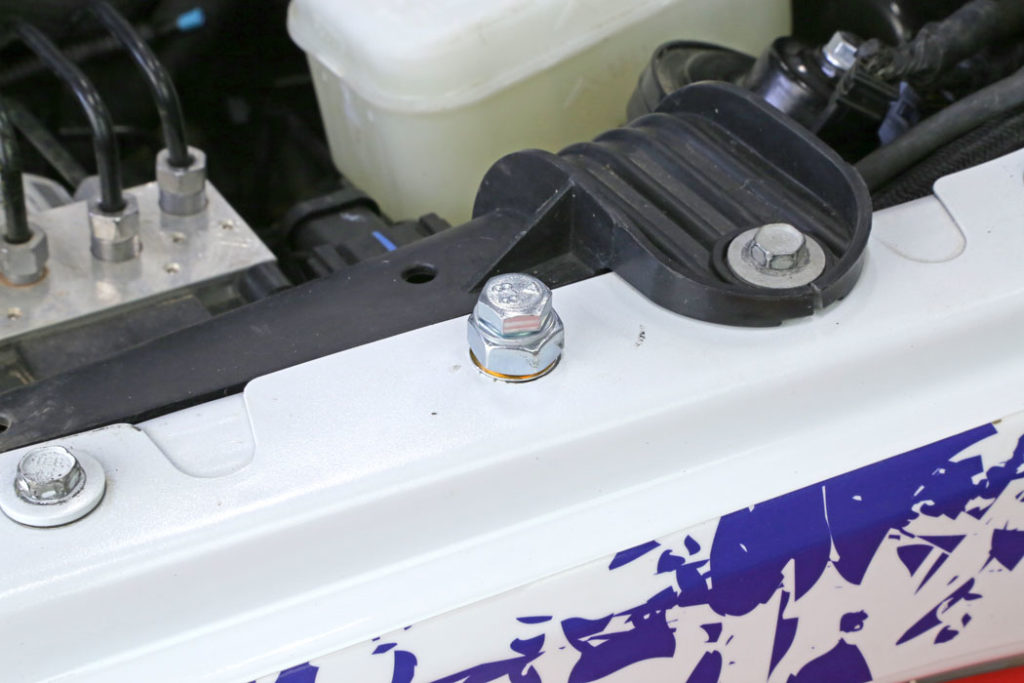
Tighten down the bolt until it sits flush.
Hold the large nut with a 17mm wrench and tighten the bolt using a 13mm wrench. Continue to tighten until the rivet nut crushes and is tight in place.

Remove the horn from it’s mount. Use a 10mm wrench to remove the nut.
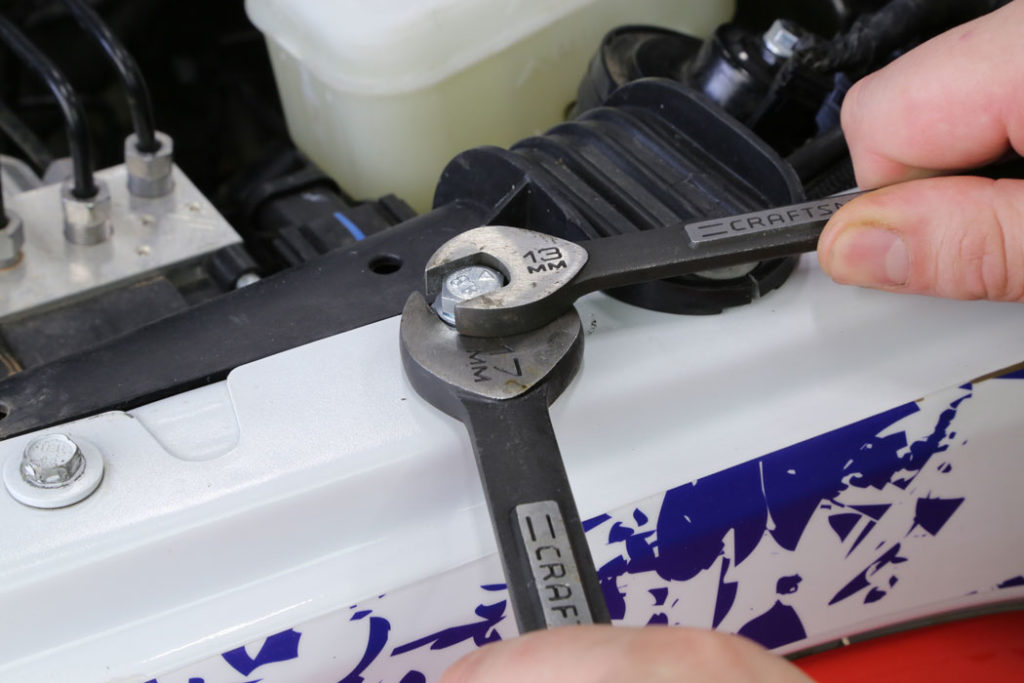
Use a 13mm wrench or socket and loosen the RH nut on the brake master cylinder. You don’t need to remove it, just loosen it until you have a 1/4″ gap between the nut and the the flange.
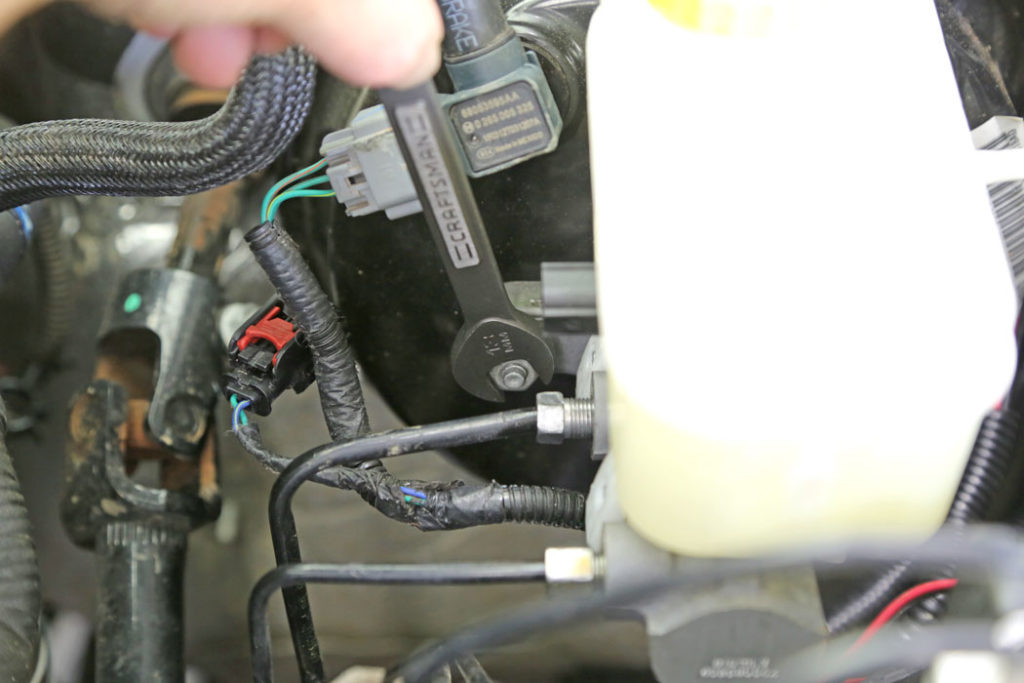
Install the compressor mount gusset onto the stud behind the nut you just loosened. The closed slotted hole should be facing up (as shown). The open slot should slide down between the nut and the master cylinder.
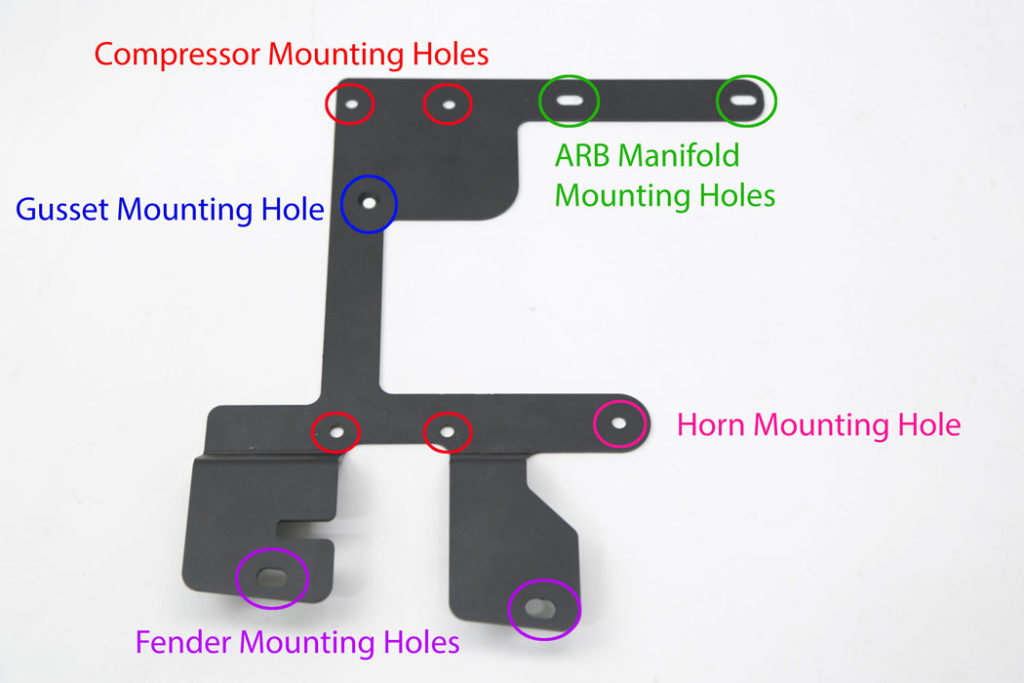
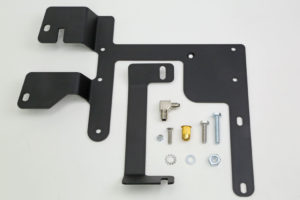
Looking at the Grimm Offroad mounting plate, the four red circles indicate the ARB Twin Compressor mounting holes, the green circles indicate the ARB manifold mounting holes, the blue circle indicates the support gusset mounting hole, the pink circle indicates the horn mounting hole and the purple holes indicate the holes for the fender bolts.
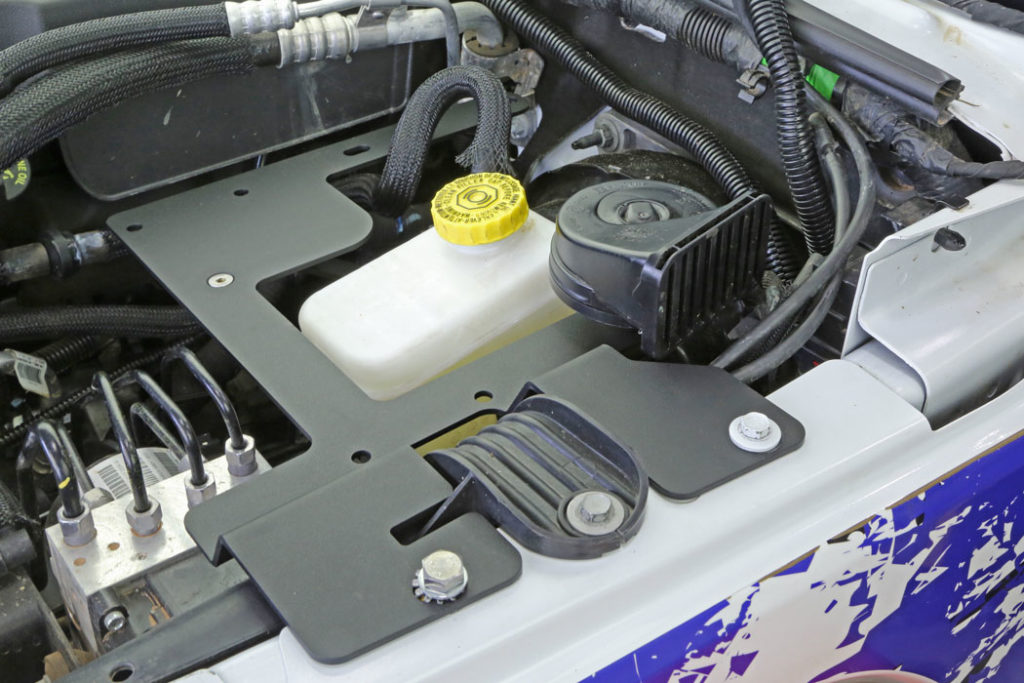
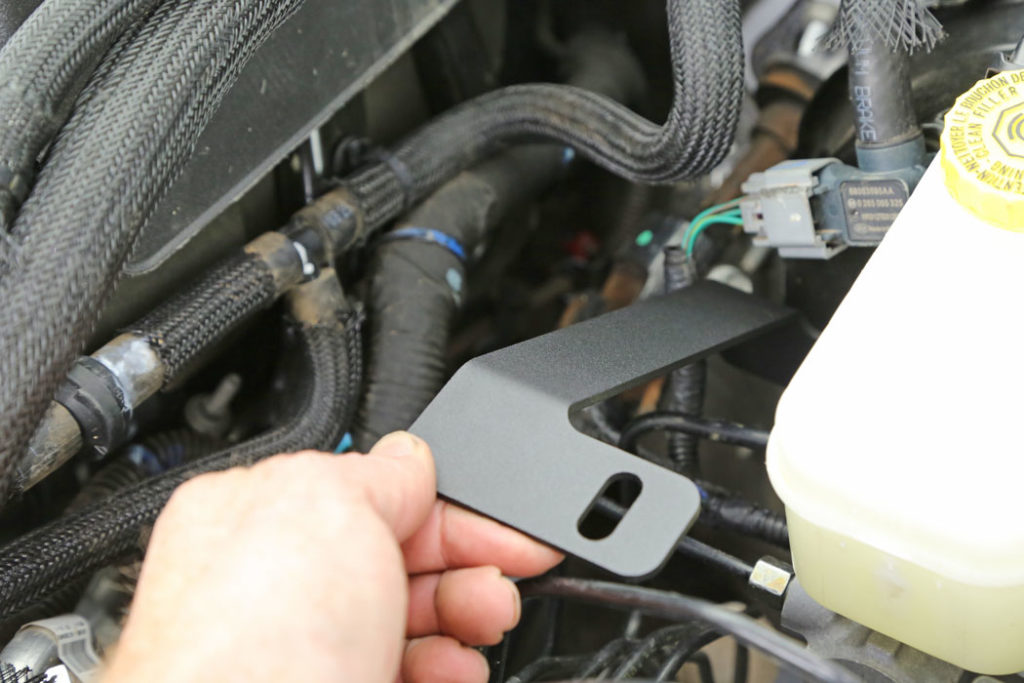
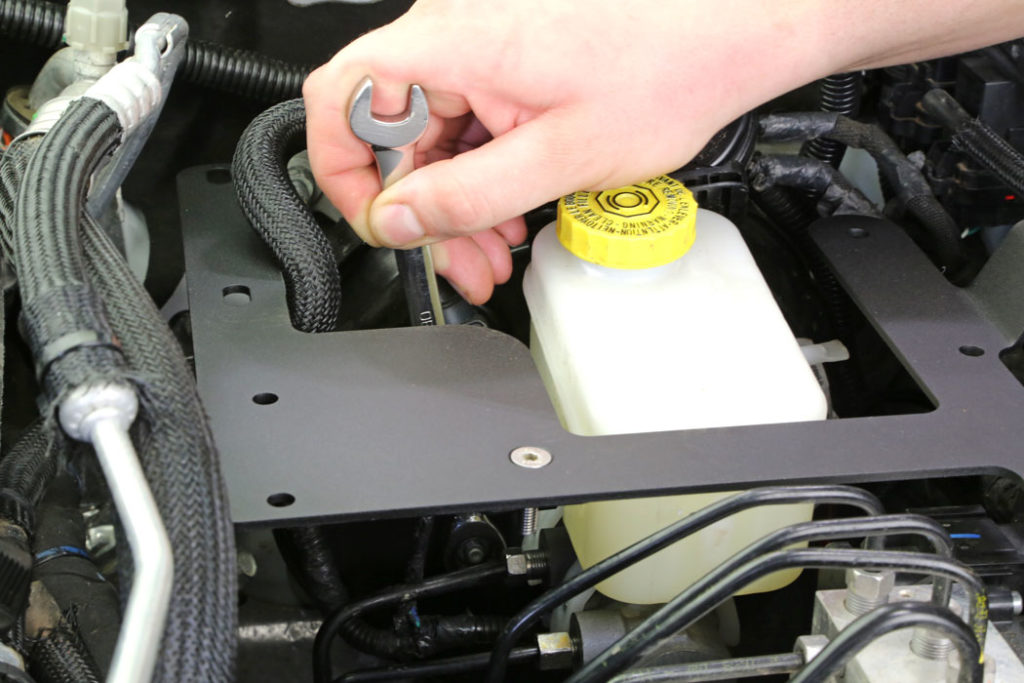
Set the Grimm Offroad ARB Twin bracket onto the fender and the compressor mount gusset and temporarily bolt in place. This is to line up the compressor bracket and the gusset.
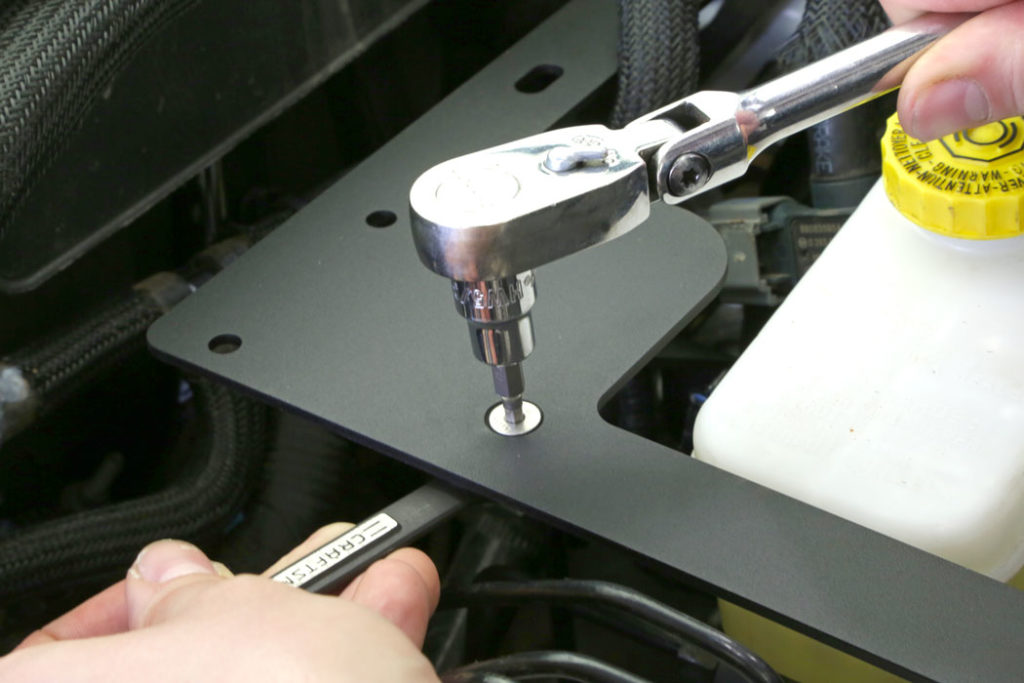
Install the M8 x 25mm bolt into the rivet nut with a 13mm wrench. Then reinstall the original 10mm fender bolt into the rearward hole. Snug these up, do not fully tighten yet.
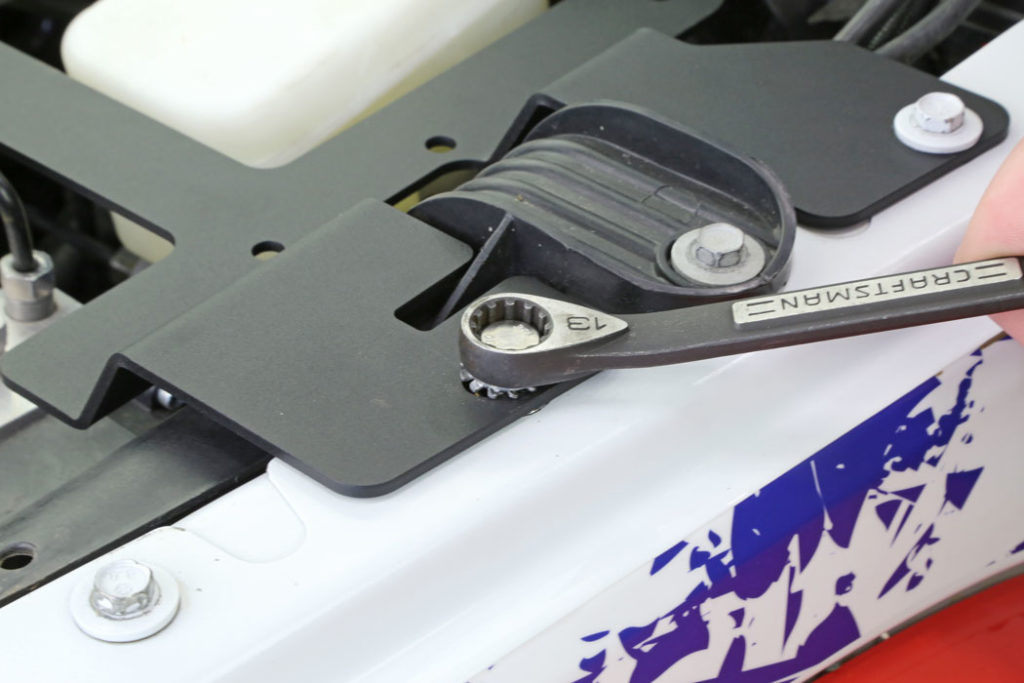
Install the M6 x 25mm tapered bolt through the compressor mount and the compressor mount gusset, install the 6mm nut on the backside and use a 10mm wrench with the 9/64th hex key to snug up the bolt.
Tighten the nut holding the compressor mount gusset to the master cylinder flange.
Now tighten the support gusset bolt firmly to lock the gusset placement. Once the ARB twin compressor is installed on the bracket, it is next to impossible to get at the countersunk gusset bolt head. Remove the fender bolts, loosen the master cylinder retaining nut and remove the bracket assembly from the Jeep.
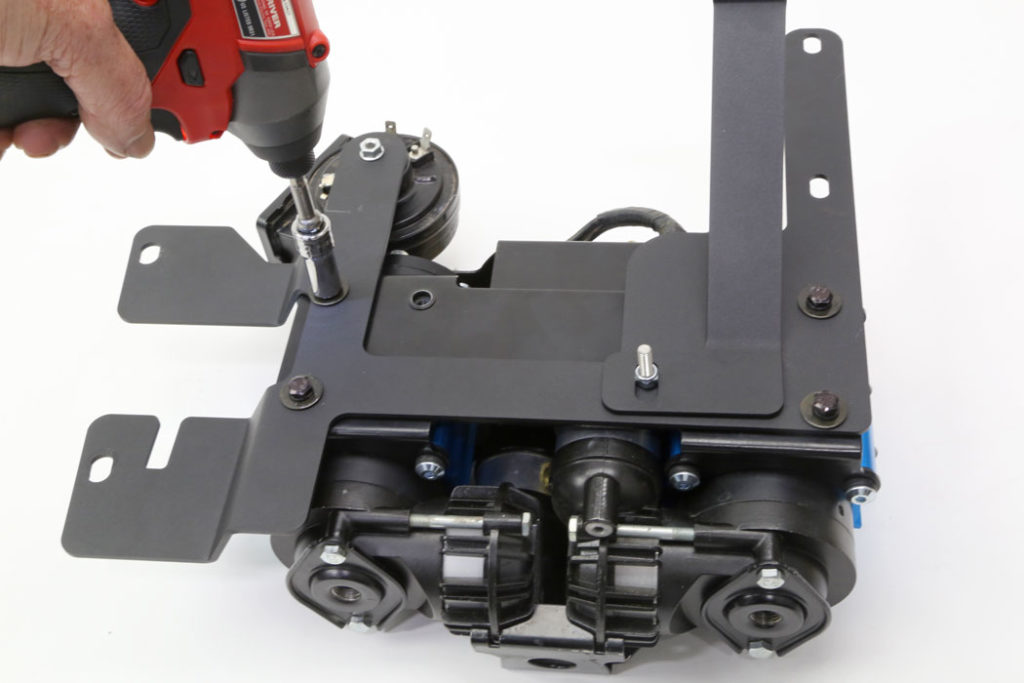
Set the ARB Twin Compressor upside down on your work bench, then set the GOR bracket assembly onto compressor and install the ARB mounting screws. Use a little blue Loctite on the ARB mounting screws to help keep the bolts from vibrating loose over time.
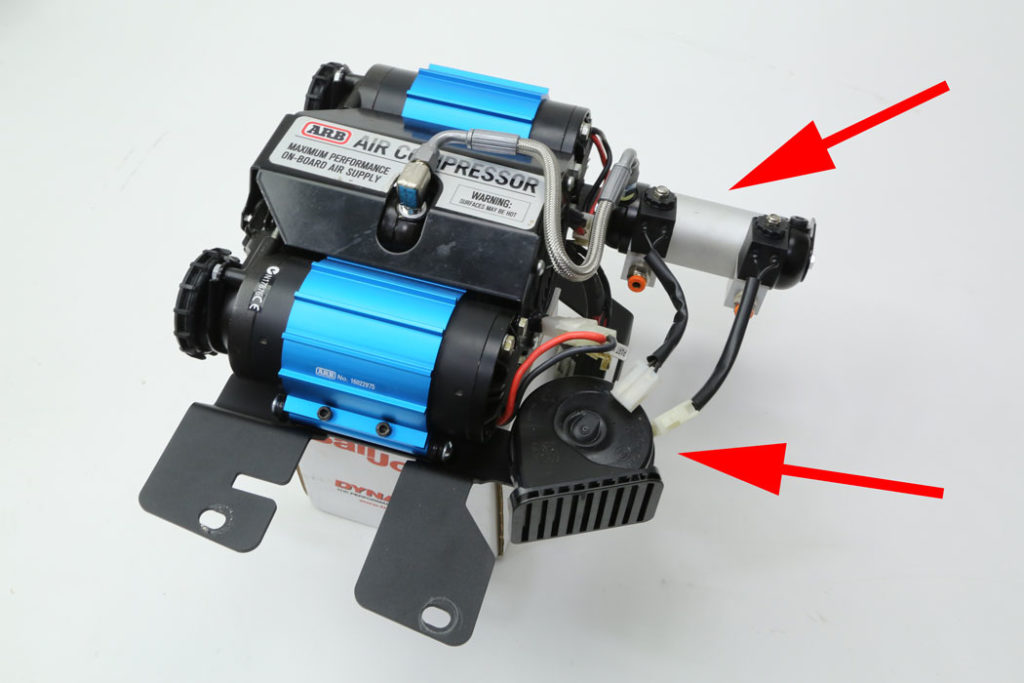
With the compressor out on the work bench mount up the horn and the ARB manifold kit.
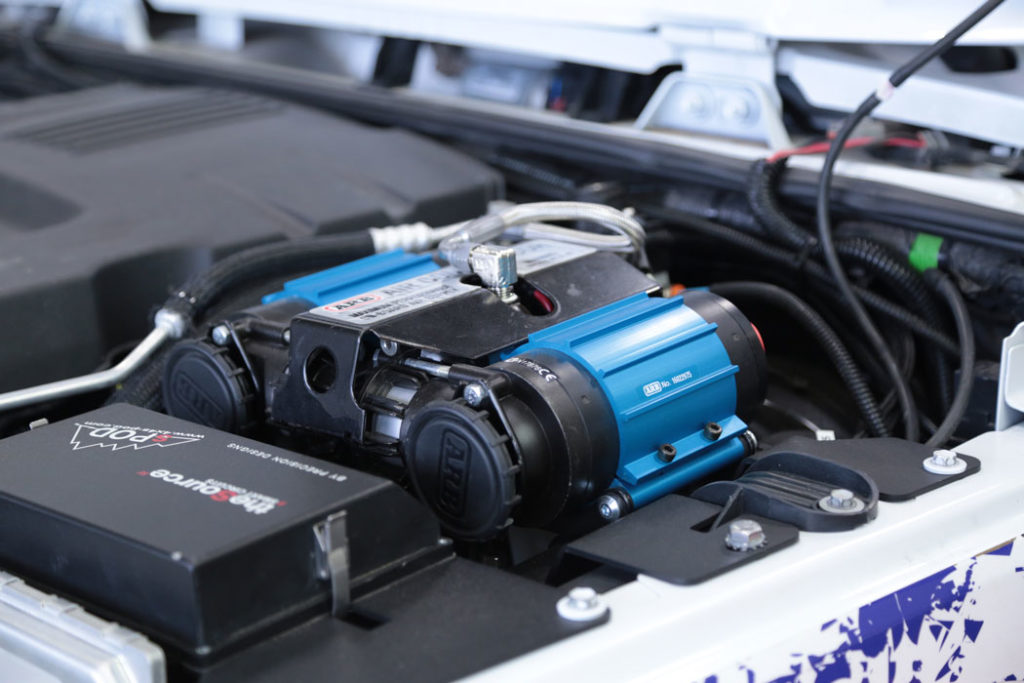
Then install the Grimm Offroad bracket with ARB twin compressor into your JK and bolt it in.
Install Tip:
![]()
Check master cylinder fill cap to ARB compressor clearance. If you have the compressor and GOR bracket slid as far forward as you can and the filler cap is touching the ARB twin compressor, use a screwdriver to bend the fan grille on the compressor in just enough to clear the filler cap.
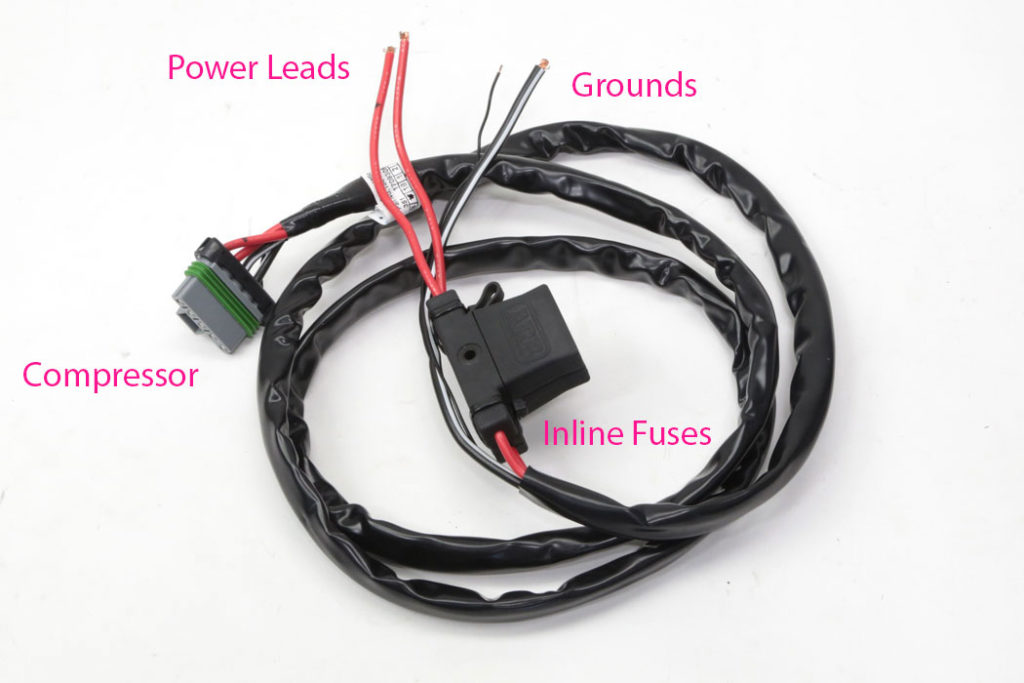
The ARB main harness is first to go in.
Plug the large plug into its mate on the ARB twin compressor. Run the rest of the main harness along the firewall over to the battery box. Zip tie it in place every 6″s or so.
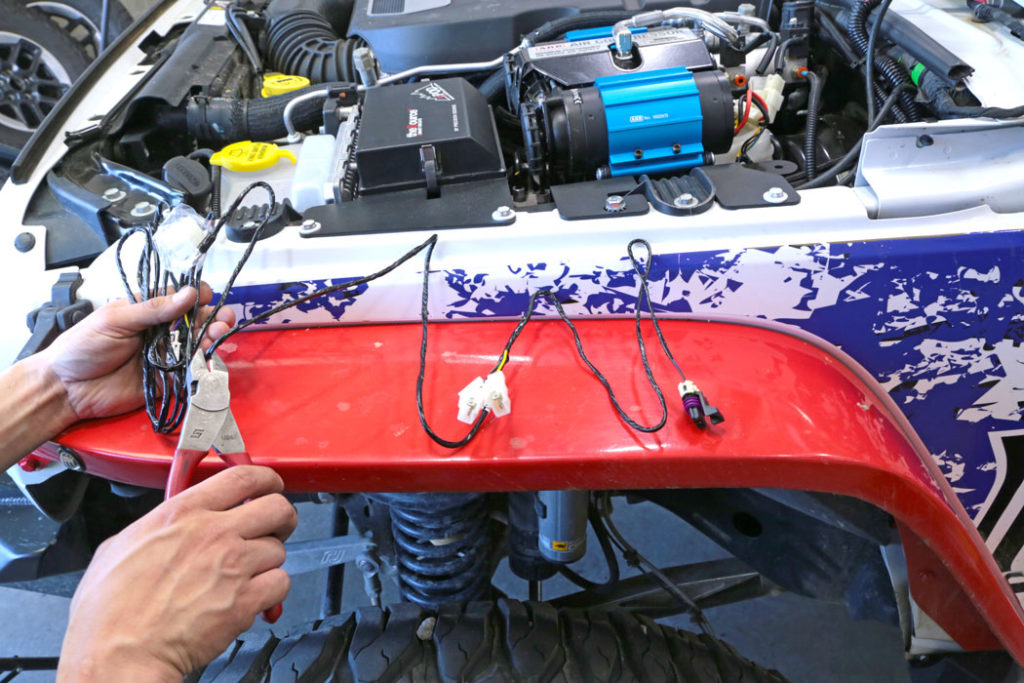
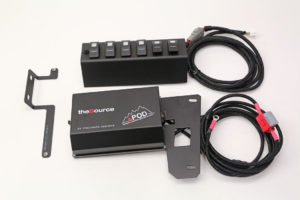
We’re installing an sPOD at the same time, so instead of running the ARB harness into the cab and using the ARB switches, we’re going to cut the ARB switch harness short and run the wires into the sPOD control box.
If you are going to install the ARB twin compressor with the ARB switches, route the switch harness in through the firewall to the dash and wire according to ARB instructions.
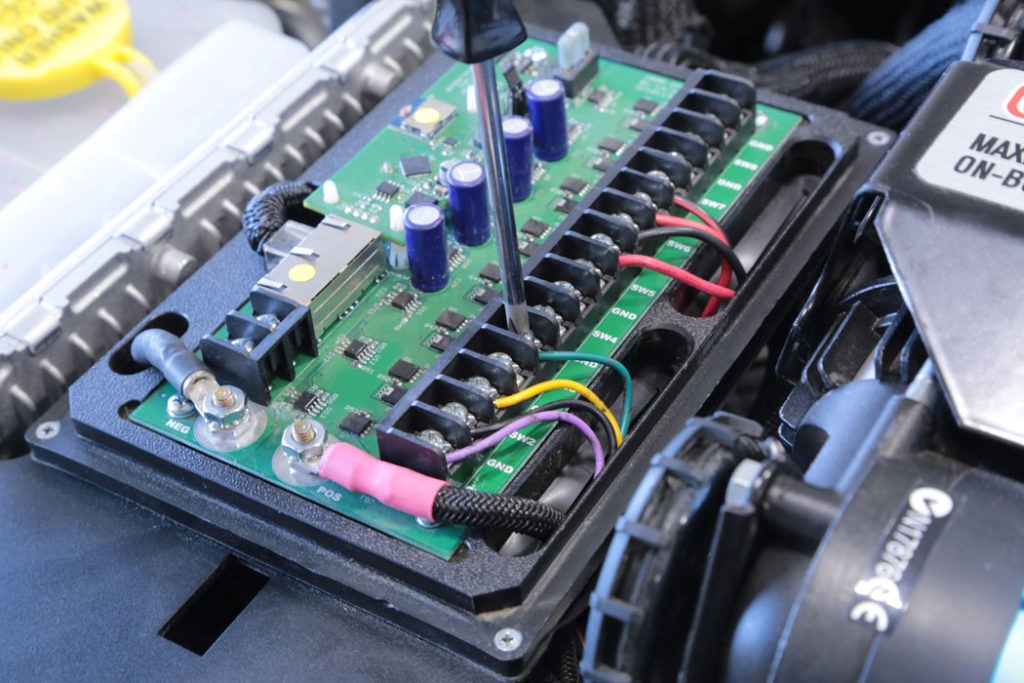
We wired the clipped end of the ARB switch harness into the sPOD.
-
Purple wire is the compressor ON wire, we wired that into the SW1 position.
-
Black wire is the ground and grounds the other three wires, so it can go into any of the GND positions. We wired it into the first GND position.
-
Yellow wire is for the rear air locker, we wired that into the SW2 position.
-
Green wire is for the front air locker, we wired that into the SW3 position.
**With the standard ARB harness you must first activate the compressor switch and the rear locker switch before you can activate the front locker switch. A big bonus to wiring the ARB switch harness into an sPOD is you by-pass the original ARB switch wiring and can now control all three switches independently.
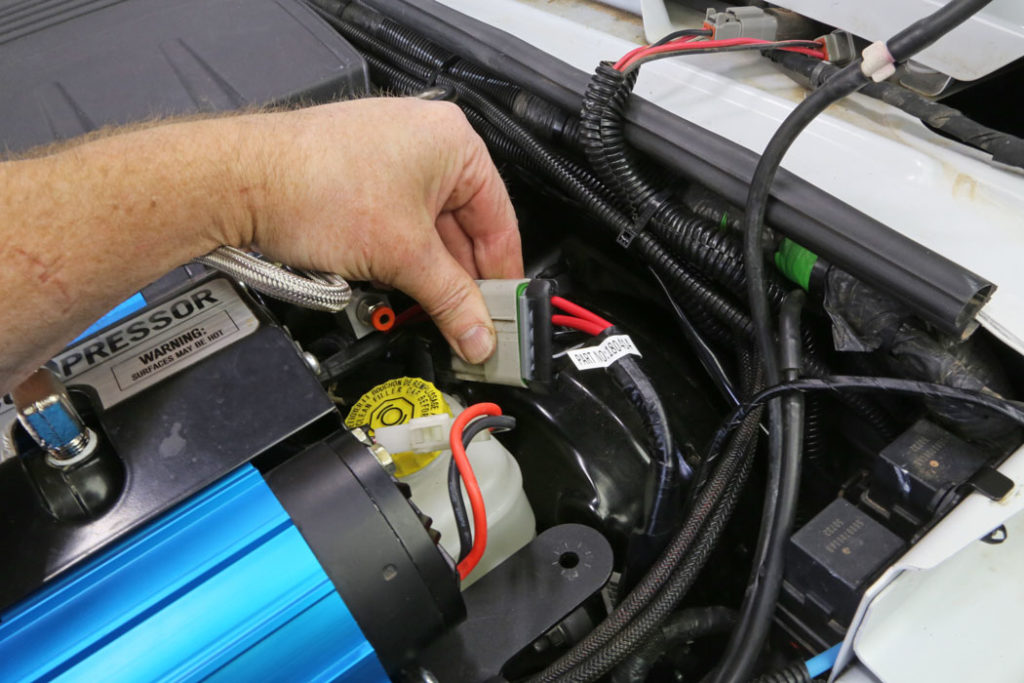
Connect the plug with the purple and black wire into the smaller compressor plug. This is the compressor activation circuit.

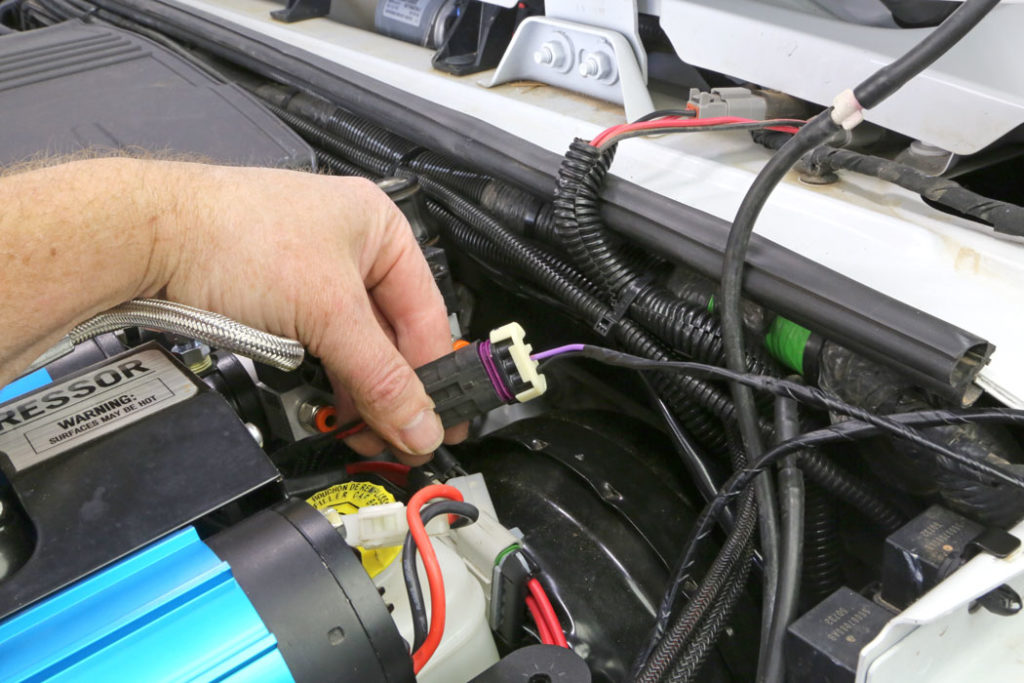
Plug the two white plugs on the switch harness into the solenoids. We like to plug the lead with the green wire into the forward solenoid as a reminder that it is the lead for the front Air Locker and then plug the lead with the yellow wire into the rear solenoid as a reminder that it is the lead for the rear Air Locker.
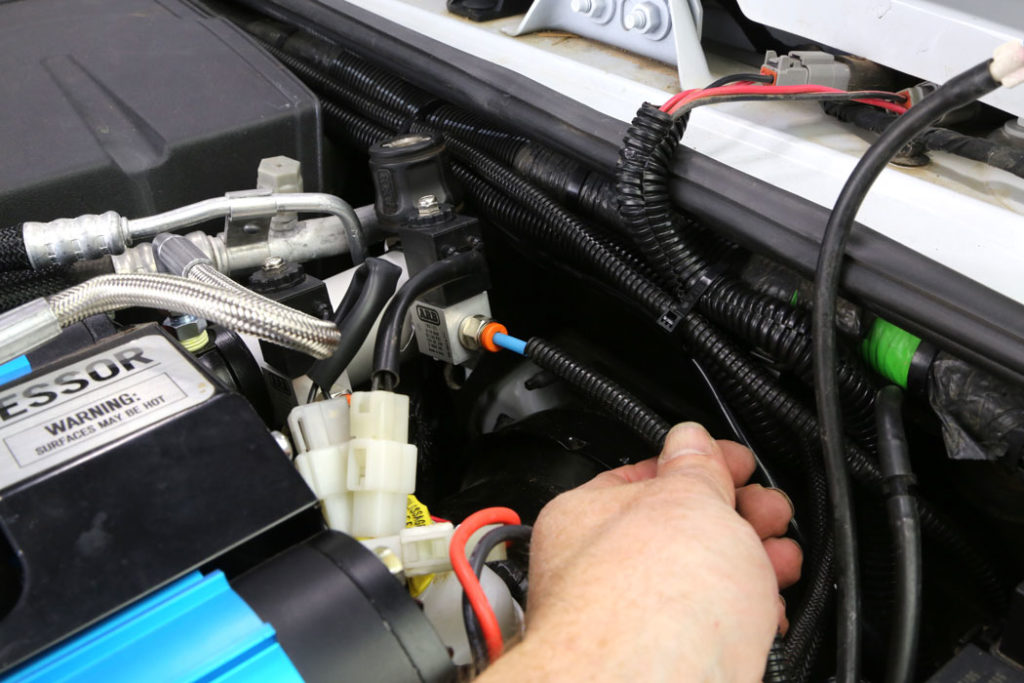
We then plugged in the ARB blue airlines into their respective solenoids. The blue line to the rear locker into the rear solenoid and the blue airline for the front locker into the forward solenoid.
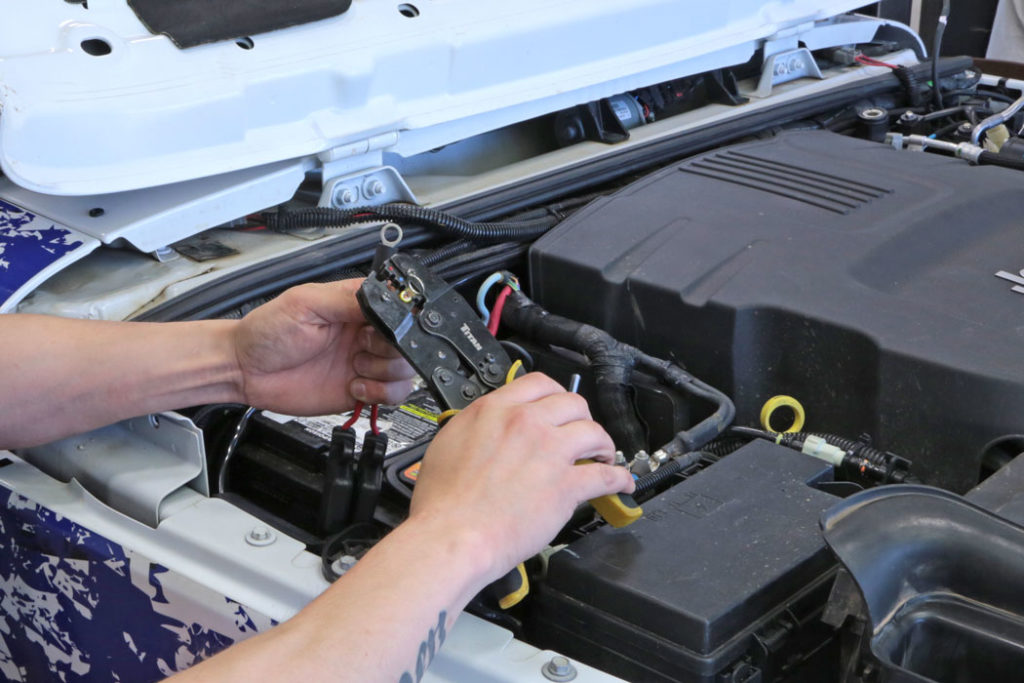
Move over to the main harness at the battery box, trim the insulation back on the wires and crimp on ring terminal ends. We always add a piece of shrink wrap to the wire before putting the terminal on, then slide it up one the terminal shoulder and shrink it down with some heat for a little extra protection.
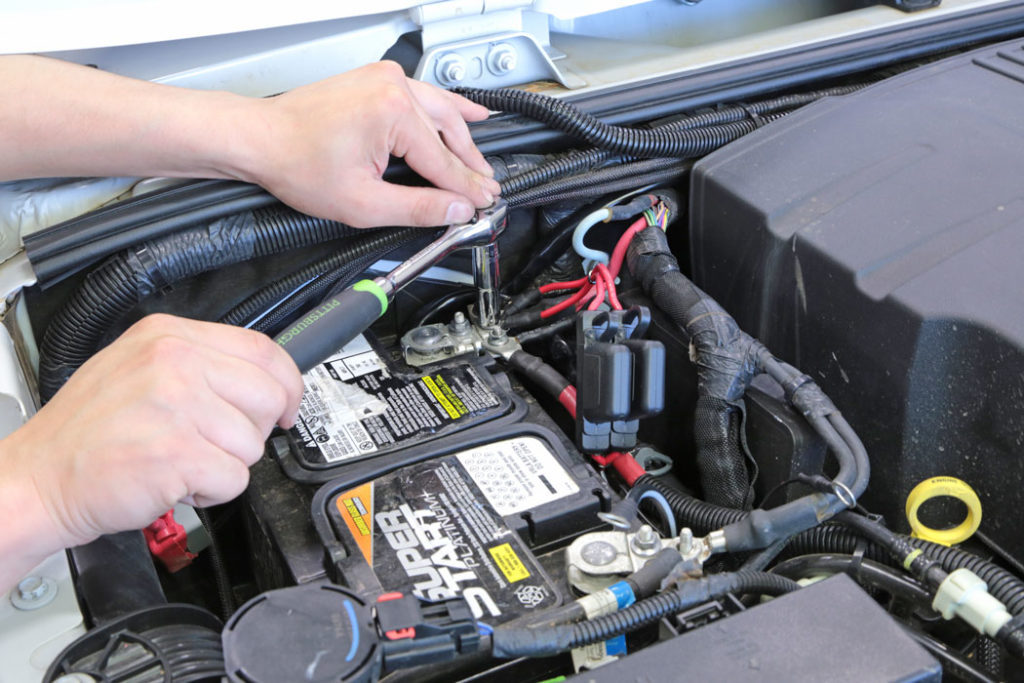
Install the two positive terminal leads to the positive strip on the battery.
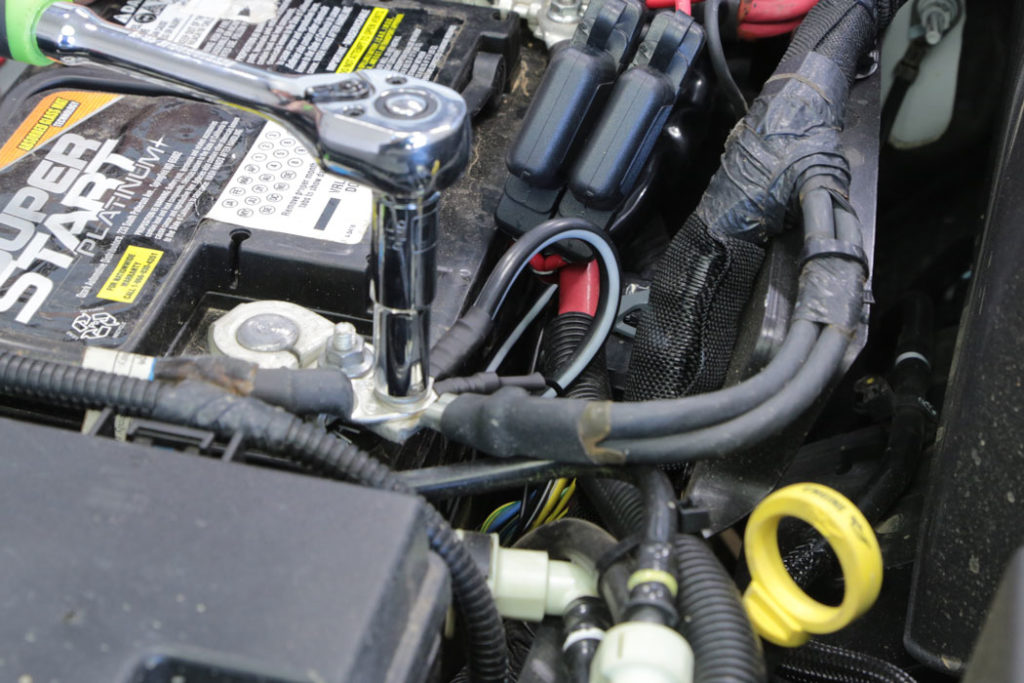
Hook up the negative leads to the negative terminal on the battery.
**Always connect the positive lead first and secure tight, then install the negative lead(s) last.**
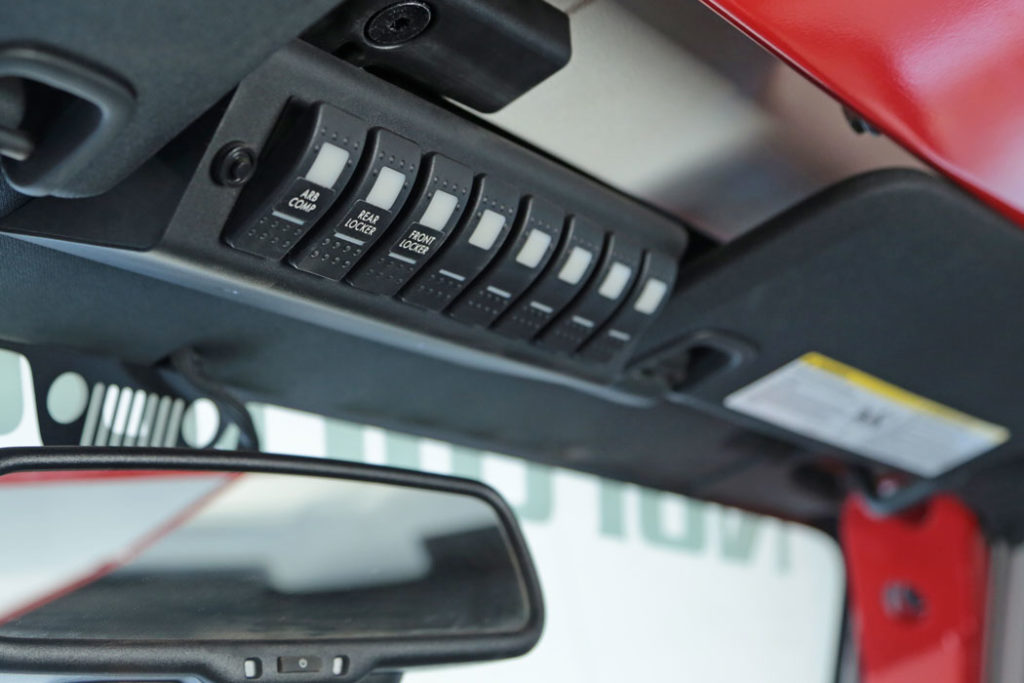
We then moved into the cab and labeled the first three switches on the sPOD to coincide with our wires in the sPOD module. What about the air fills???

We installed the ARB air chuck at the back of the ARB manifold and pointed it straight up.
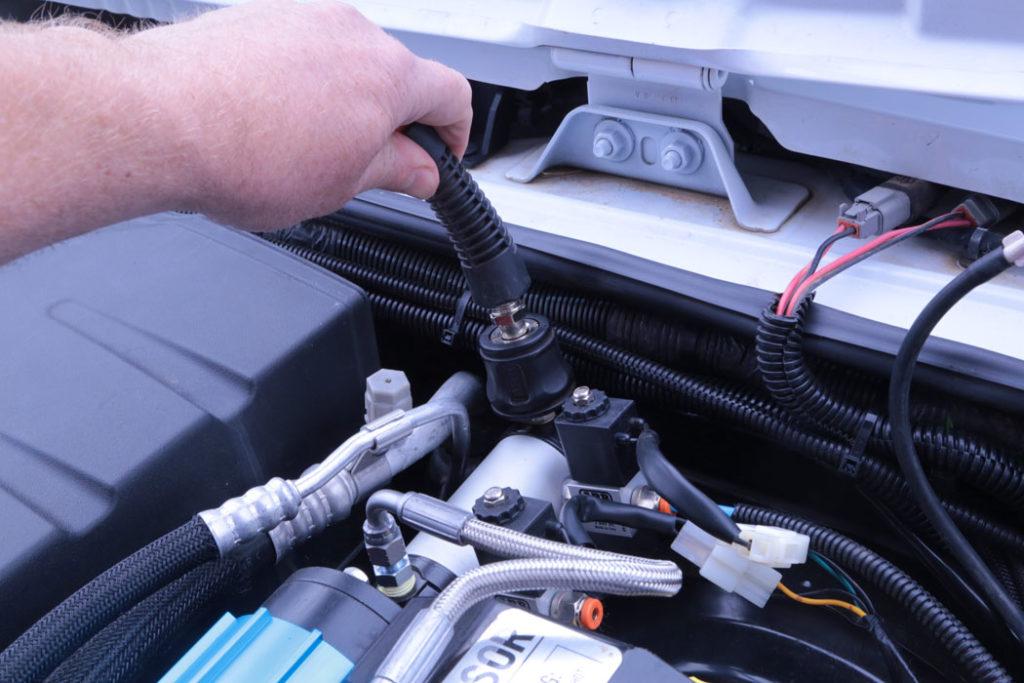
This allows us to get at it by opening the hood and pushing the ARB hose in.
SIMPLE ENOUGH?
The Grimm Offroad twin compressor mount for the JK/JKU makes installing the ARB twin compressor easy and tucks it nicely under the hood, keeping it protected from the elements and easy to get to when you need to get at that big air.