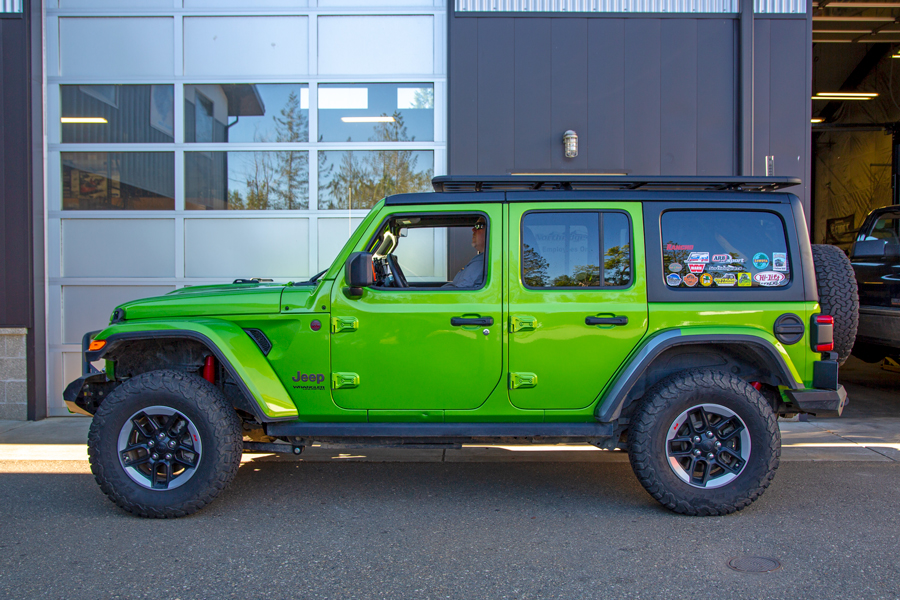
We've done a quite few lifts on Wrangler JLs here at the Northridge Nation/Northridge4x4 DIY garage, however there has been one lift we haven't installed yet and have been looking forward to.... The Rancho 2" Suspension System.
Not for any particular reason other than Rancho is one of those legendary names in 4x4 suspension, especially Jeep suspensions, and they are known to build a good lift kit.
How legendary is Rancho Suspension in the Jeep world?
Rancho Performance was one of those companies that helped start the off road aftermarket parts industry. They started out as family ran Jeep parts and service business back in 1955 and progressed to their current status as one of the best known 4x4 suspension manufacturers in the world.
Originally called Rancho Jeep Supply and ran by father Clarence Shook, the small shop sold Jeep parts, designed many of their own parts and did Jeep build-ups. In the 1970's, sons Gene and Keith Shook took the reins and Rancho Performance soon became the premier 4x4 suspension company of the time. Then in 1990, automotive parts giant Tenneco purchased the company and has held it since then, slowly growing and changing. Over the 60+ years Rancho has been around, they have seen a lot of changes. You could say that they have been there, done that and unlike so many of the other early day companies, Rancho performance is still around and still going strong.
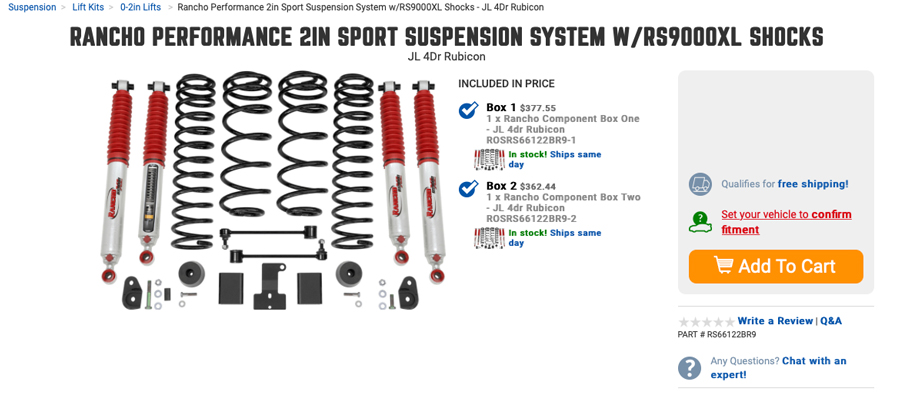
Time to Lift your Jeep: What's In The Box?
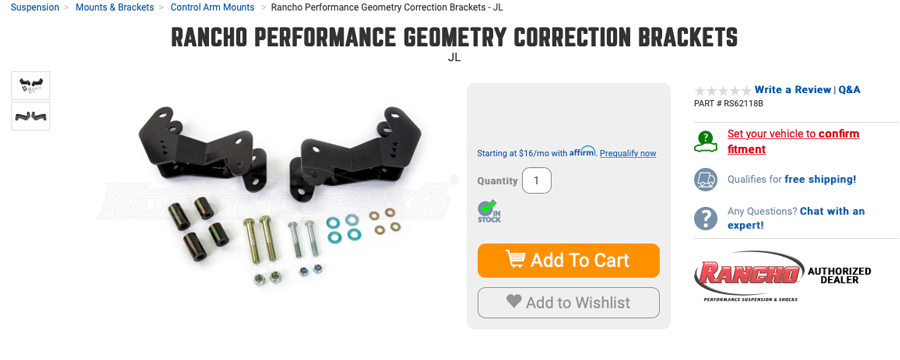
The Rancho 2" kit Suspension Kit comes with variable rate coils, adjustable RS9000 shocks and all the brackets and components needed for the lift (including a pretty sweet parking brake cable reroute bracket that would be a great addition to any lift kit). We also added in the Rancho Geometry Brackets to get the caster back to the sweet spot. Some may say they are not necessary with only 2" on lift, we sure like the way a lifted JL drives after installing the geo. brackets.
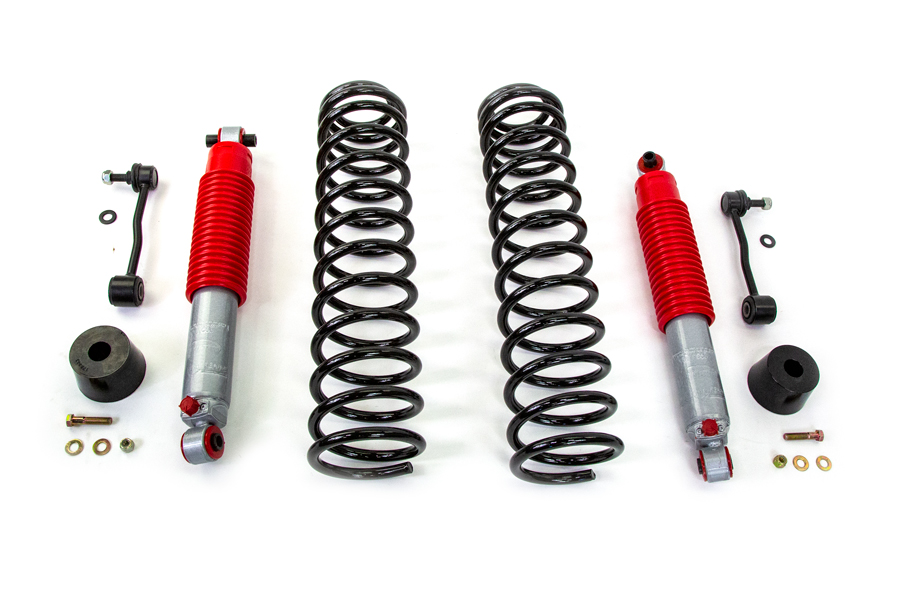
Rancho Lift components for the front of a Jeep Wrangler JL, PN# RS66124BR5
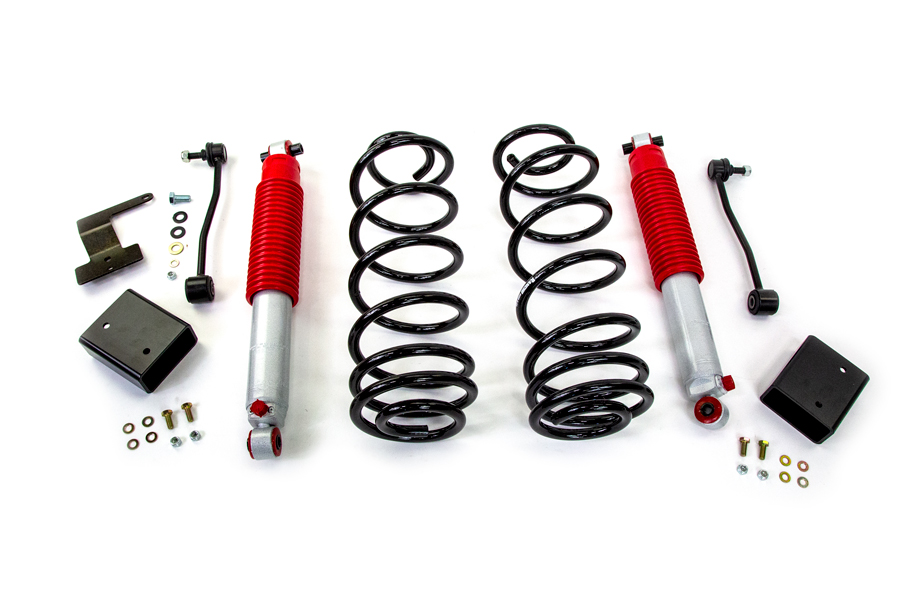
Rancho Lift components for the rear of a Jeep Wrangler JL, all part of PN# RS66124BR5

Rancho geometry brackets ( PN# RS62118B.) to go along with the front lift kit.
For more information, here are the official Rancho Instructions: Rancho-2" JL lift kit instructions.
Starting The Jeep Lift Kit Install:
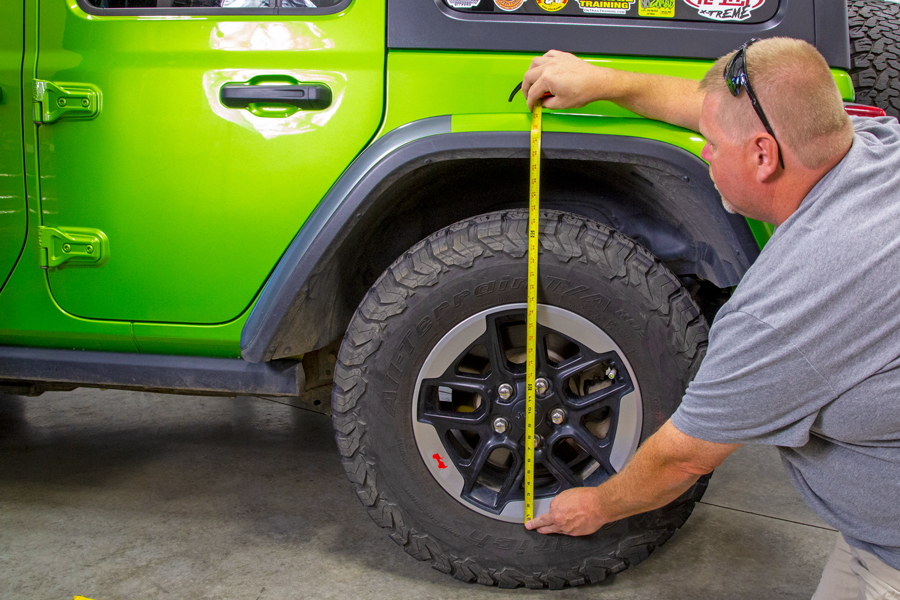
First things first, establish your BEFORE pre-lift baseline. Measure all four corners, from the bottom edge of the wheel to the edge of the fender.
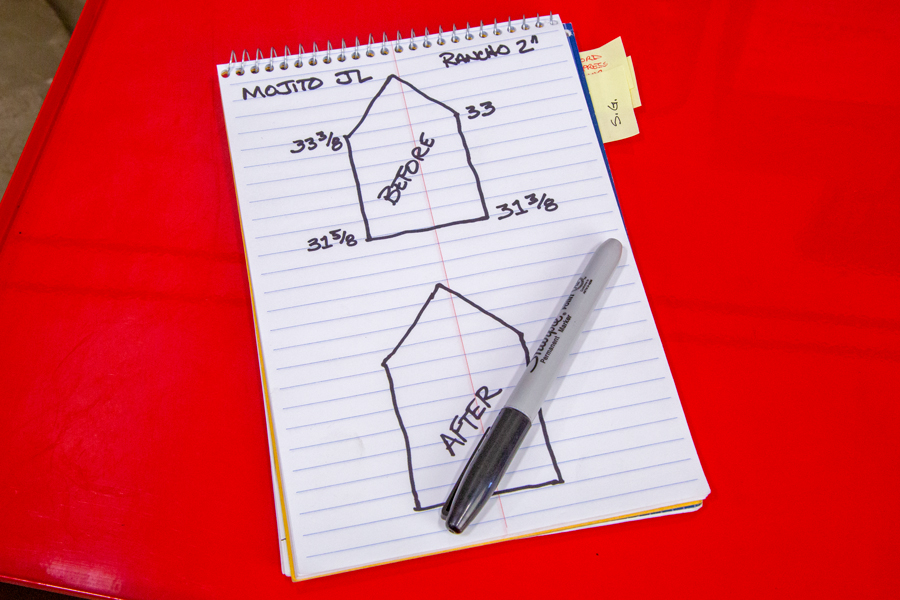
Write them down on a sheet of paper and keep it for future references.
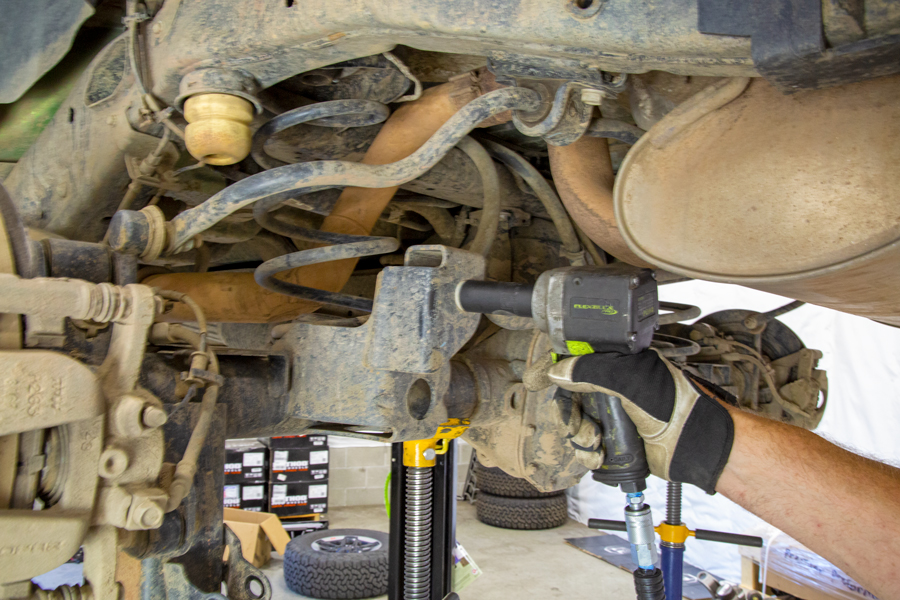
Start out by removing front and rear track bar bolts at the axle. It is easiest to do when the vehicle is still sitting on all four tires.
Also loosen up all the control arm bolts, front and rear. Don't remove them, just loosen them a few turns to take any preload off of them.
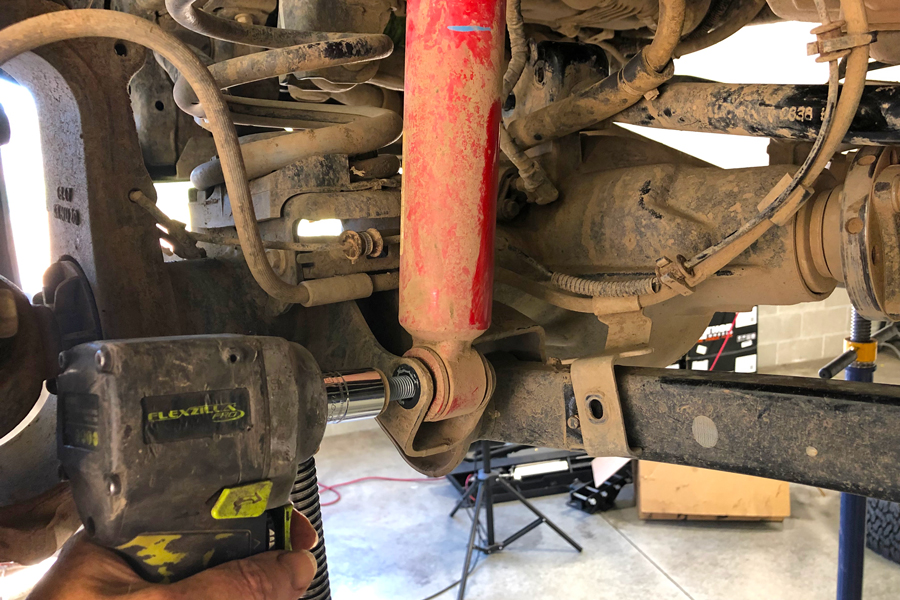
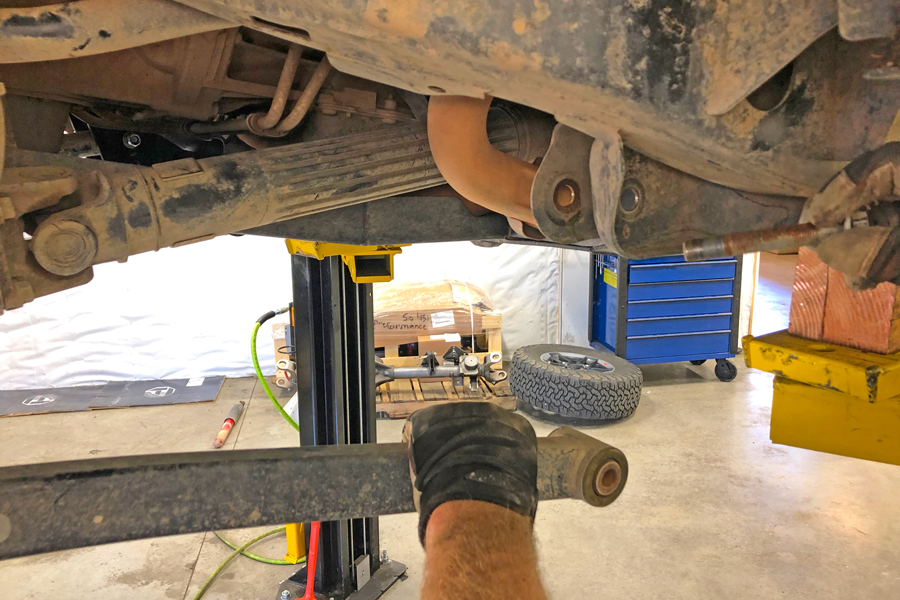
Remove both rear shocks. For the bottom mount you'll need an 18mm socket and wrench, for the top mount, just the 18mm socket.

Remove both rear sway bar links. They also need the 18mm socket and wrench.
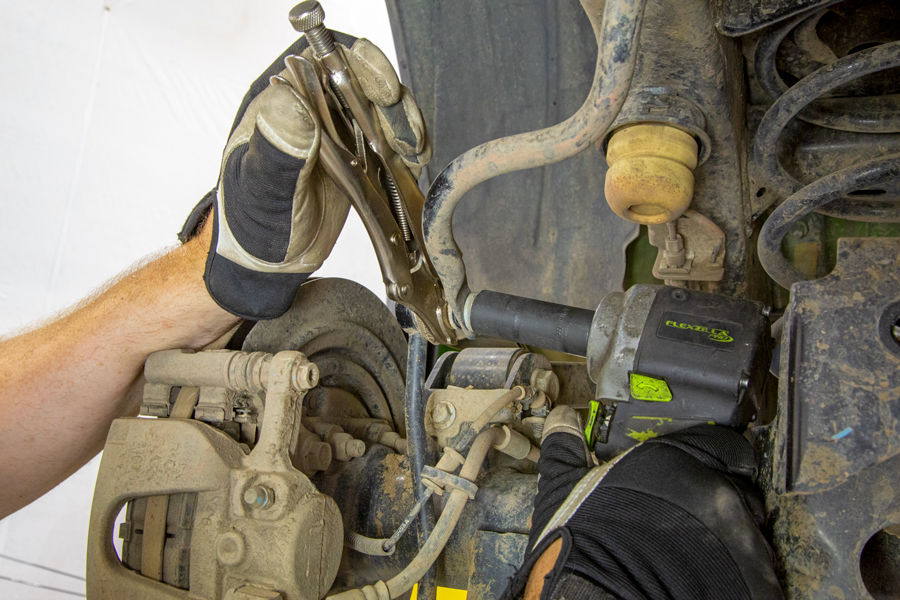
We ran into a little problem where we couldn't get the nut off the upper sway bar link end. You normally can use a hex key in the end of the threaded shank to hold the stud from spinning. Ours was messed up by some previous ham-handed mechanic, so we had to grab hold of the shank through the boot with a set of Vise-Grips to lock it down.
We'll be replacing the sway bar link with new longer Rancho units, so we weren't too concerned with messing up the boot.

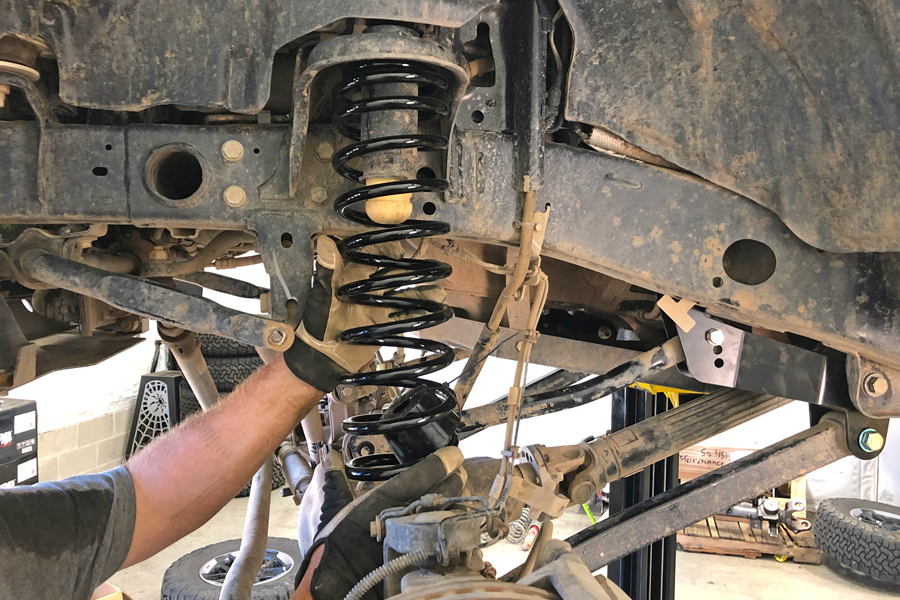
With the track-bar bolt, shocks and sway bar links removed, the axle will drop down enough that you can easily remove the rear coil springs.
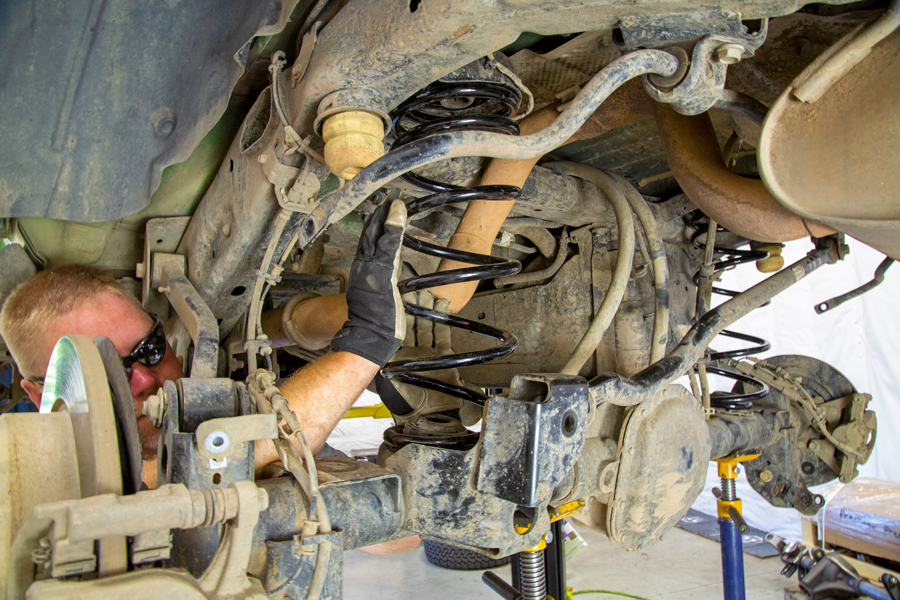
Install the new Rancho rear coil springs.
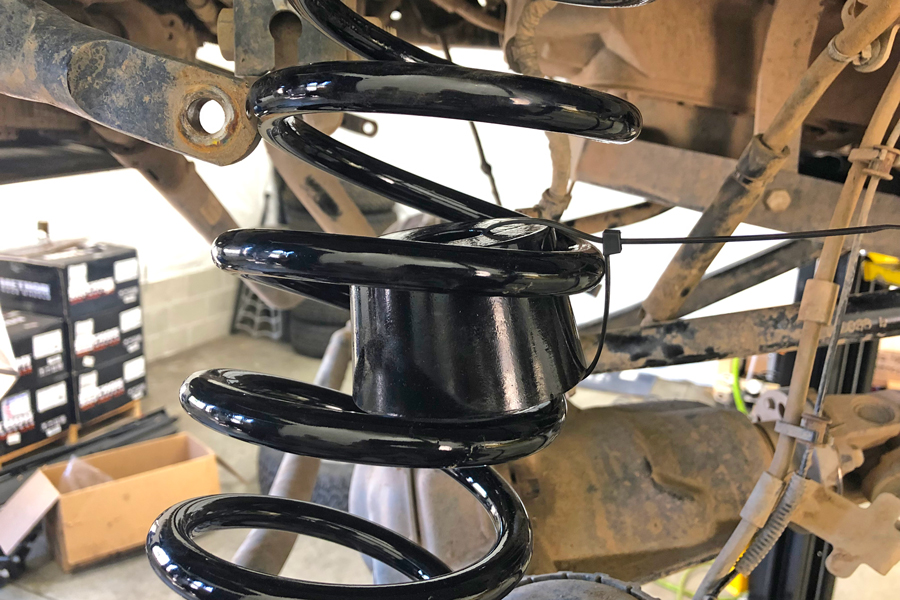
Install the Rancho rear bump stop extension bolts right on top of the OE bump stop pads.
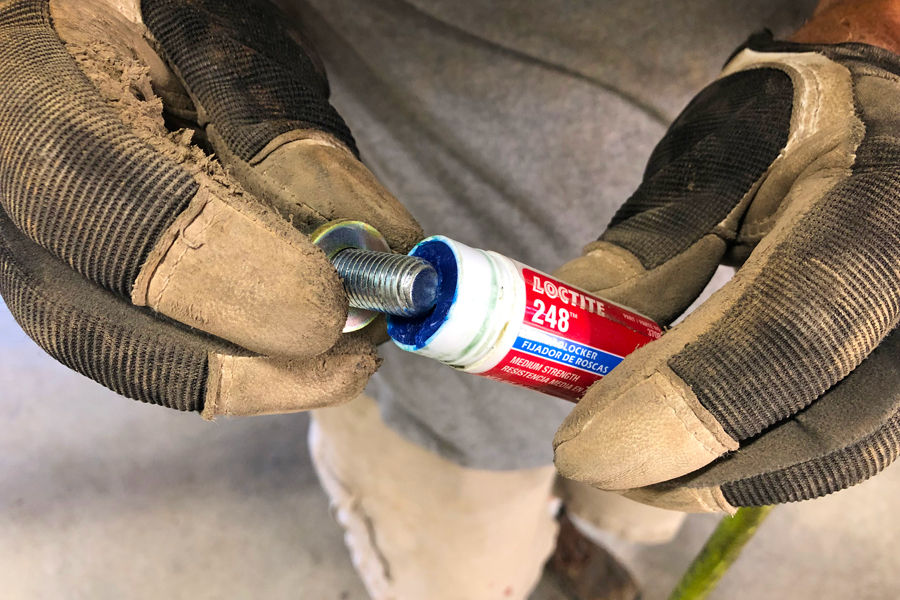
Make sure to use a little Loctite 248 or some other medium strength thread-locking compound on all bolted suspension fasteners. It'll help keep everything tight during your off road excursions and help seal the threads to help keep them from rusting together.
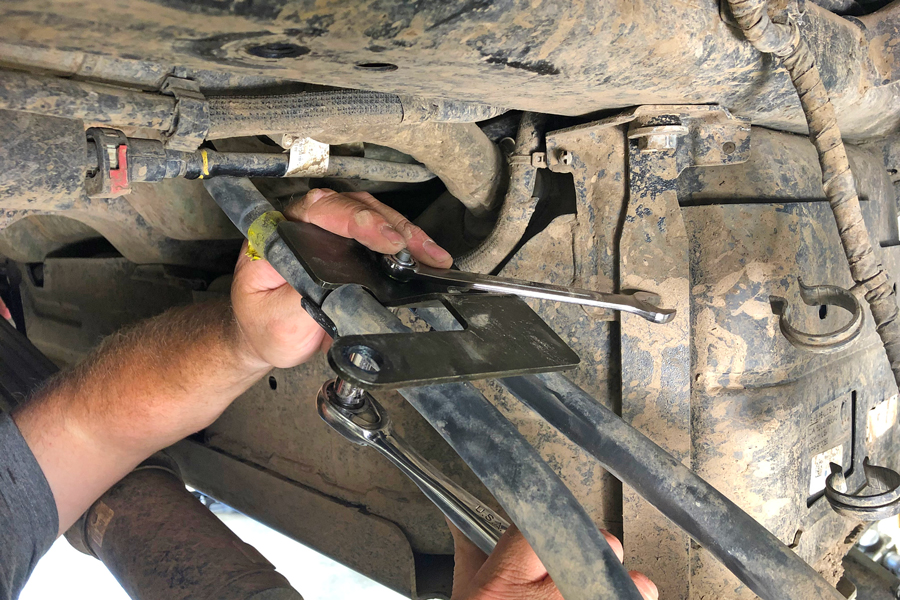
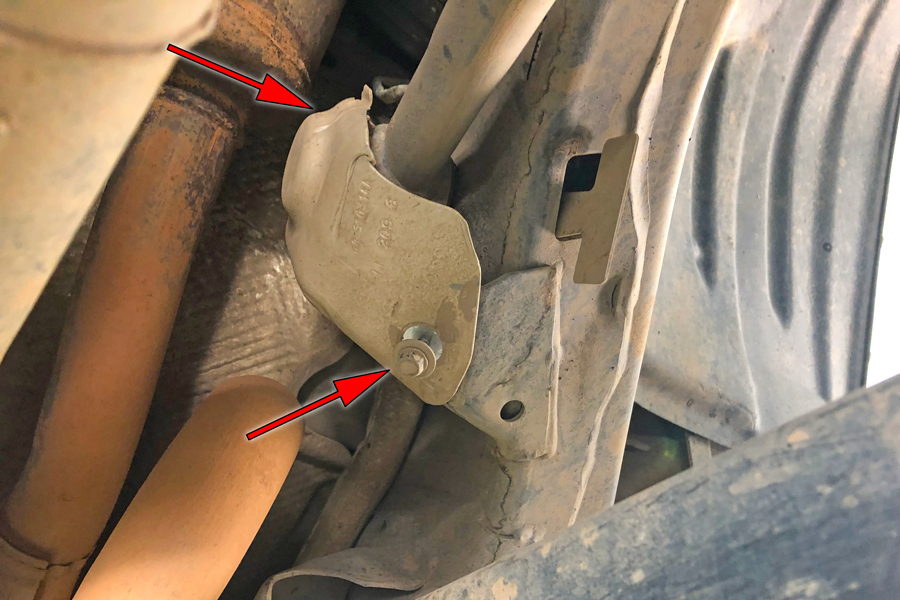
Relocating Your Parking Brake Cables:
Lifting your JL Wrangler can cause problems with the parking brake cable. It's not a hug deal with the smaller lifts, though it is a good idea to relocate the cables below the rear cross-member to keep them from binding during droop. Start out by making sure your parking brake is released!
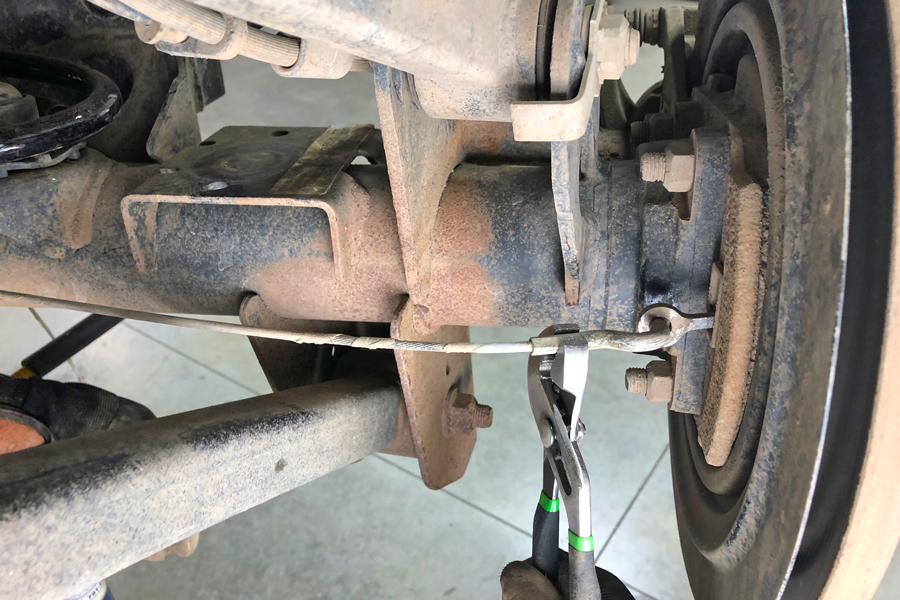
Use a pair of pliers to grab the end of the parking brake cable and wriggle it out from the parking brake lever at the brake backing plates. It is 'S' shaped, so you need to do a little forward and back twist to get it to come loose.
PRO-TIP: Use a 13mm flare wrench to compress little tangs on the cable end and push/pull the cable through the bracket.
Unbolt the OE parking brake cable retaining bracket from the body tub.
Pull the parking brake cable from above the rear crossmember.
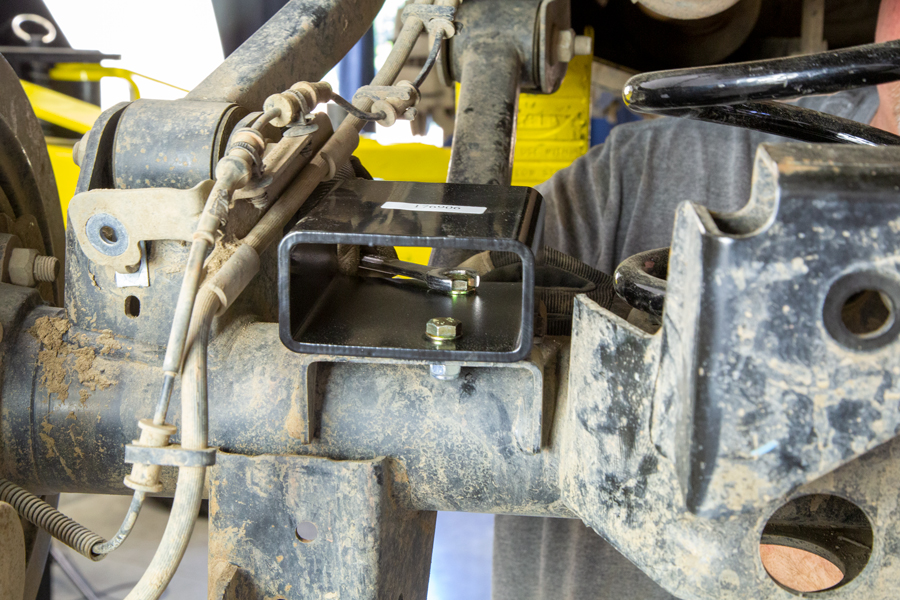
Bolt the cables to the Rancho parking brake cable extension bracket.
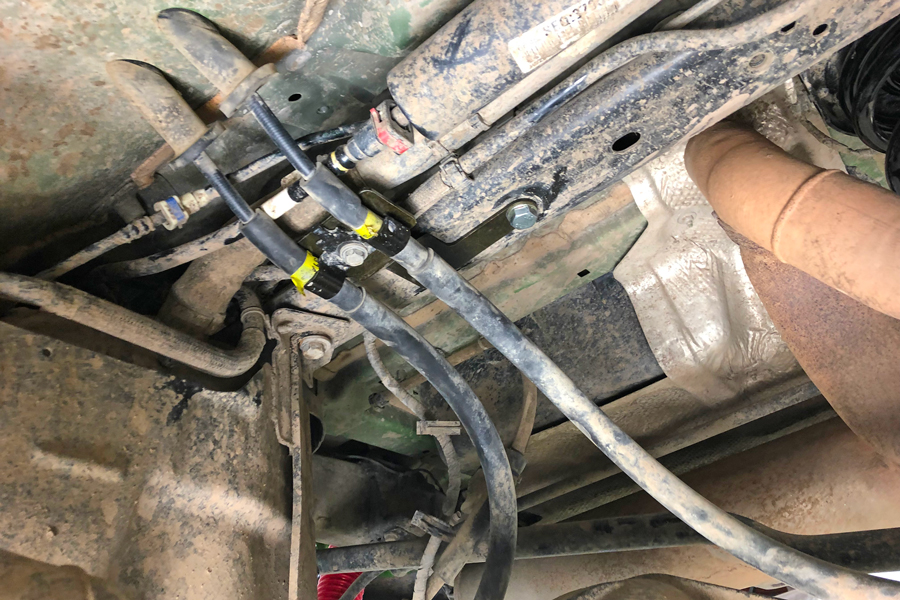
The Rancho drop bracket then bolts up to bottom of the crossmember.
This part is pretty cool and we've got to give Rancho big kudos for this bracket, it works great and keeps the parking brake cables from flopping around.
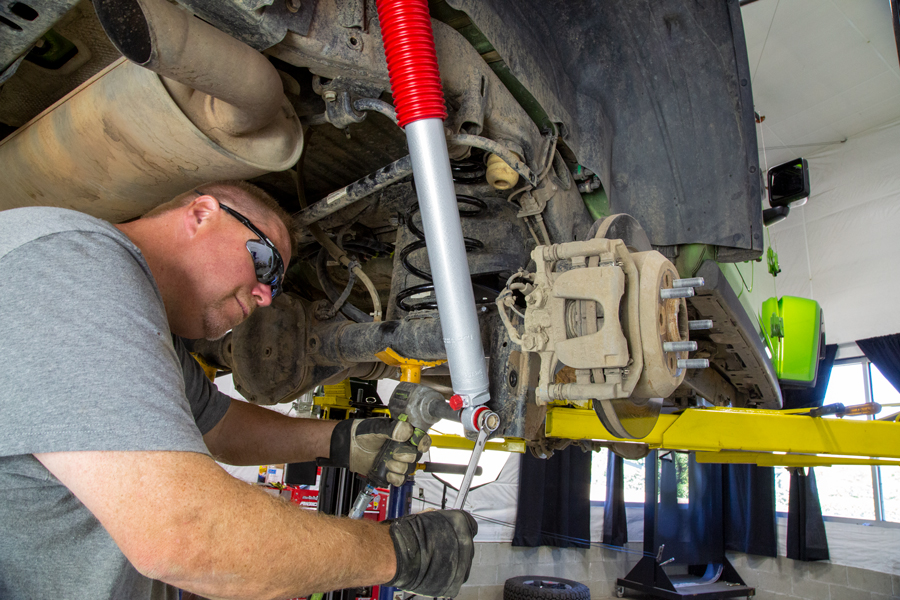
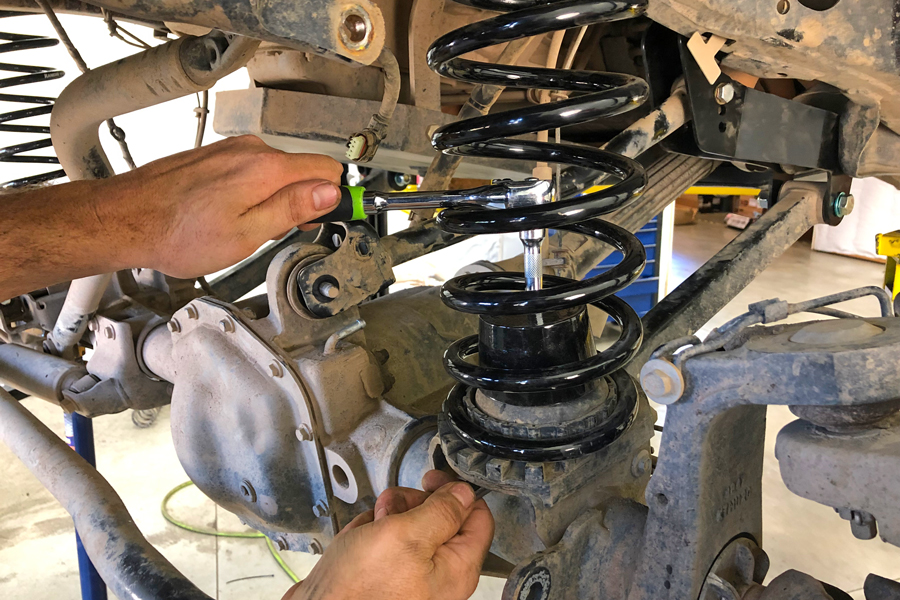
Install the new Rancho RS9000 shocks into the JL. One trick we use on the JLs is to switch out the longer lower shock bolts with the shorter lower sway bar link bolts, this will protect that long threaded bolt end from getting damaged off road.
The new extended length sway bar links can go in next. Then double check all your connections and move to the front suspension.
Install the Ranch Lift on the Front:
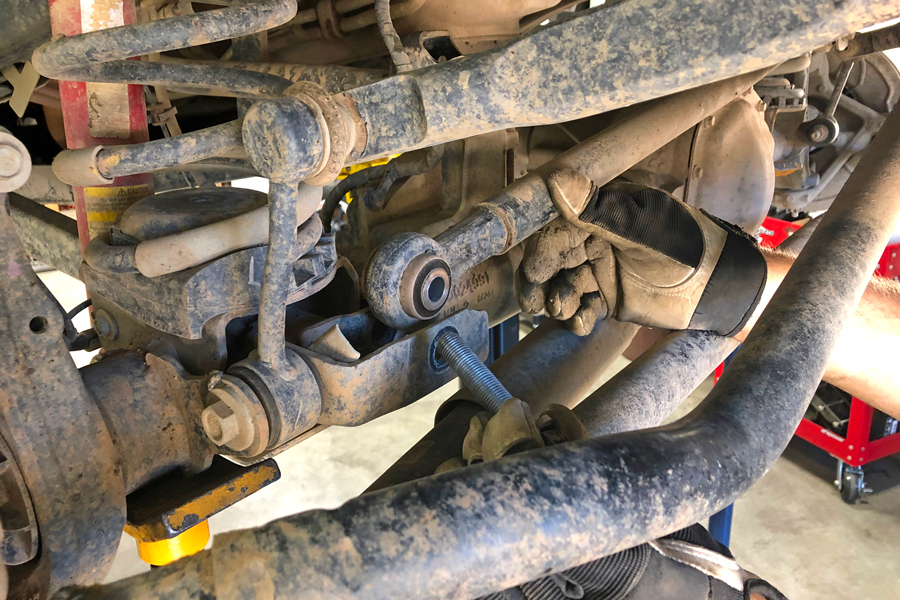
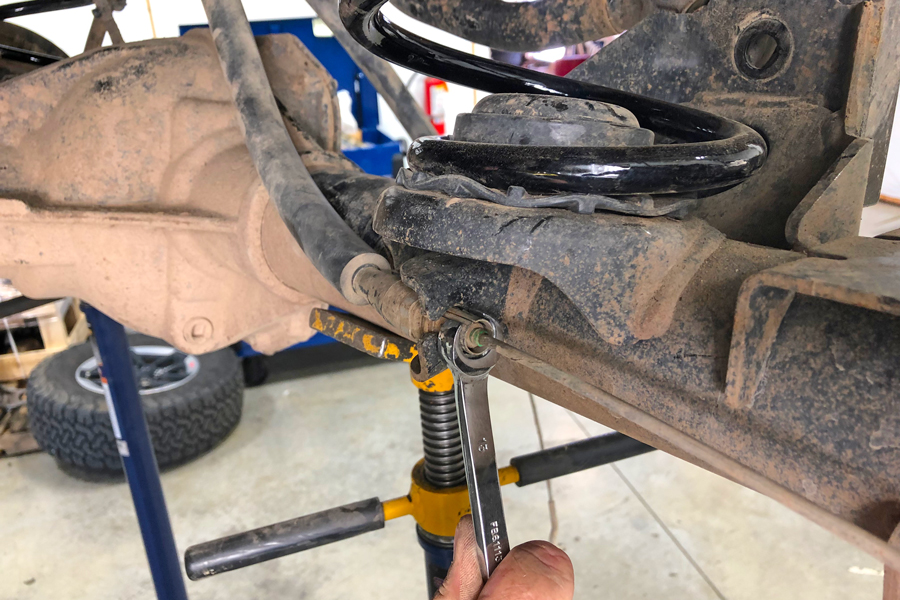
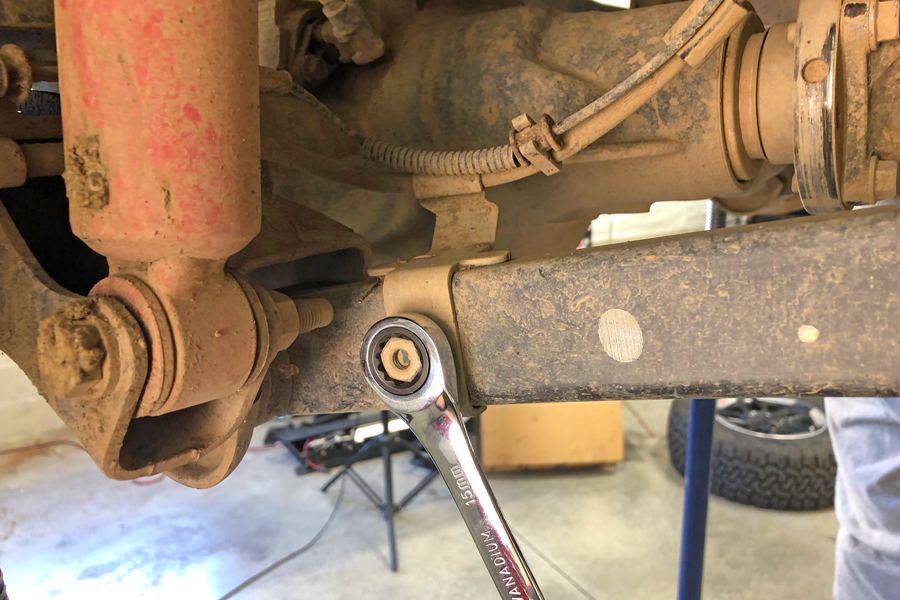
Just like the rear, remove the front track bar bolt at the axle.
Remove the nut holding the front brake line bracket to the front lower control arm.
Remove the front sway bar links. These will also take an 18mm socket and/or wrench.
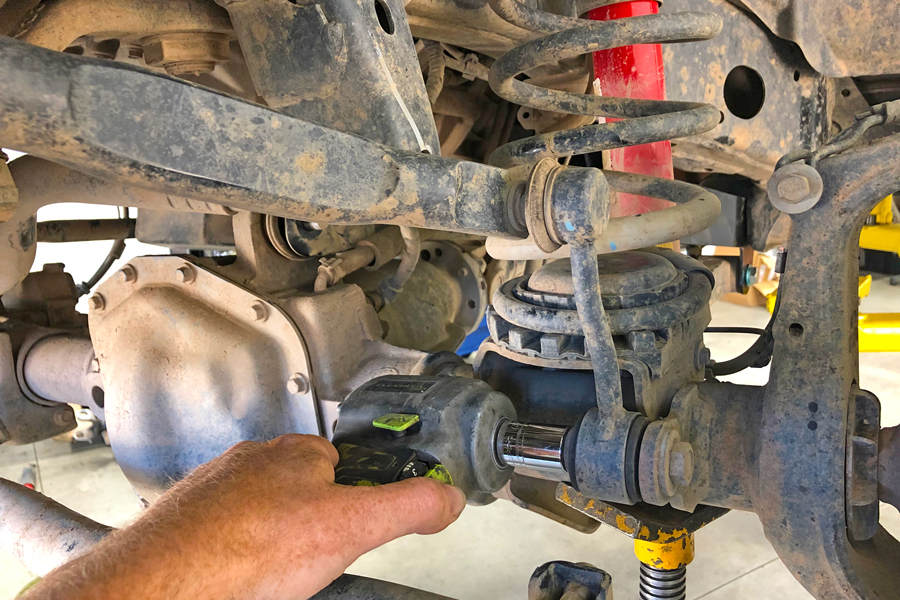
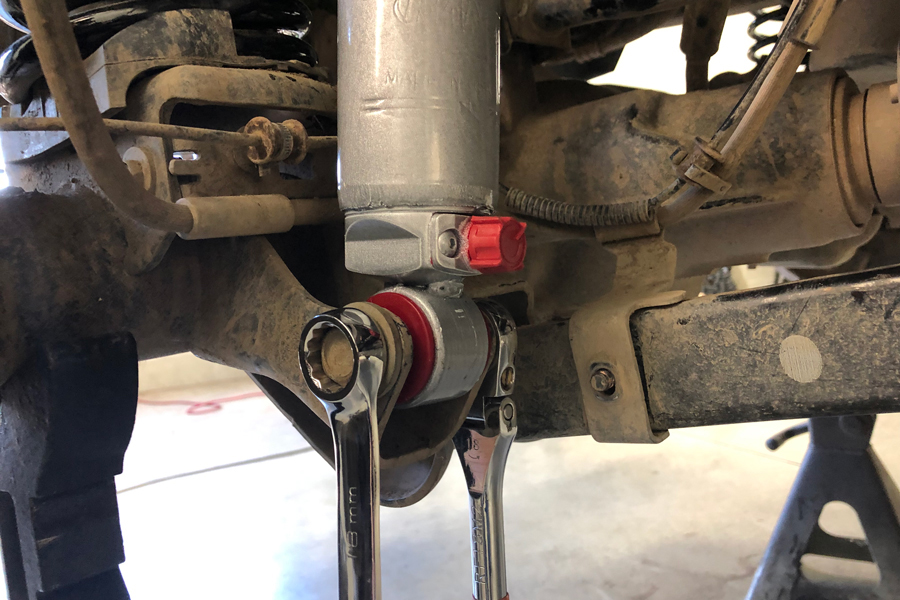
Just like the rear shocks, you'll need an 18mm wrench and 18mm socket to remove the upper and lower bolts holding the front shocks in place.
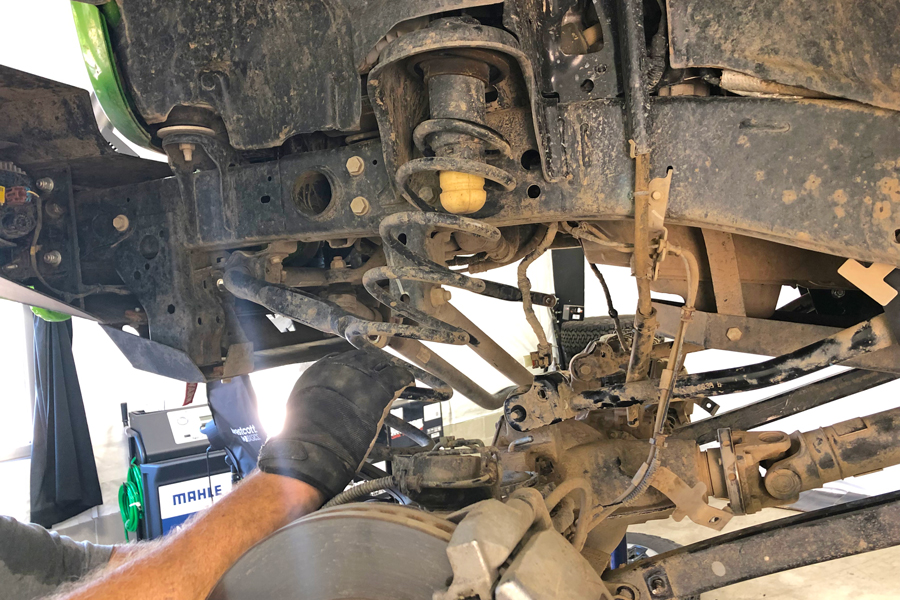
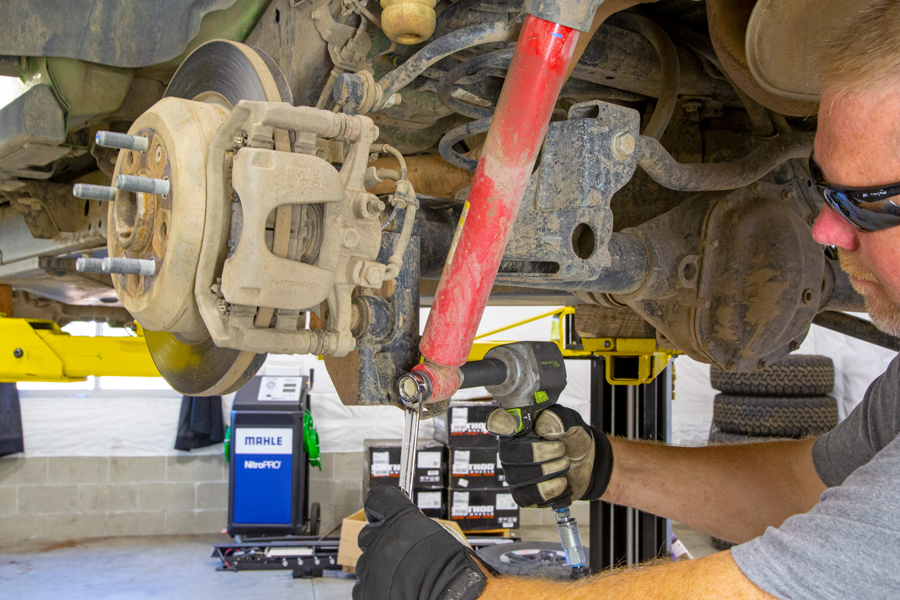
Lower the front axle down until the coil springs are loose enough to remove them.
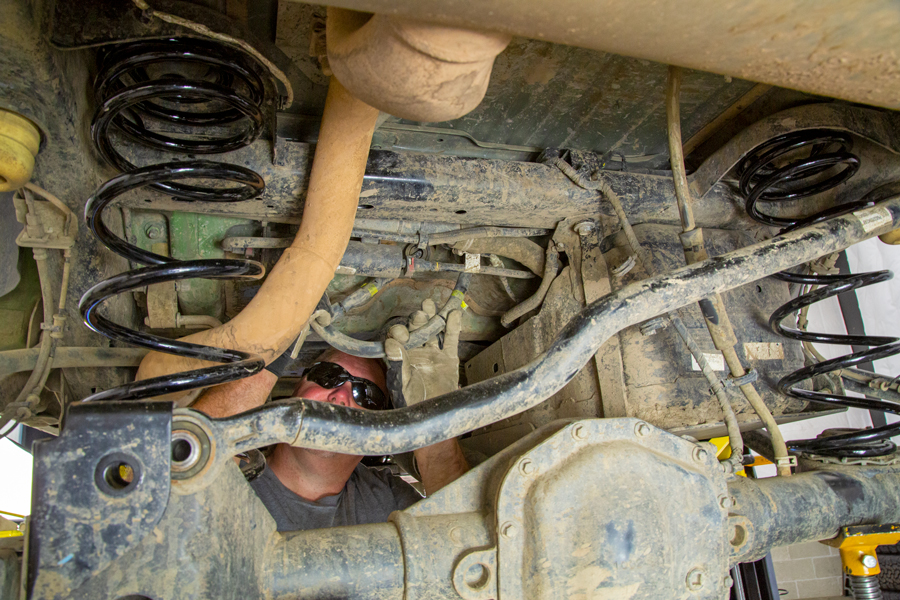
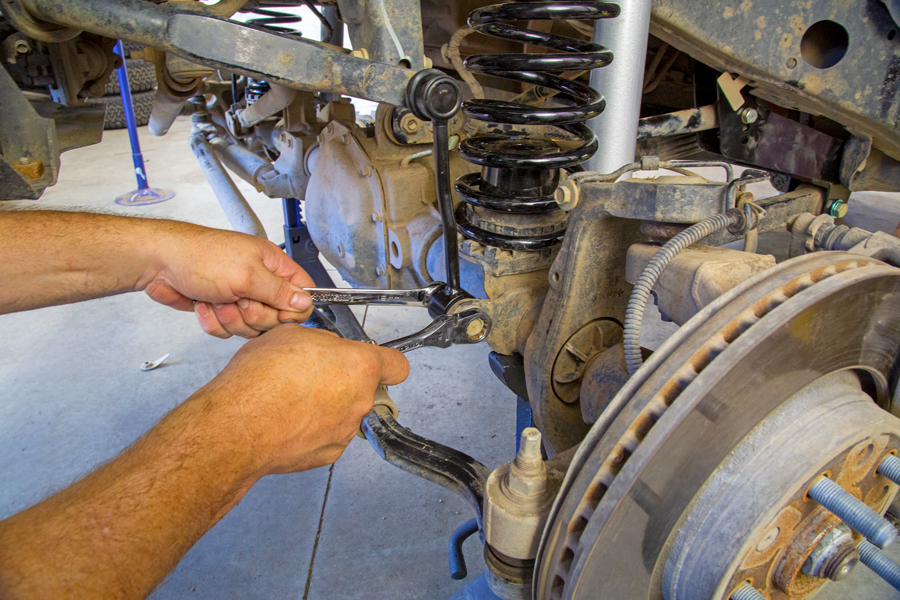
Support the front axle securely and remove the front upper and lower control arms at the frame side. It is usually easiest if you do only one side at a time.
The upper control arm pivots at the frame are covered by heat shields, use a 10mm wrench to pull the two screws holding the in place. One screws is towards the bottom, the other is up on top, so you'll need to practice your blind faster removal skills to get that one.

Install the geometry brackets into the stock controls arm frame mounts and then install the controls arms into the Rancho geometry bracket and snug up the hardware.
Do not tighten the control arm bolts or the geometry bracket bolts until the Jeep is sitting on all four tires on the ground.
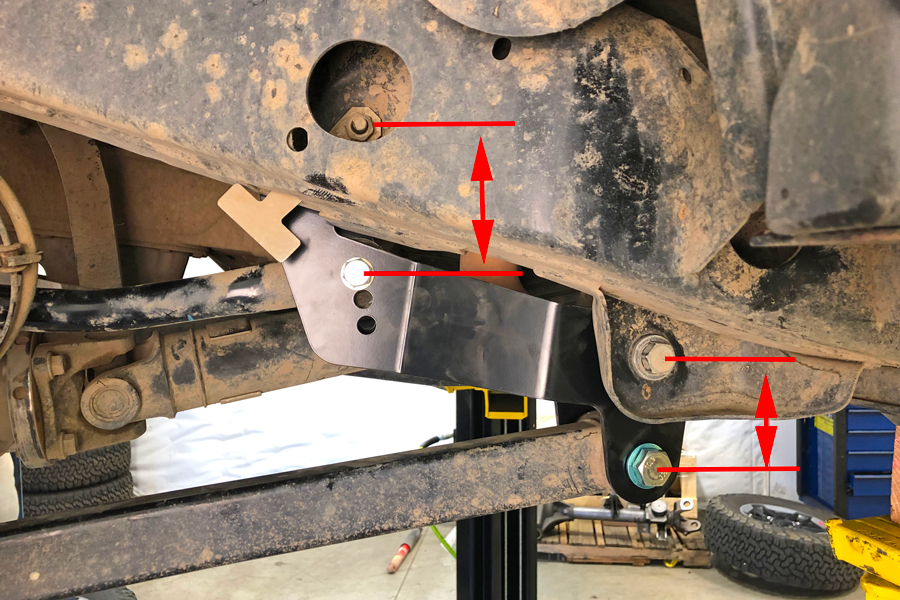
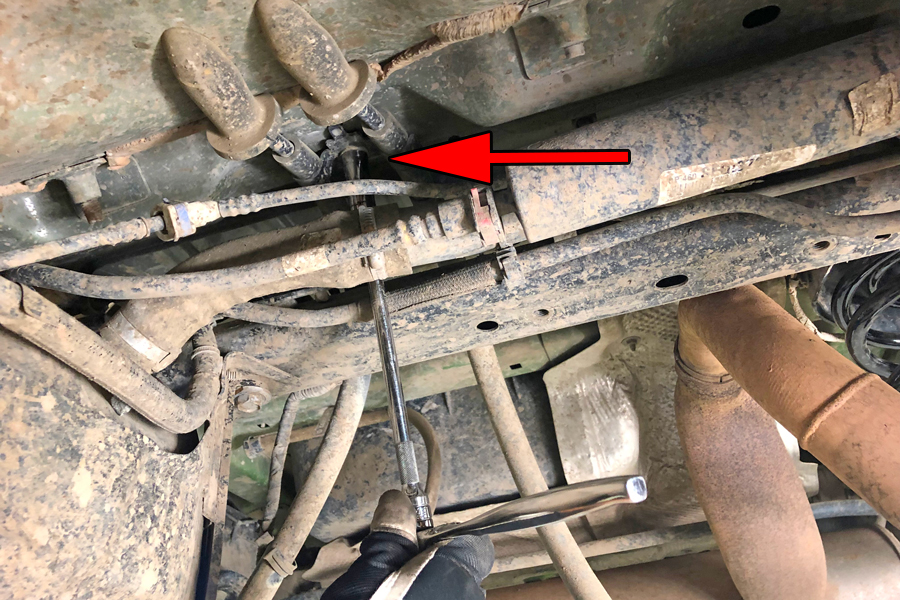
As you lift your Wrangler, you will change the angles of the suspension control arms, which changes the arm geometry originally designed by the Jeep engineers. Geometry correction brackets help to bring those links back closer to your original geometry. The red arrows show how much the controls arms have been moved down from their factory position to bring the suspension geometry back closer to stock.
Slide the Rancho bump stop spacer into the coil spring and install the new Rancho front coil springs into your JL.
PRO-TIP: Once you have inserted the bump stop spacer up into the coil spring, zip tie it to the coils, this will hold the bump stop spacer out of the way while you install the coil springs.
With the new coil springs in place, remove the zip tie, set the bump stop spacer down on the stock bump stop seat and bolt it in place.
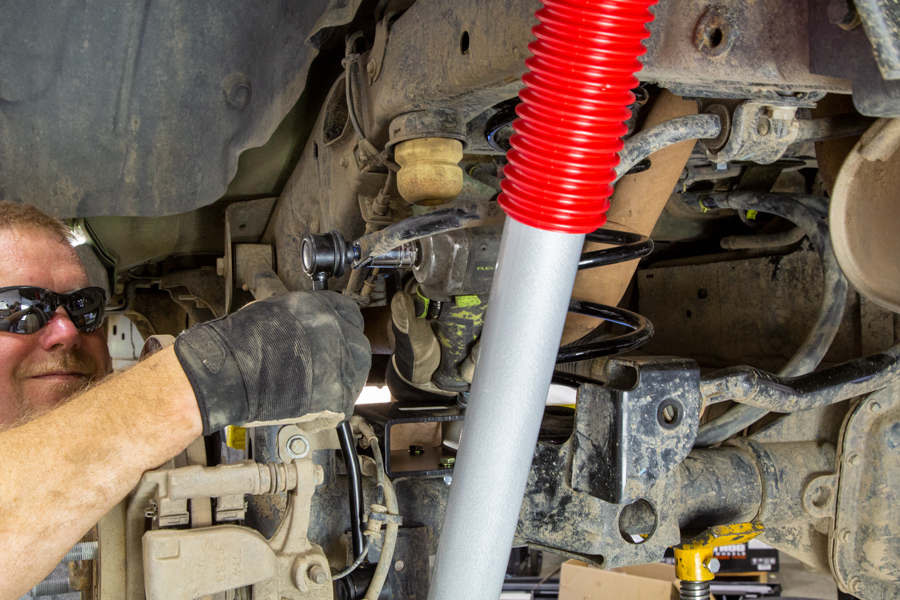
Install the Rancho front shocks with the original hardware.
Install the new extended sway-bar links and you are almost done with the lift.
Finishing Touches:
Reinstall the wheels and tires on and get the Jeep sitting on all fours at static height, do the final torque on all the control arm and geometry brackets. This locks everything at the ride height (neutral position).
Don't forget to adjust the draglink to recenter your steering wheel and keep the dash from lighting up like a Christmas tree. Click here for a quick step-by-step on how to recenter your JL's steering wheel after a lift.
We do recommended to have an alignment done to make sure that your Jeep is tracking straight and true down the road.
Don't Forget Your AFTER Measurements:
Make sure to park your Jeep on level ground and take those AFTER measurements. Then add them to your earlier notes.
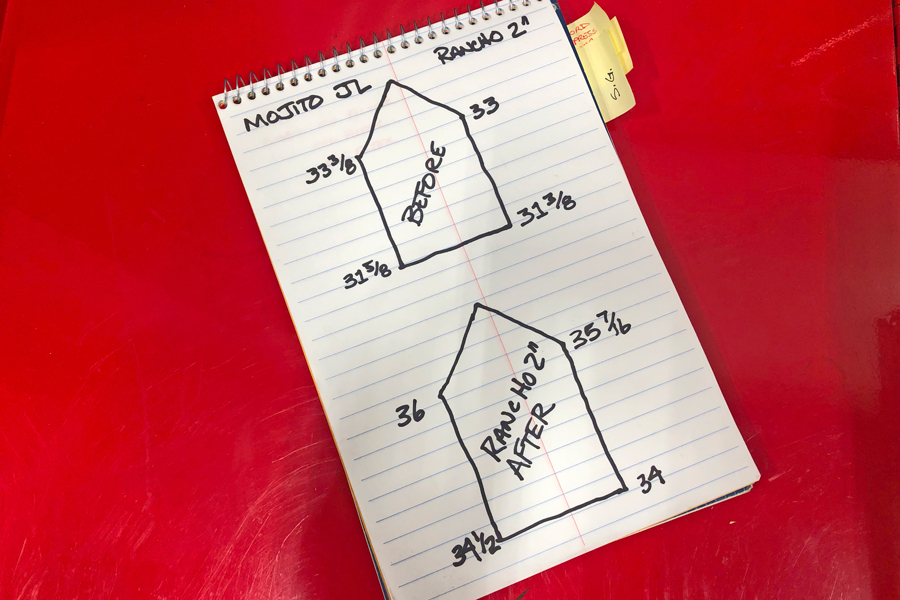
These AFTER measurements seem a little high at first, but this is after the kit was first installed. These numbers will definitely drop closer to the 2" height after the first good wheeling trip.
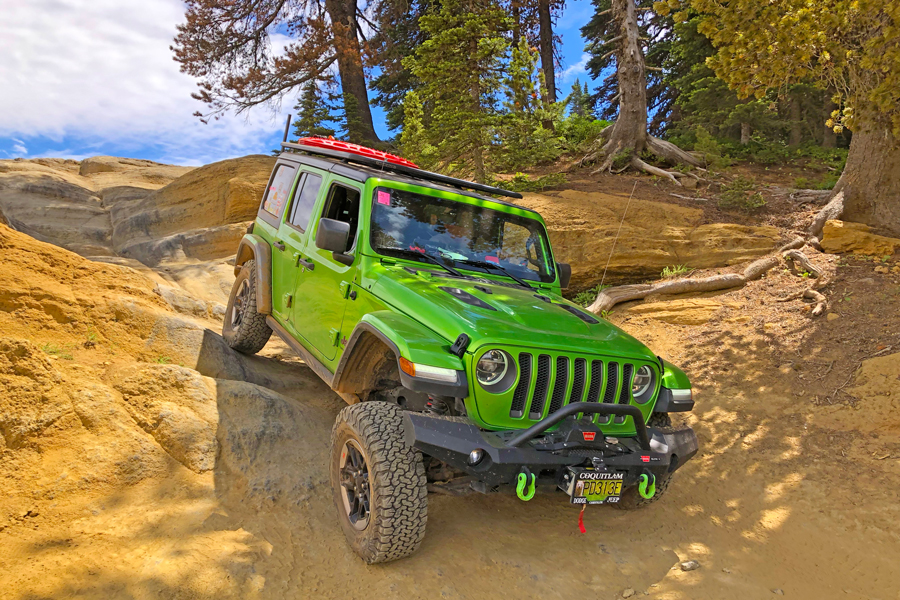
Showing off the flex of Rancho 2" Lift Kit for the Wrangler JL. Fully loaded and flexed like this over a few local trails were all it took to settle the suspension to the 2" lift height we expected.
More fantastic Jeep Lift Kits for your JL, JT or JK.
Are You Ready For A Rancho Lift For Your Jeep Wrangler JL?