SET YOUR VEHICLE
TALK TO A PARTS EXPERT TODAY!
FREE SHIPPING ON ORDERS OVER $70 in the contiguous US lower 48 states
SPECIALS!
Browse By Category
- Auxiliary Lights
- Light Bars
- Fog/driving Lights
- Underhood/rock Lights
- 3rd Brake Light Solutions
- Back Up Lights
- Other Auxiliary Lighting
- Shop All
X Close Search
Results for
Filters:
Stock
Category
Brand
Rating
Price
Stock
Category
Brand
Rating
Price
OH NO!
We couldn't find any results
We couldn't find any results
Search Tips:
- Use different keywords
- Double check your spelling
- Start with something less specific - you can refine your search results later
- Try changing some of your filters below:
Search term:
How do you know when it’s time to install a winch and winch bumper on your Jeep? Seriously? You have a Jeep, of course you’re going to put a winch and winch bumper on the front of it and the sooner the better!
Most times, its not when you’re going to put one on, it’s which one you’re going to install. With the huge selection of winch bumpers out there, it can sometimes be daunting to chose one. But we decided to make the choice easy, we knew we were going to install a Warn Zeon 10-S, so why not install a matching Warn Elite Front Winch Bumper while we’re at it?
Warn has been building winches and winch bumpers for decades and with the recent departure of Superwinch, they are the only high end consumer winch company left. A few months back we did a tour of the Warn factory in Clackamas, OR. That really wetted our appetite to install a few more products from Warn Industries.
The Elite series comes in four flavors, the Full Width Elite bumper and the Stubby Elite bumper and then with or without the hoop. They all mount up the same, so it doesn’t matter which one you choose, the mounting is the same. So follow along as we show you the How-To DIY on the Warn Elite bumpers.
What We Used:
Warn Elite Series Full Width Front Bumper with Tube.
Warn Zeon 10-S Winch, 10,000 lbs w/ synthetic line.
Removing Factory JL/JT Rubicon Plastic Front Bumper:
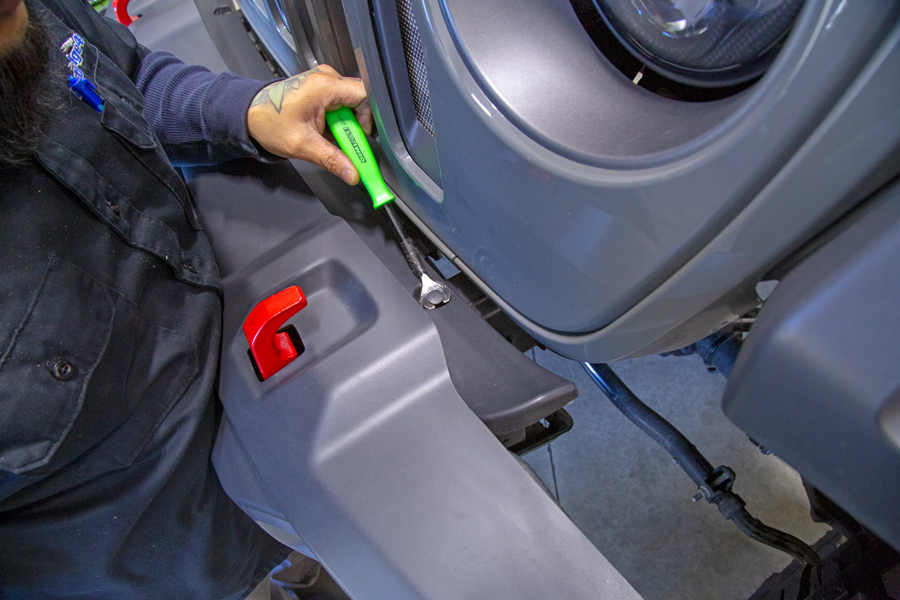
Start by removing the top side trim piece between the bumper and grille. It is held in place with two rivet clips. Use a small flat screwdriver or a trim removal tool to “pop” the center pin up and then remove the body. The trim piece will then lift up and out of the way.
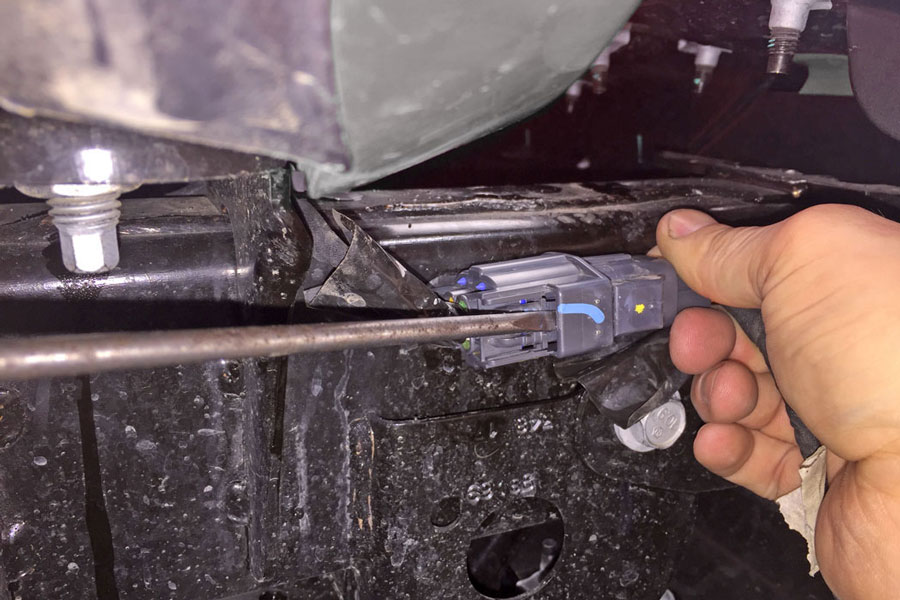
Unplug the fog light harness on the passenger side frame rail. We used a screwdriver to carefully depress the tab and then a little wiggle and a pull, the plug popped right out.
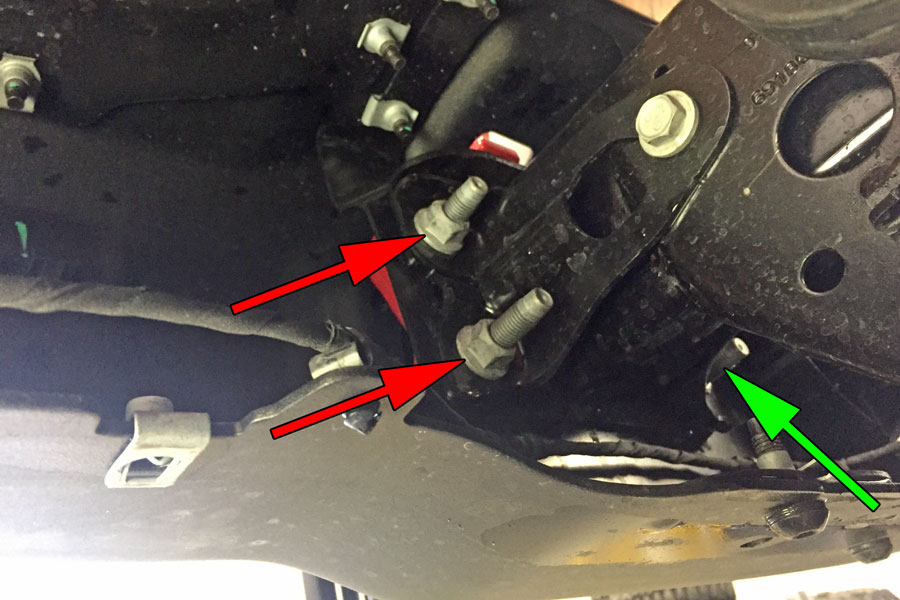
Use a 18mm deep socket to remove the eight nuts holding the factory front bumper to the frame rails, there are two on each side of both the left and right frame rail ends. This picture shows the left hand side frame rail, the red arrows pointing out the two outside nuts, the green arrow pointing up to the two inside nuts that are tucked away.
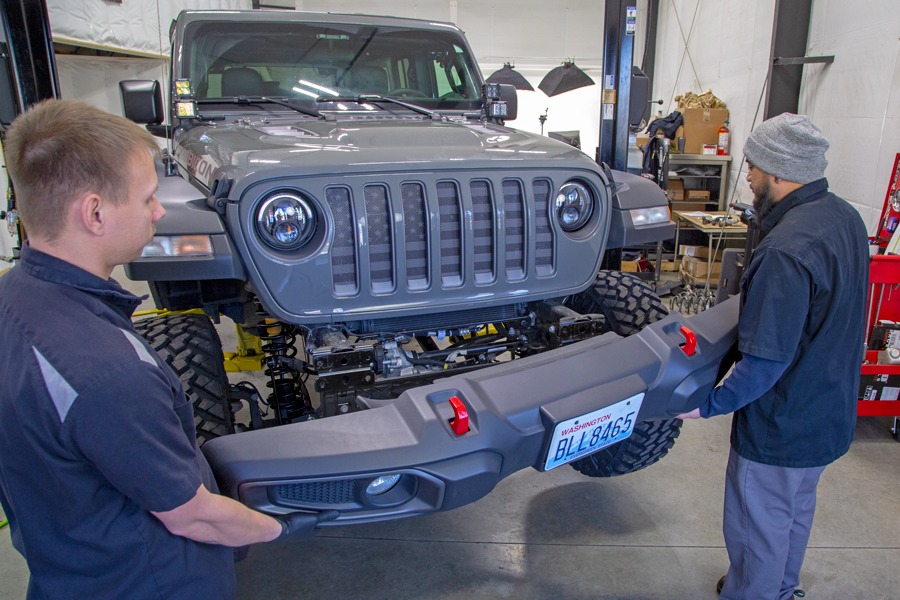
After removing the eight nuts, the factory bumper can be removed. Sometimes the studs on the back of the bumper misalign and can make it tough to remove the bumper. Just do a little twisting and jiggling of the bumper, it’ll come loose.
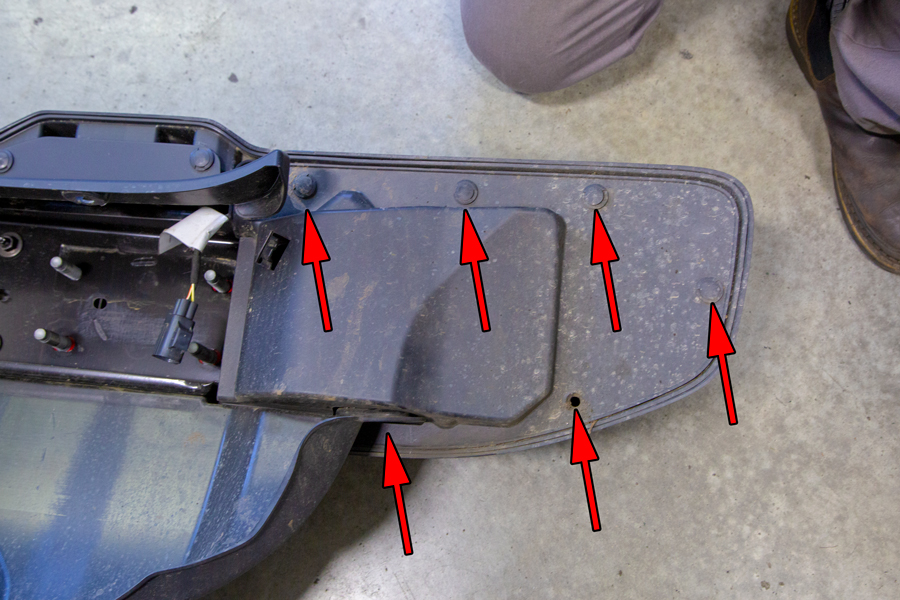
Remove the clips holding the fog light covers on the back of the factory bumper.
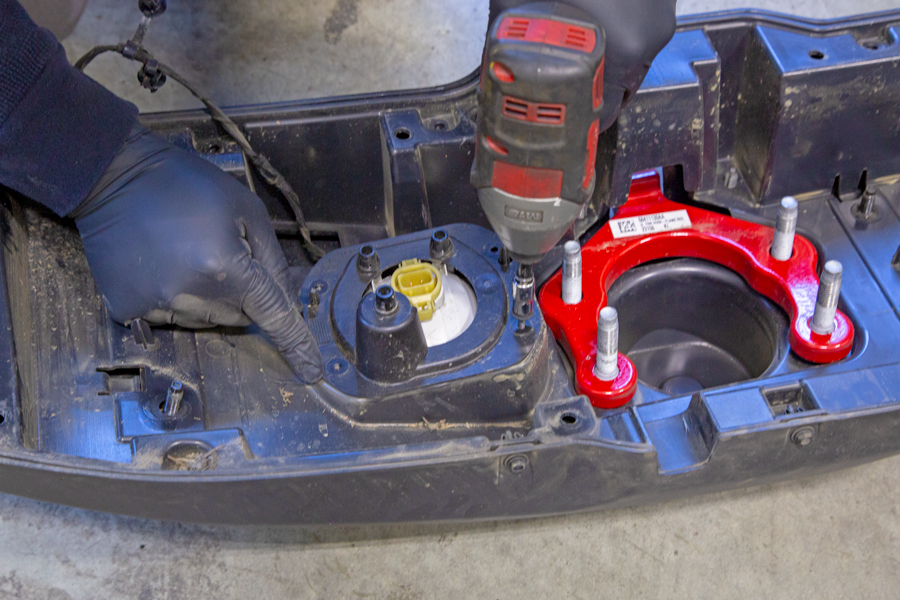
Remove the hardware holding the OE fog lights in place and remove the fog lights.
Prepping The JL/JT Frame For WARN Elite Bumper:
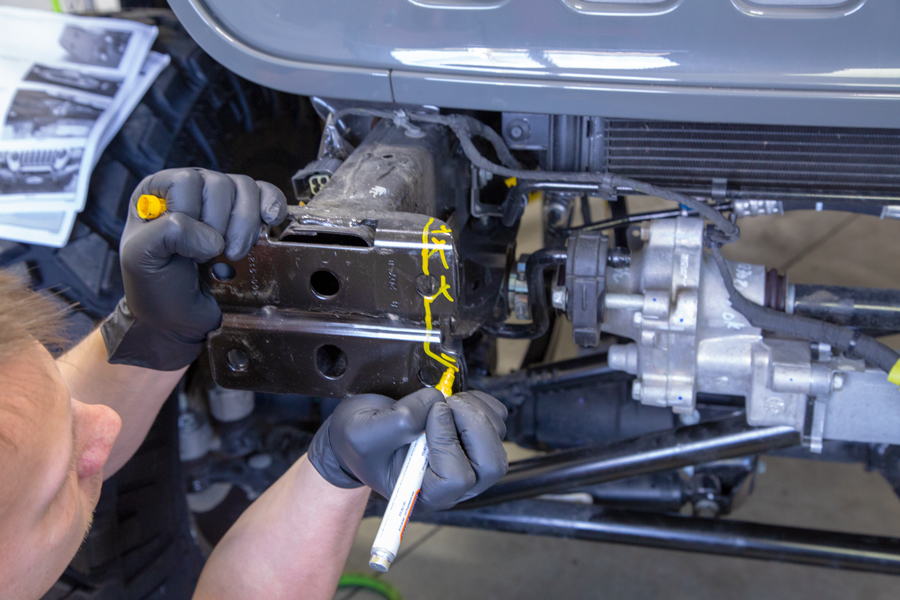
Mark the frame horns on both sides according to the included instructions. The brackets need to be trimmed to clear the winch.
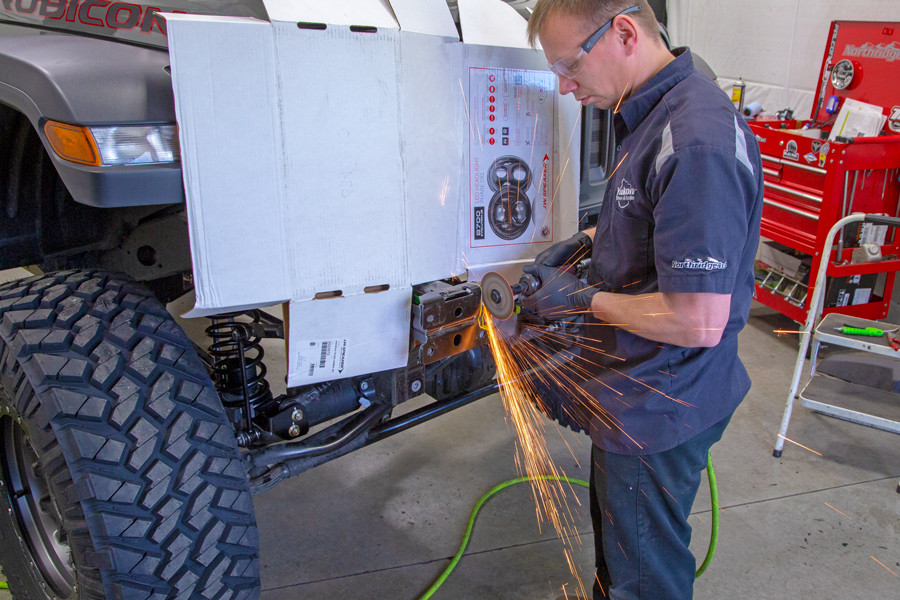
Trim the frame horn brackets, sand smooth and paint the exposed edges to keep from rusting. We used a cut-off wheel, a Sawzall would also work very good.
Prepping The WARN Elite Front Winch Bumper:
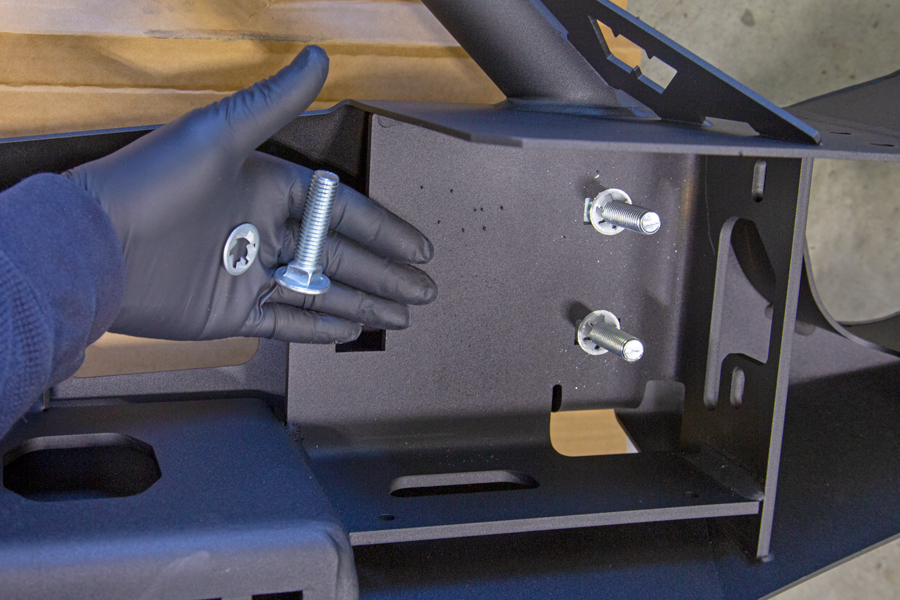
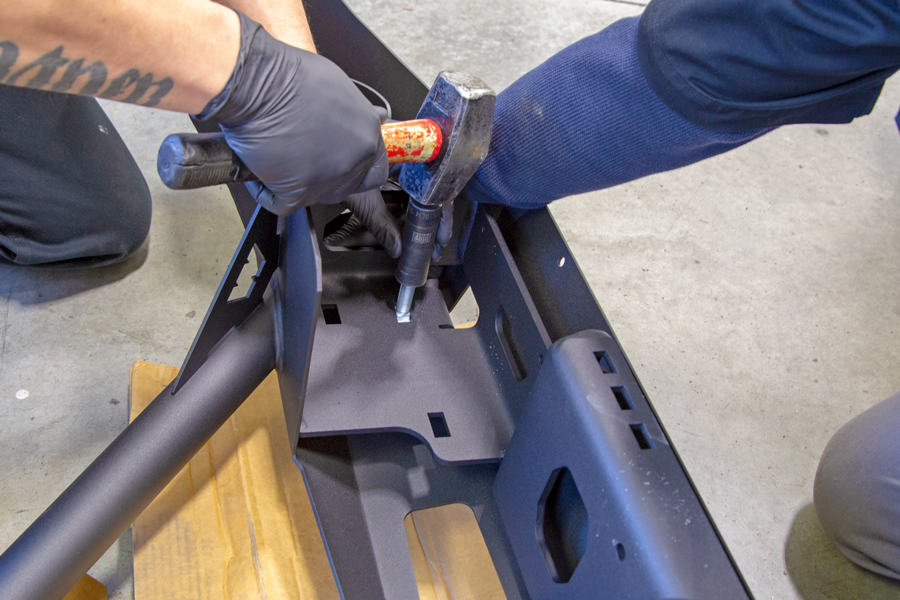
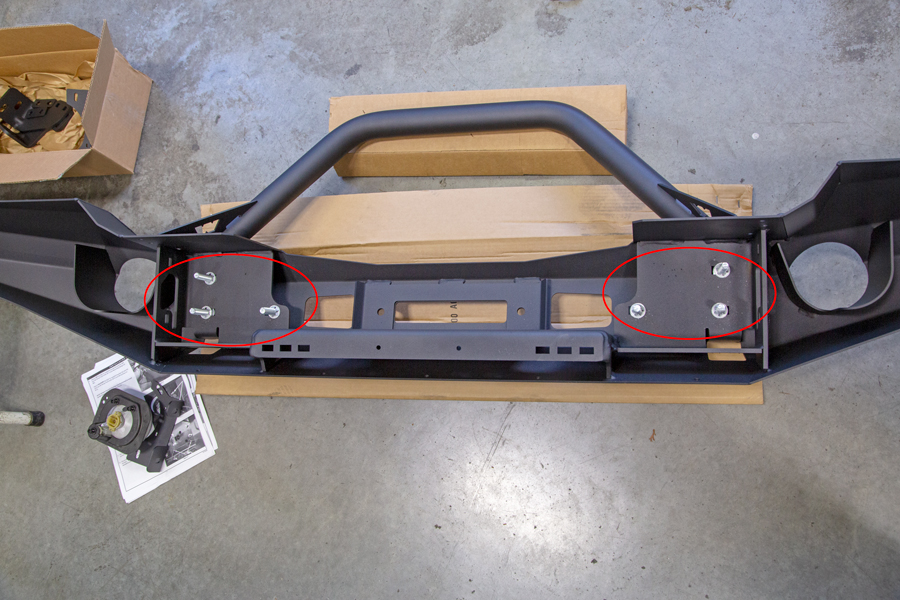
Install the carriage bolts and locking washers into the warn bumper, there are three per side.
To install the locking washers onto the carriage bolts, slip a small block of wood underneath carriage bolt head and then drive the locking washer down the threaded shank with a socket slightly larger than the bolt.
Here’s the back of the bumper after installing the six carriage bolts and locks.
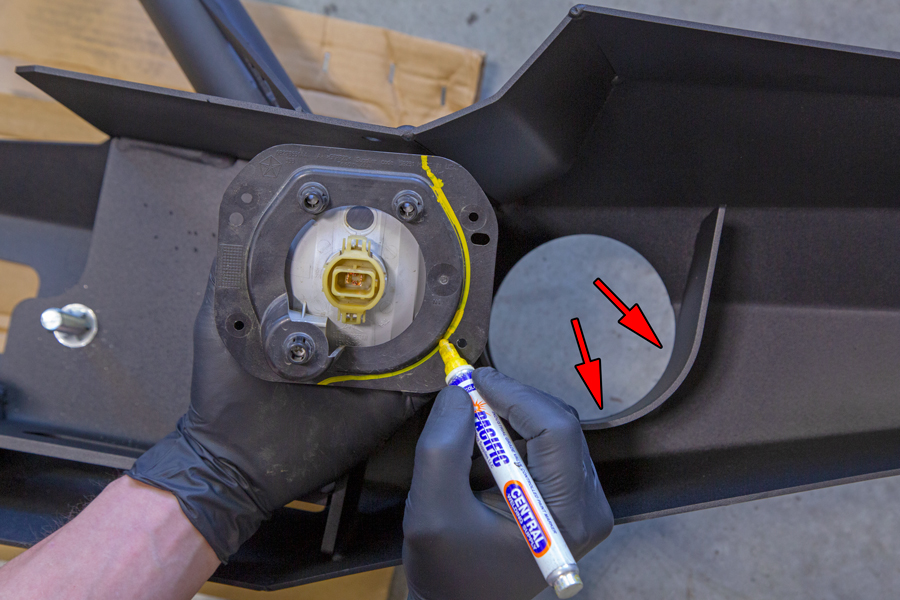
The Rubicon fog lights need to be trimmed to fit in the back of the WARN Elite winch bumper. Hold the light up near the fog light hole and use a marking pen to draw a trim line.
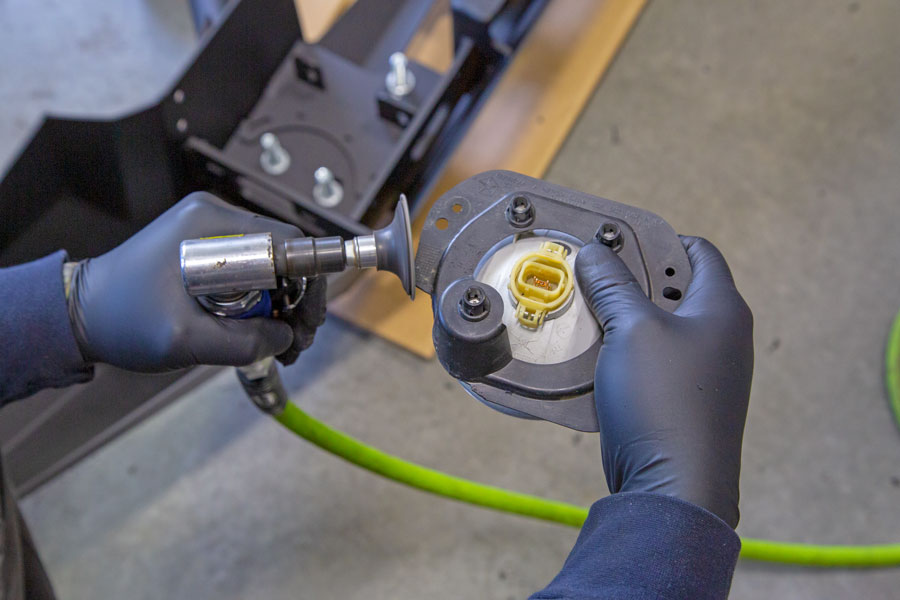
We used a small cut-off wheel to trim the flanges off the fog lights, then a small sanding disc to clean up the edges.
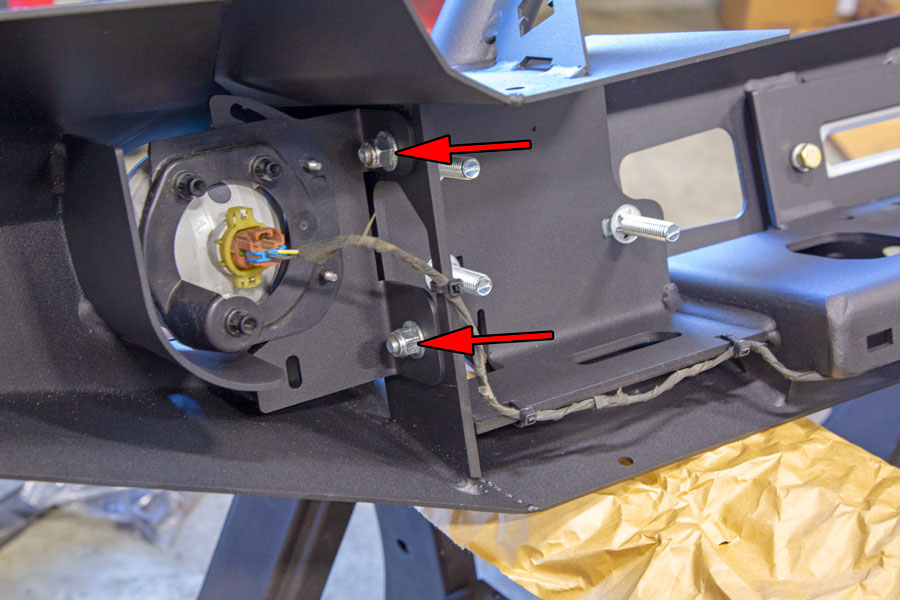
Install the OE fog lights into the WARN fog light bracket and then install the bracket into the WARN Elite winch bumper.
Bolt on the fairlead. As we were installing a Warn ZEON 10-S, it came with the Warn aluminum fairlead. If you have a a VR series winch with synthetic rope, it’ll come with a steel fairlead. We would recommend going to an aluminum fairlead, they’re a little more rope friendly than the steel ones.
While we were at it, we also installed a Tuffy Flip-Up License Plate Bracket (pn# 189-01) in between the bumper and the fairlead.
Install the winch onto the bumper. The Warn Zeon winch is held in place by four bolts coming straight up through the winch plate into four flanged nuts that are recessed into the winch feet. These are easy to lose, so be careful setting them into place.
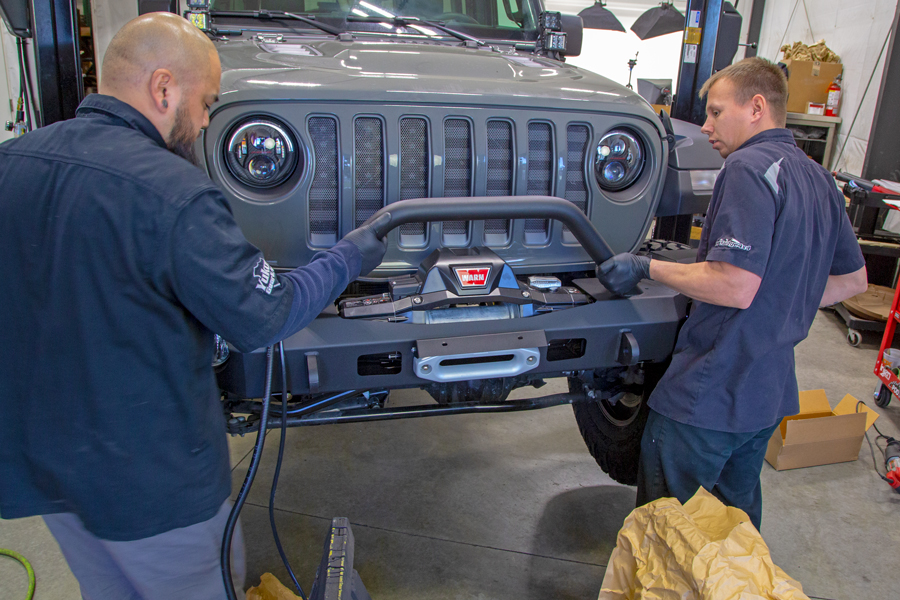
Install the Warn Elite bumper onto the Jeep. Definitely plan on having an extra set of hands to help lift the bumper and winch assembly, it is heavy! You could install the bumper first and then install the winch from the top, but it is still a two person job.
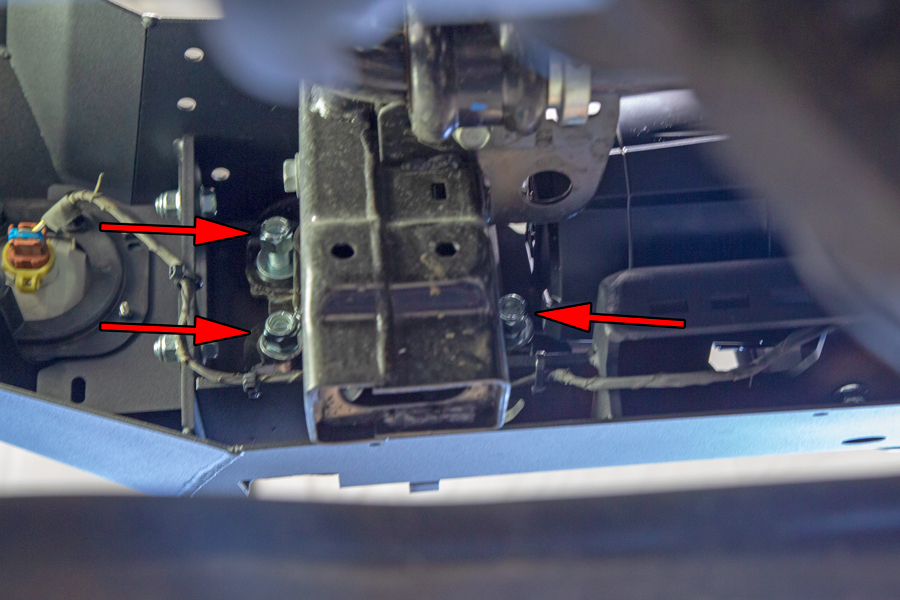
With the new bumper in place, install the included washers and nuts onto the warn bumper bolts.
PRO TIP: Use some blue Loctite on the bolts to make sure the bumper bolts stay tight!
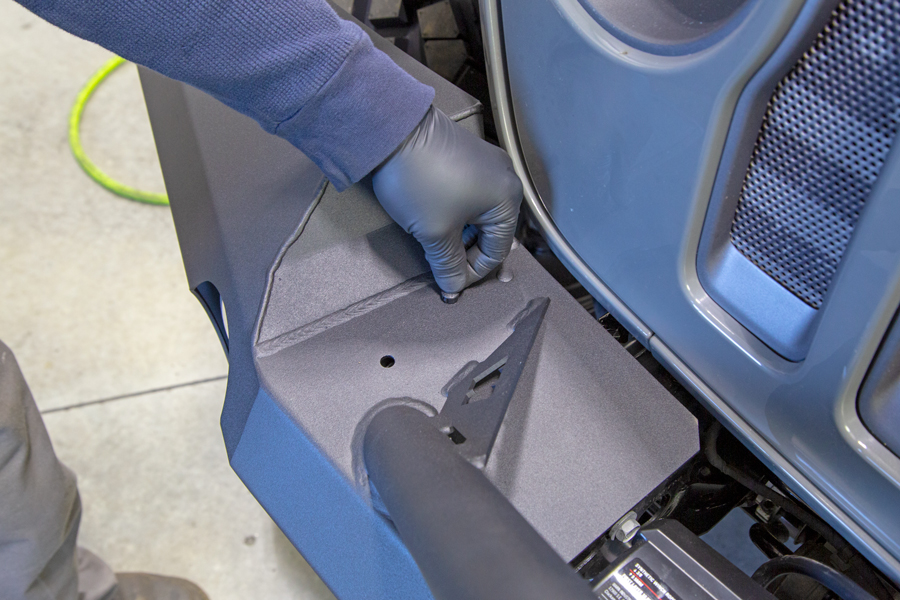
Install the small hole plugs on the top of the bumper.
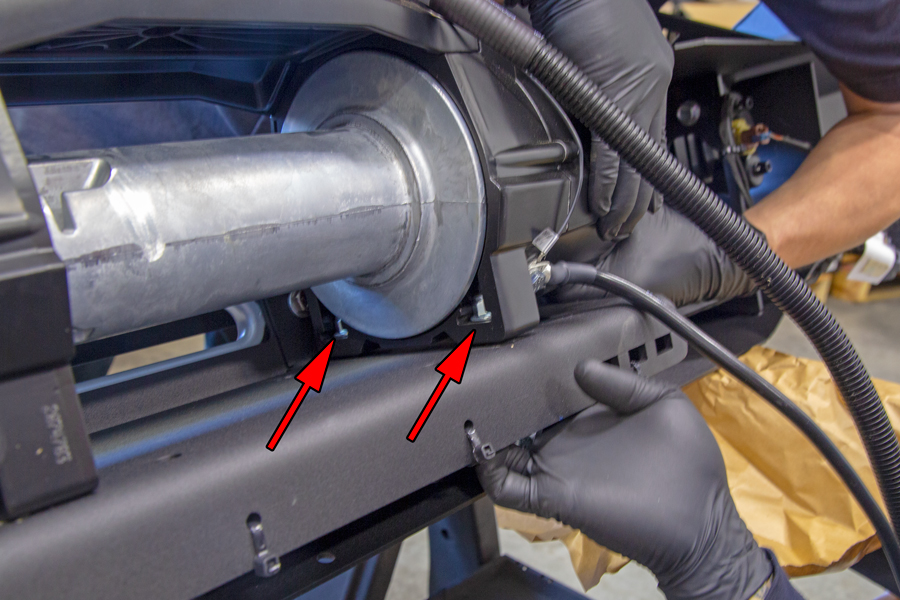
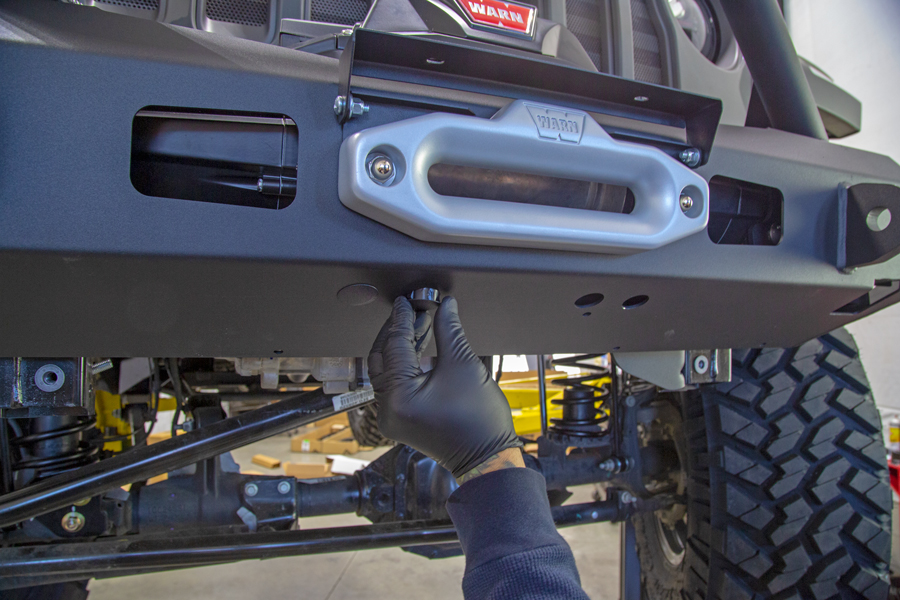
Finish by installing the large hole plugs on the underside of the bumper.
Wiring The Warn Winch:
Route the Warn power cables under the grille, over the top of the sway bar and then up into the engine bay between the air filter box and the battery. Once you have the cables routed, zip tie them every 6″-12″.
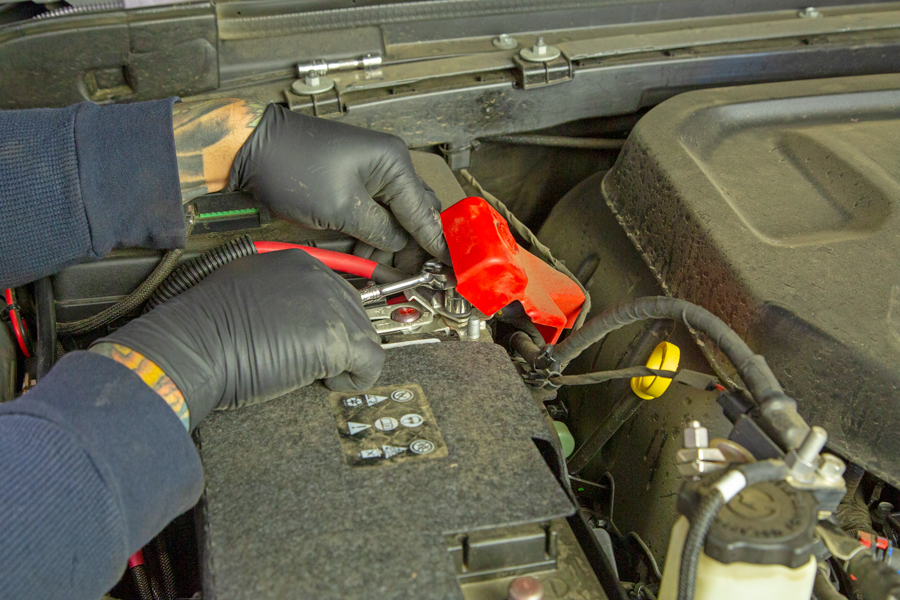
Hook the red cable up to the battery leads first.
Hook up the black ground cable to the battery last.
Always run both winch leads direct to the battery, do not ground the negative cable to any other grounding location or you may see reduced winch efficiency and possibly overheat the winch leads or have other grounding issues.
Installing the Warn Spydura Winch Rope:
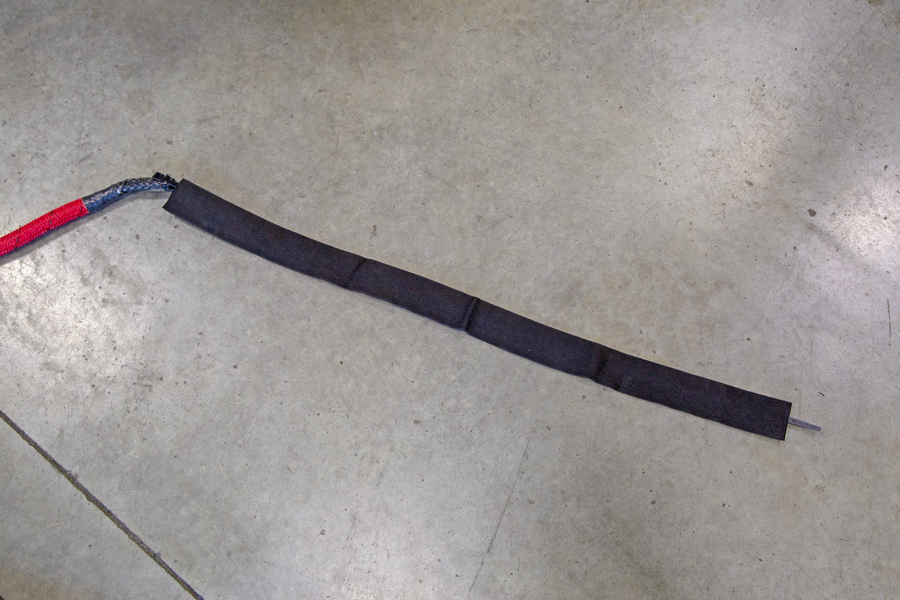
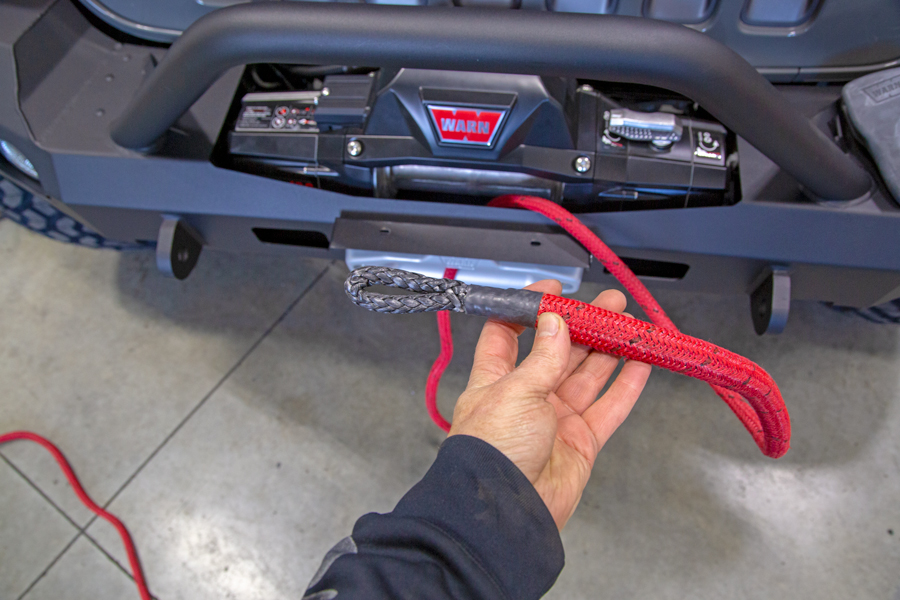
First step is to get the chaffing guard installed. We taped a big HD zip tie on the end of the Warn Spydura winch rope to act as a fish and ran it through the Warn Chaffing Guard.
Fish the winch rope through the fairlead and out through the top in front of the winch.
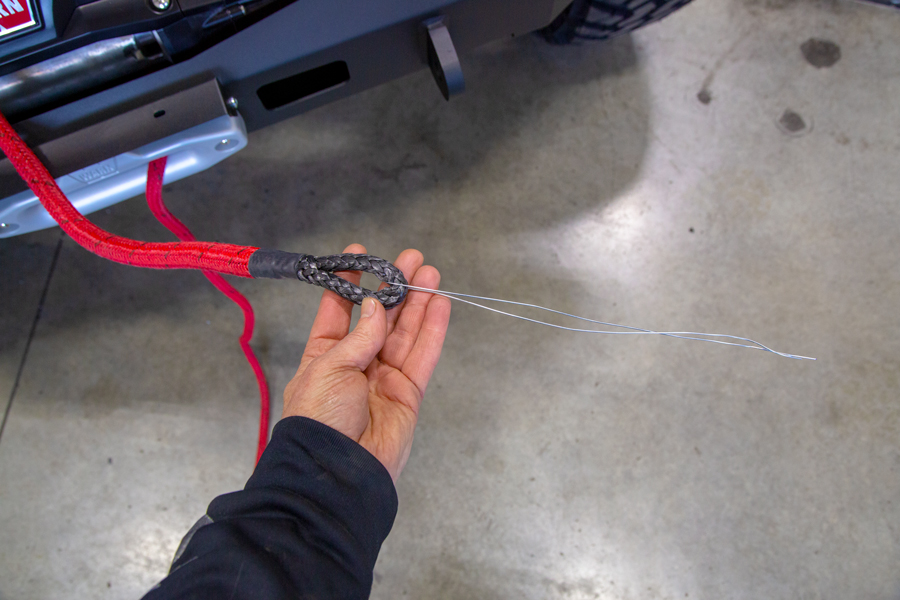
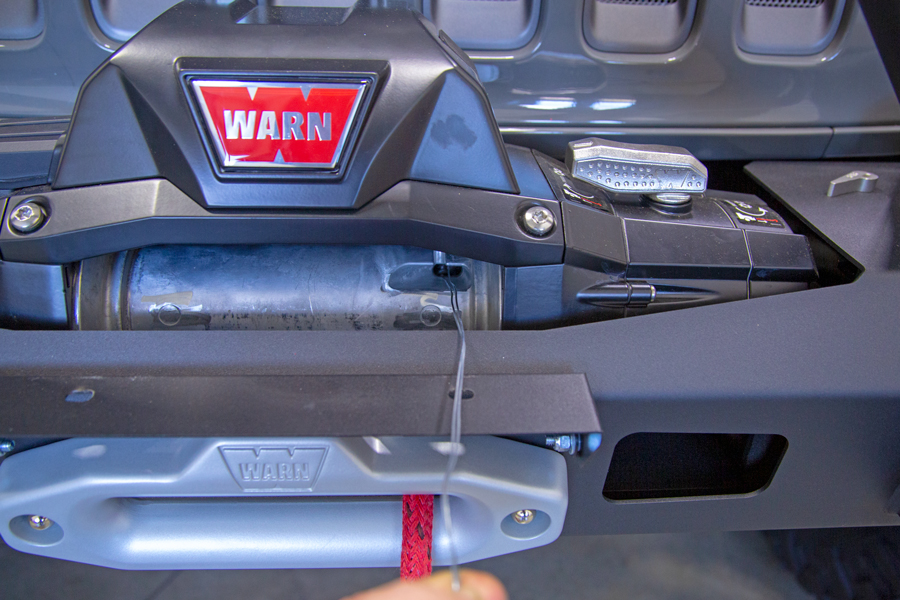
String the included mechanics wire through the soft loop at the end of the rope.
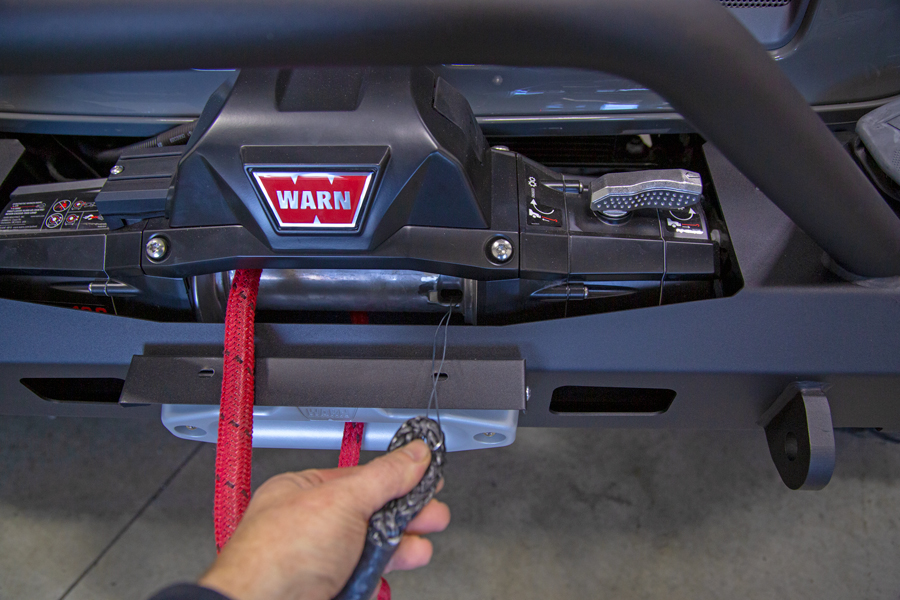
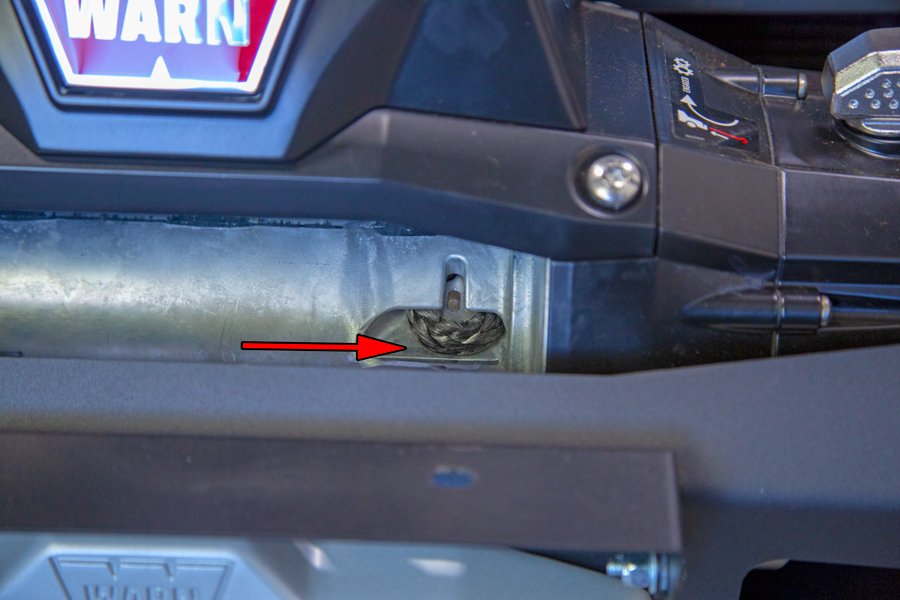
Freespool the winch and spin the drum until you can see there anchoring slot. Fish the wire through the slot to the other side.
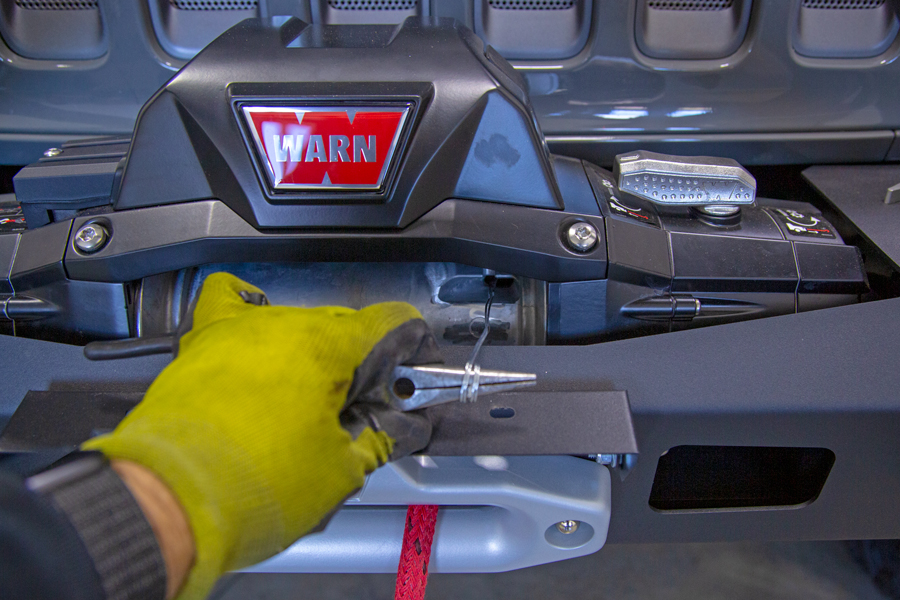
Spin the drum around until you see the wires facing up at you, then lock the drum engagement handle.
Grab the wires with a pair of needle nose pliers, spin the pliers a couple turns to wrap the wire around the nose, then grip with both hands and pull the rope through the drum. It will be a tough pull.
PRO TIP: Use a squirt or three of 409 or other mild soapy spray to lubricate the rope and the rope channel, it’ll help the rope pull through easier.
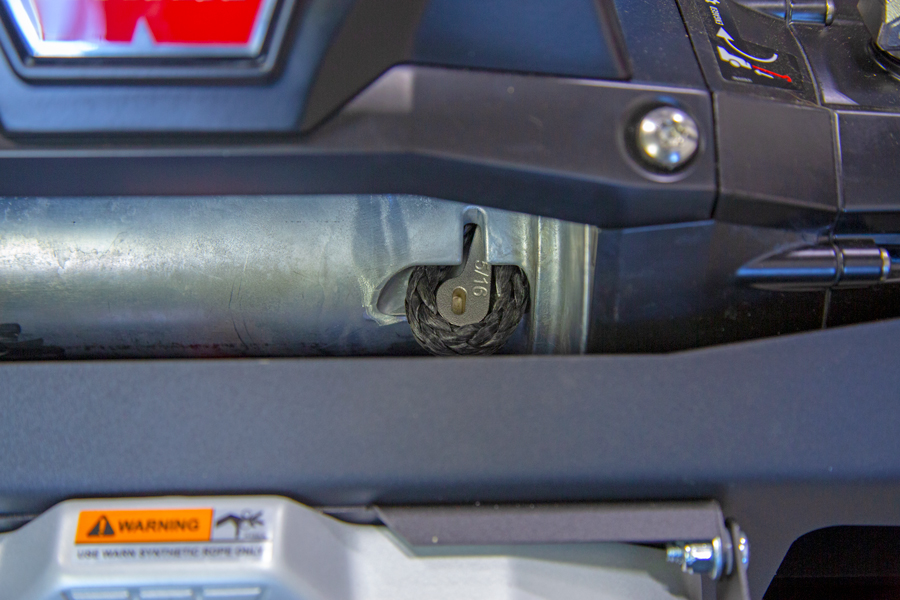
Once you’ve got the rope loop pulled through the channel, insert the rope anchor puck with the small slot showing.
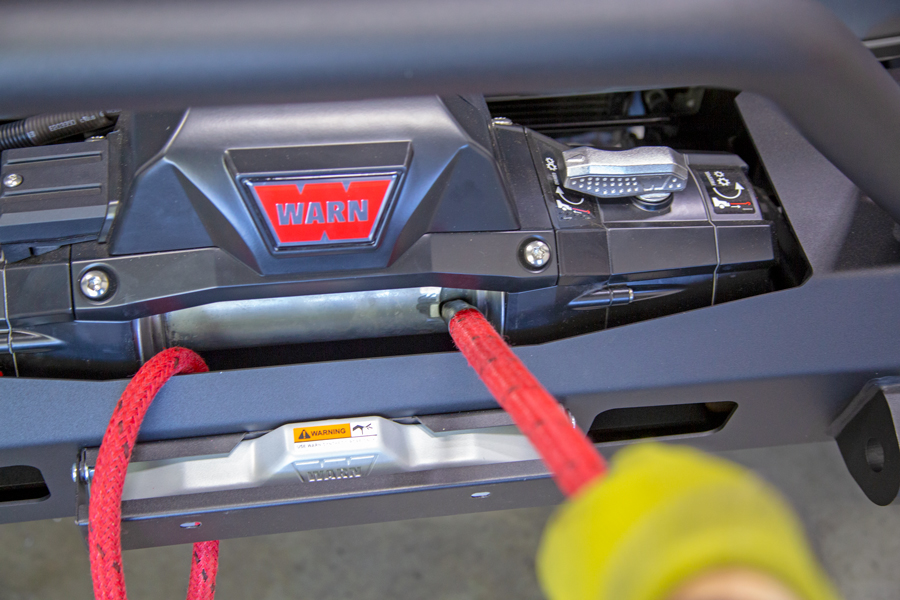
Spin the drum back around and pull the winch rope to seat the winch rope anchor puck into the channel in the drum.
Make sure that you pull the rope enough that the winch rope loop and anchoring puck is flush with the drum on the back side.
Tech Note: That little slot in the anchor puck is for a flat blade screwdriver. If you ever need to remove the rope for some reason, stick a flat blade screwdriver tip in the slot and leverage the puck back far enough you can remove it it. Then pull the rope out the front.
Installing A Factor 55 Ultrahook:
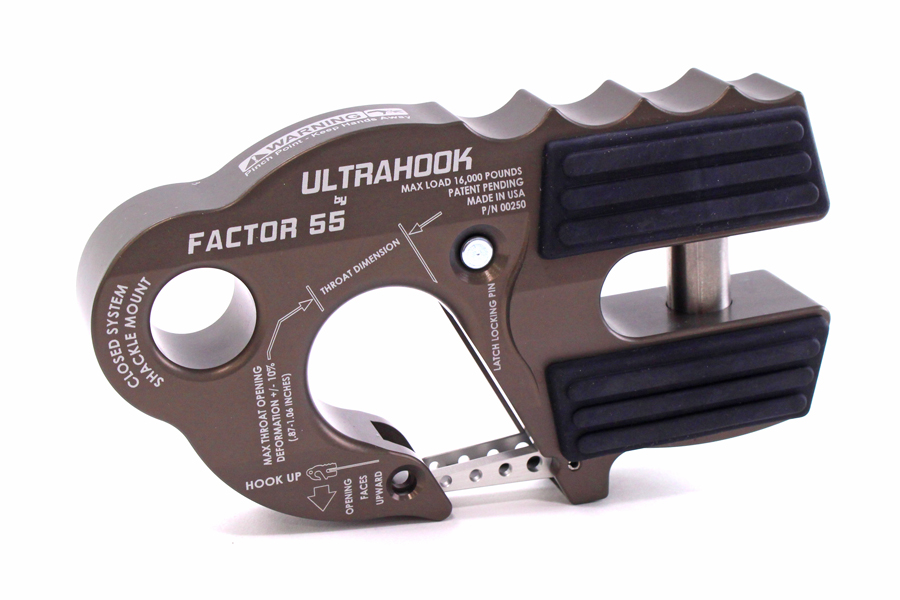
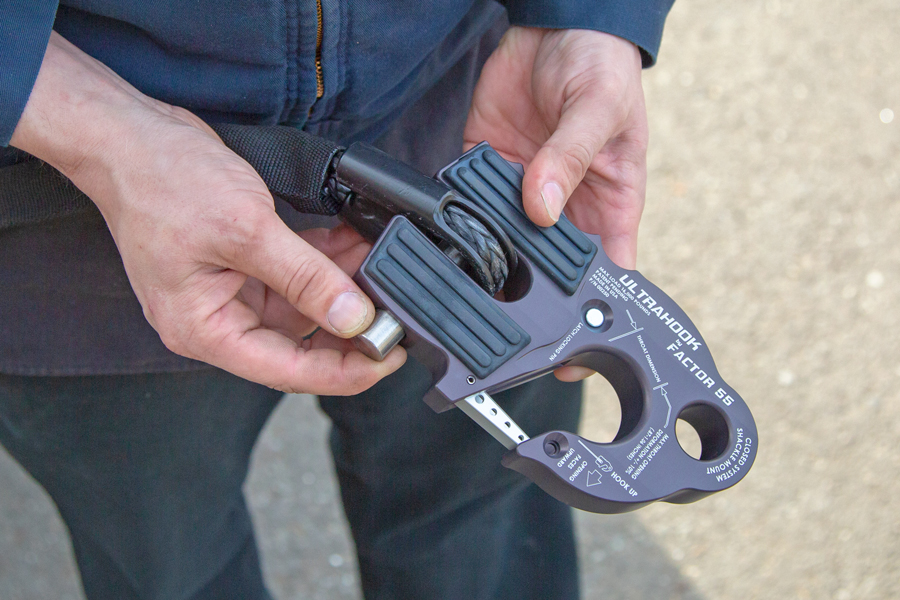
We really like the Factor 55 gear, very well built, very high quality and well thought out. For this install we originally planned to install a Factor 55 Ultrahook to do a little testing with.
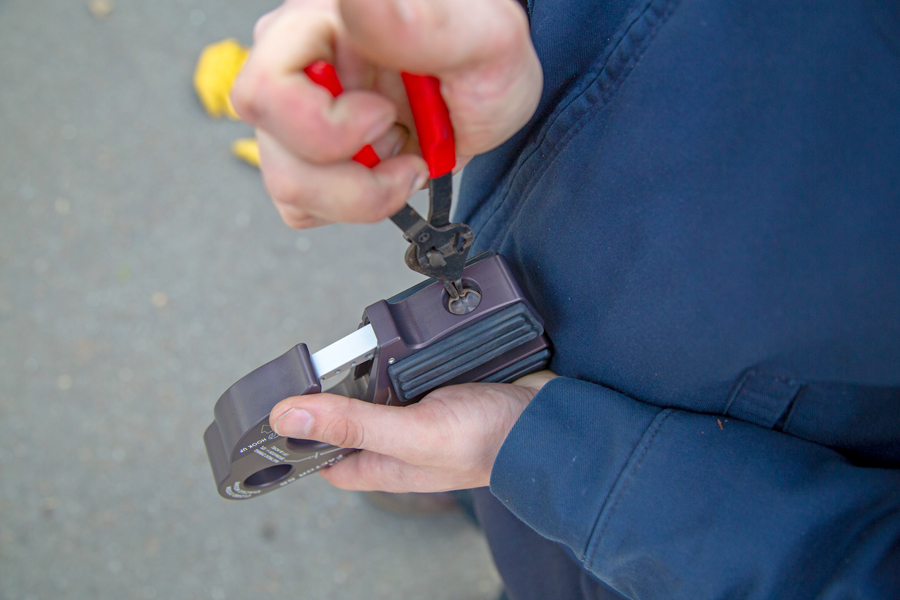
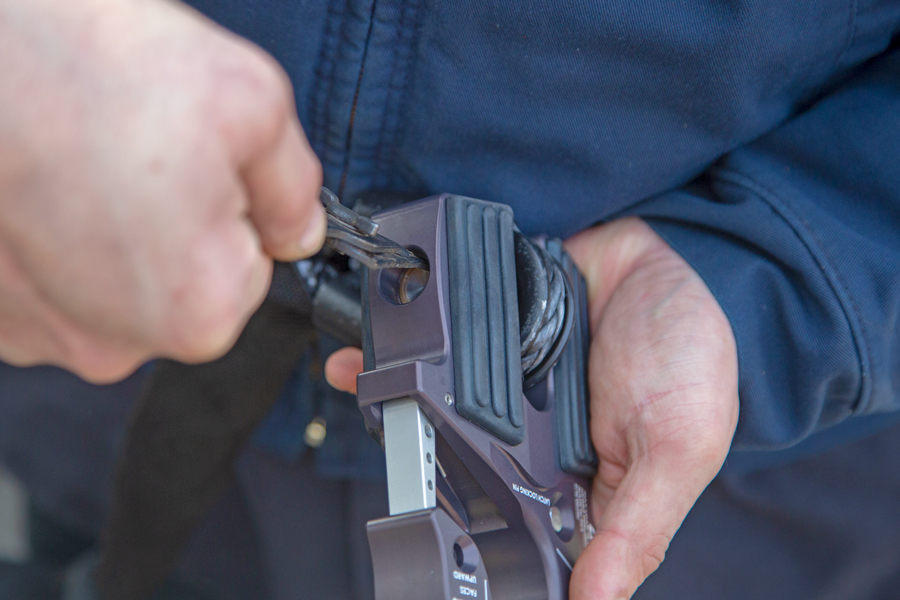
Use a set of snap ring pliers to remove the retaining clip from inside the load pin hole.
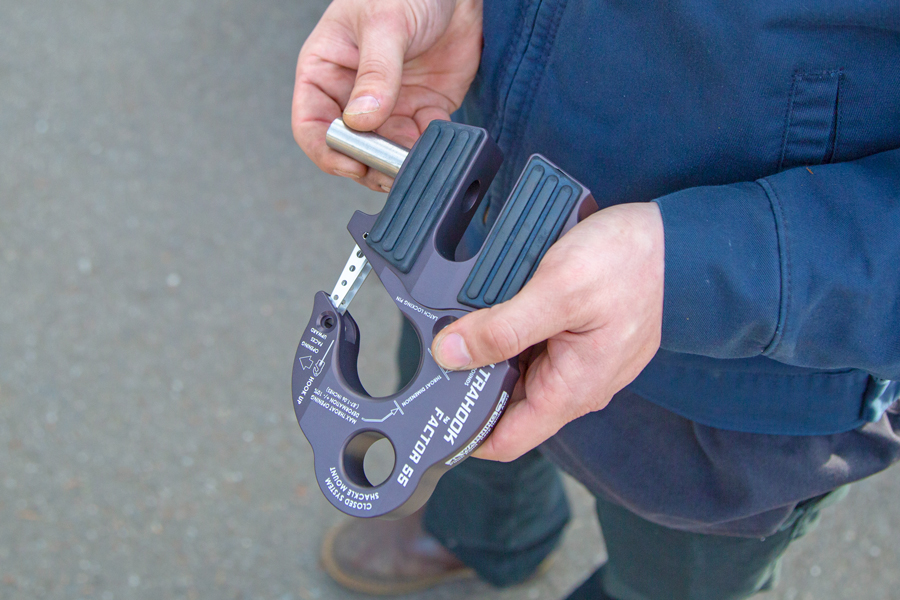
Slide the load pin out of the Ultrahook.
Insert the steel thimble end of the Warn winch rope and slide the load pin back into position.
Reinstall the retaining clip into the Ultrahook body. Spooling On The Spydura Winch Line: Now it’s time to preload and stretch the winch rope. Being a rope, it will have loose fibers when new, the best thing you can do is to stretch the winch rope under load as you wind it up.
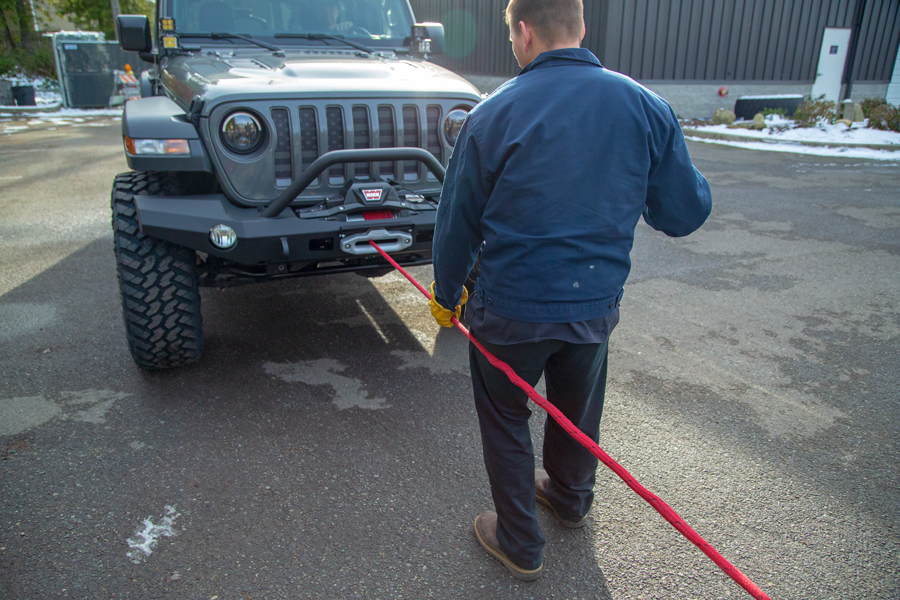
Start out on a large open flat area (even better, a slight uphill), big enough to stretch out your winch rope. Hook it up to a stationary vehicle or a tree strap around a tree… Something that will not move. Then winch it in under load.
Have someone in the vehicle to keep it running and to control it as you winch the rope in. If you are on a flat surface they should either click the parking brake a few clicks to add a little resistance or just hold the foot brake down a little for that resistance. If you are on a small incline, no extra resistance is needed.
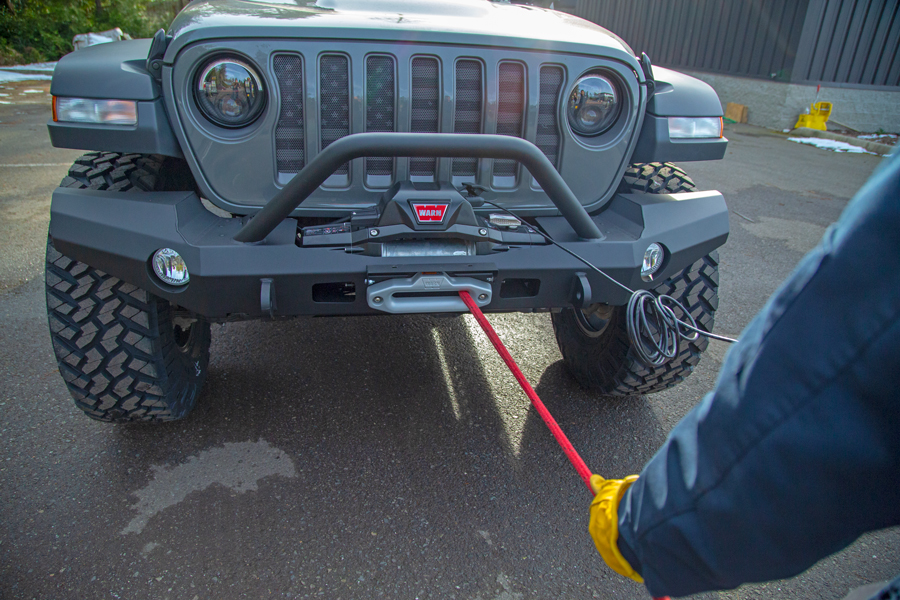
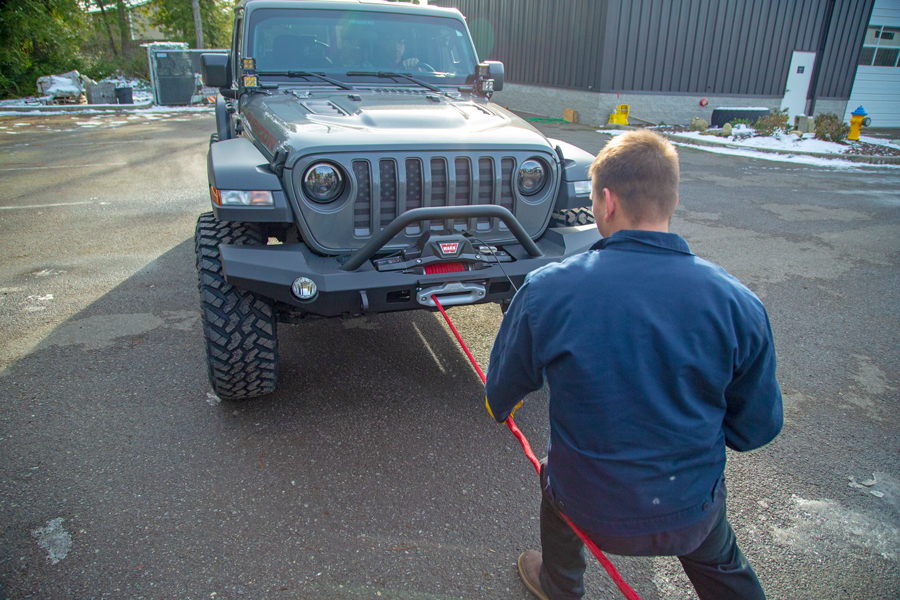
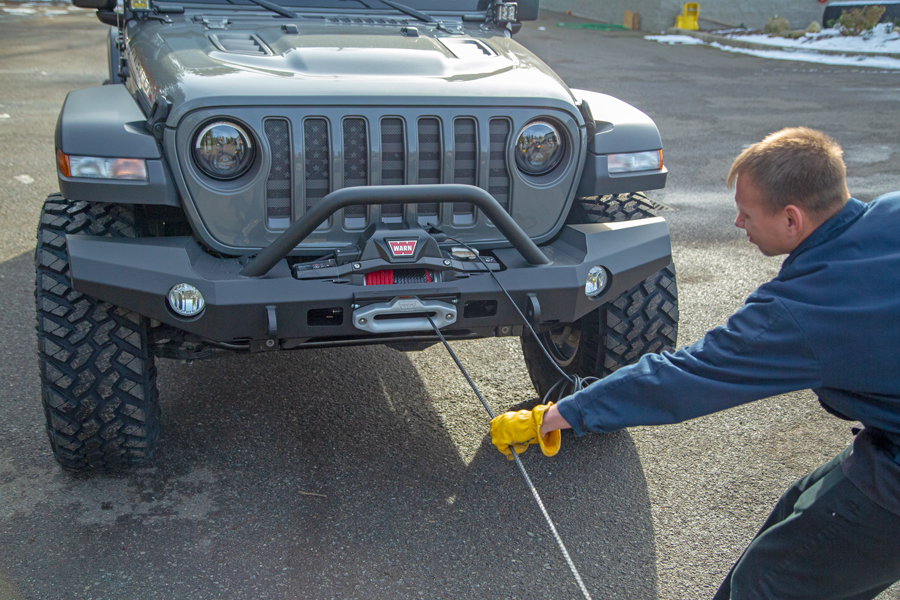
Stand about 3′ back and start to spool the winch line in. Guide the rope to keep the wraps nice and tight as you work your way back and forth across the drum.
Safety Tips: Always wear gloves when handling winch rope or cable. Do not let the rope slide through your hands while winching in. Hold the rope firmly as the Jeep is moving closer to you, then regrip further back and let the Jeep come towards you again.
As you start pulling the Jeep forward, keep spooling in the rope and keep the wraps tight against each other.
Because there is load applied, you may find you need to manipulate the rope one way or the other to keep the wraps tight up against each other. Here Kyle is applying pressure with his thigh to get the rope to spool into the corner of the drum.
To move the rope towards you, get a good grip and pull as you spool in. Keep an eye on the spooling rope to make sure it is loading evenly.
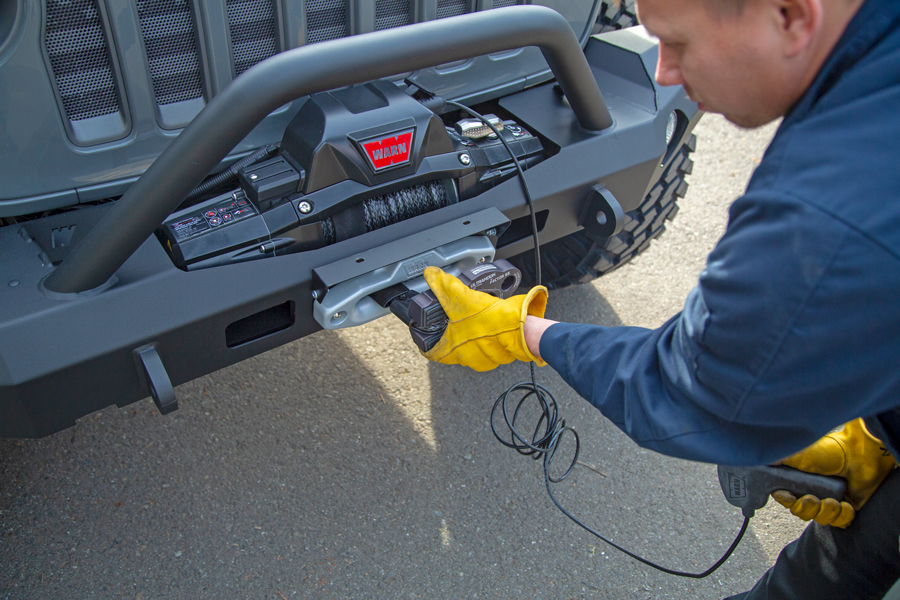
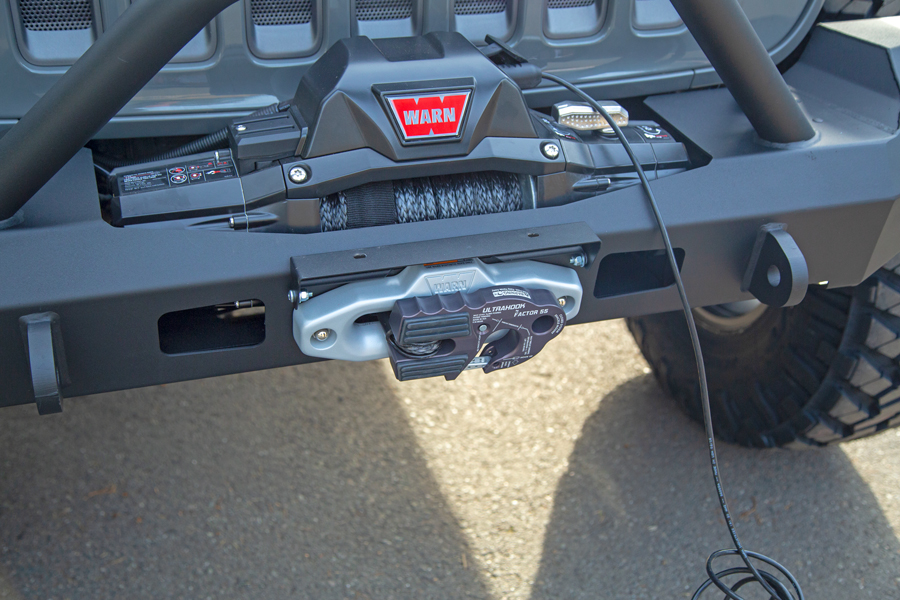
Once you get to the end of the winch rope, disconnect from your stationary recovery point and run in the Factor 55 Ultrahook until it sits flush up against the aluminum fairlead. As your hands get this close to the fairlead, you are creating a pinch point, so use little “bumps” on the winch control to slowly suck up the last bit of winch rope and snug the Ultrahook up against the fairlead.
We really like the Flat Link, Flat Link E and the Ultrahook pieces from Factor 55. One of the reasons is they sit flush up against your aluminum fairlead to help protect the fairlead, the hook and the rope from damage.
Trouble Shooting:
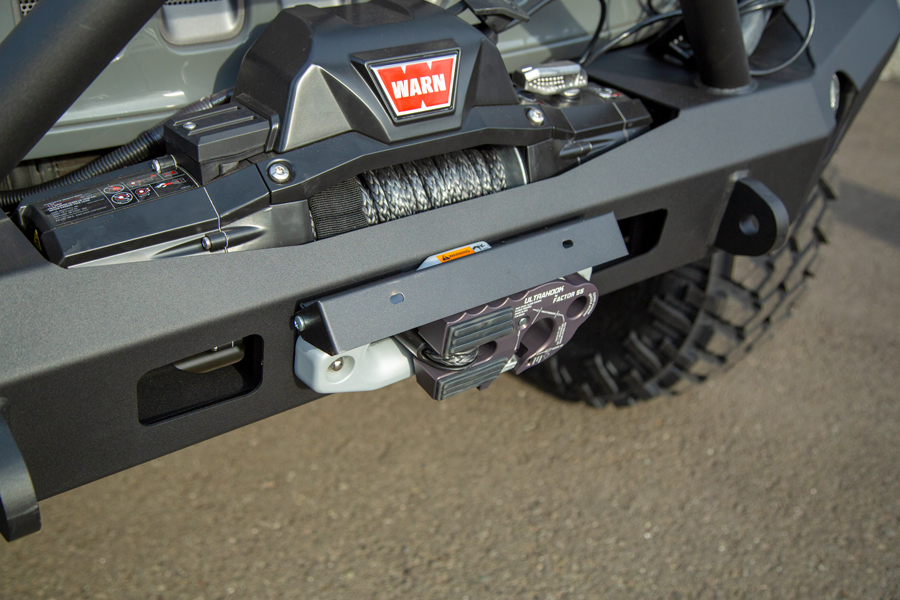
We soon found out that the installed the Tuffy License Plate Relocation Bracket doesn’t stick out far enough to clear the Factor 55 Ultrahook.
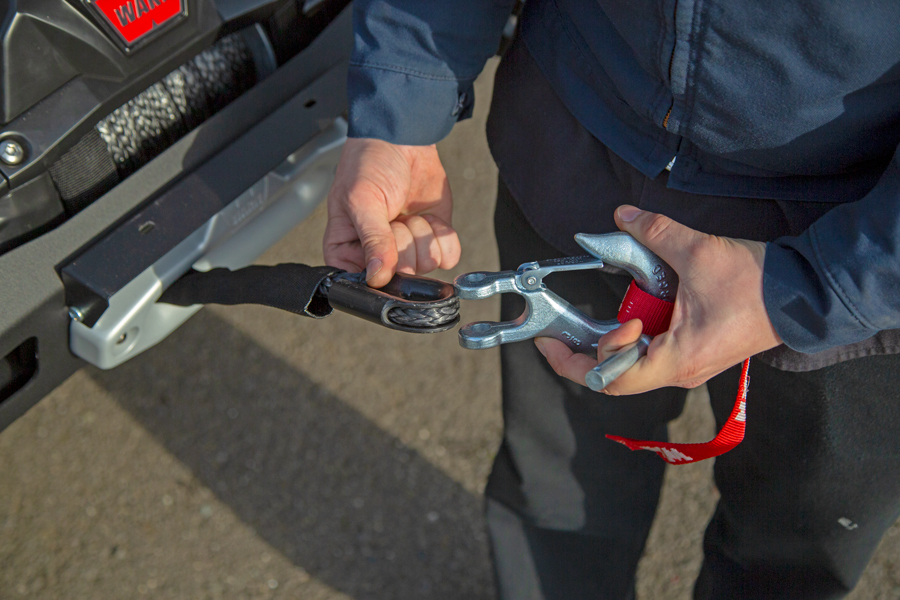
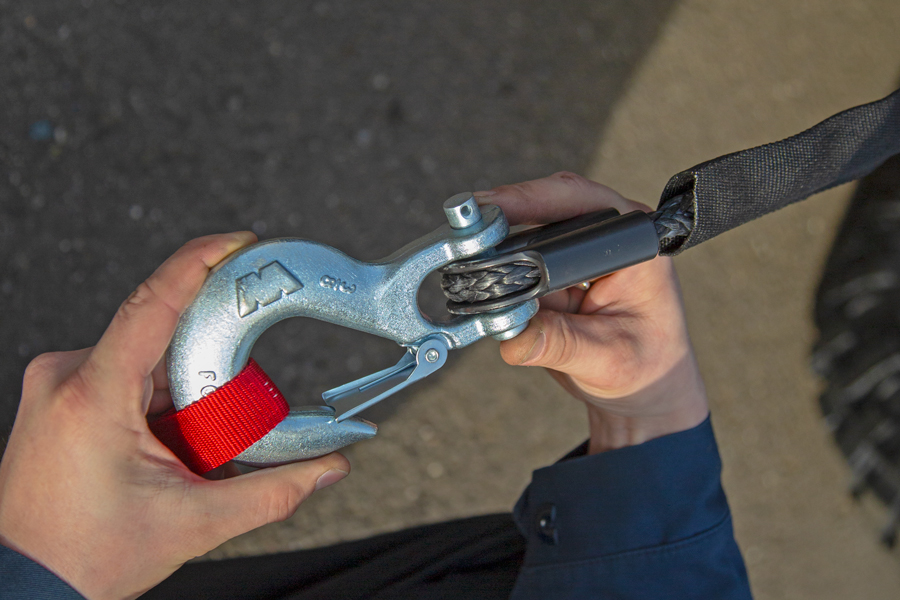
So until we could come up with another license plate mount solution, we went with the original Warn hook that came with the winch. Slide the hook over the steel thimble on the end of the Warn winch rope.
Insert the retaining pin into the winch hook, make sure the cotter pin hole is opposite the hook opening.
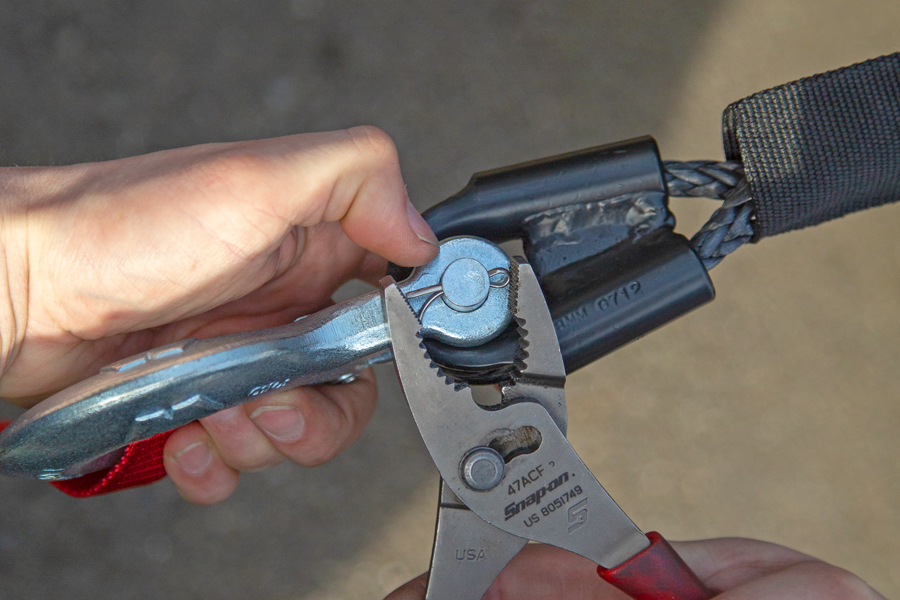
Bend the cotter pin over with a pair of pliers, try to get the ends flush around the retaining pin to lessen the chance of snagging them.
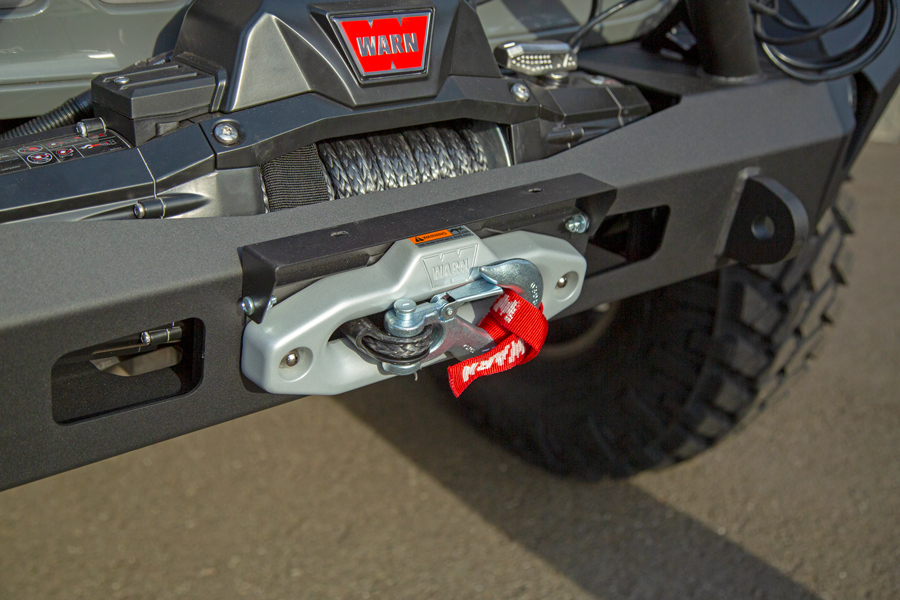
You can run the Warn hook right up against the Warn fairlead, but you have to be careful not to damage the smooth surface of the winch rope channel.
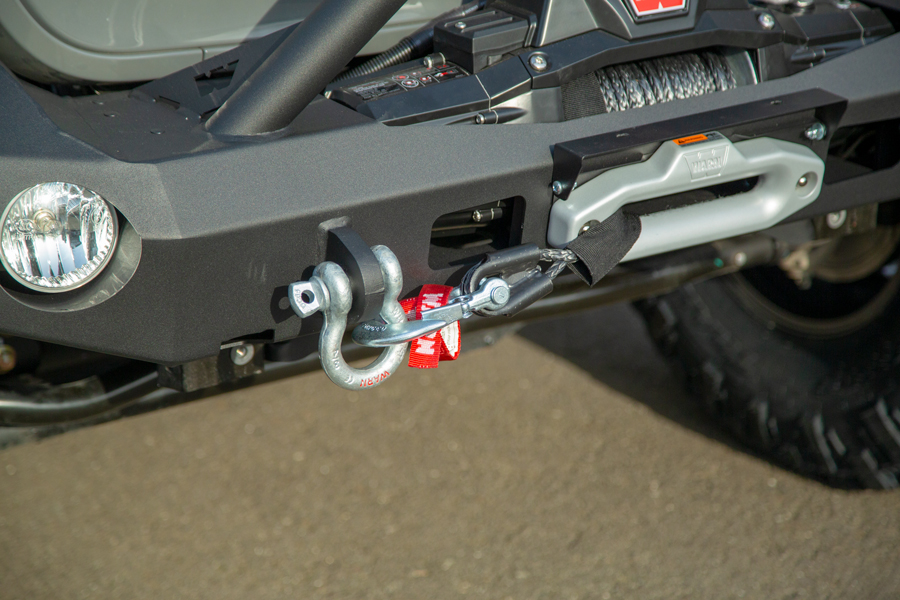
Better yet would be to use a screw pin bow shackle on the recovery point and route the hook and rope over. Once attached, apply a small amount of load to keep the rope and hook tight.
Screw Pin Who-What? The proper terminology is a Screw Pin Bow Shackle. Not D-Ring Shackle. A D-shackle is the shape of a D, two flat sides and an arc between the flat sides. They are only designed to be pulled in a straight line. The Screw Pin Bow Shackle has a bow in it that allows you to pull at slight off-angles before loosing a lot of strength. They also have a screw pin, hence the full name.
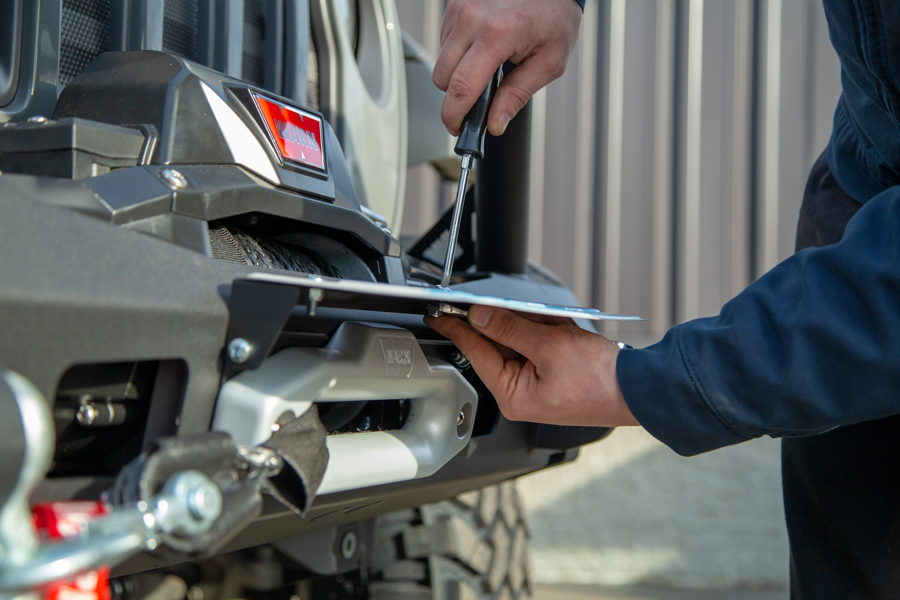
We then attached the license plate to Tuffy License Plate Bracket. The plate flips down to display your license plate and flips up when it’s time for winching.
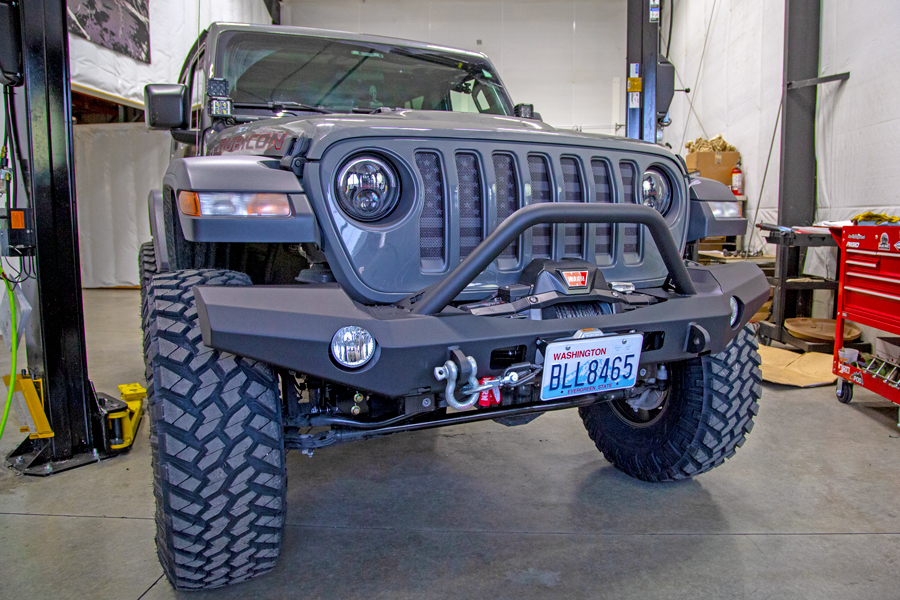
Finished Install Warn Elite Bumper On 2018 JL:
It looks pretty good sitting in the studio, now it’s time to get it out in the wild and get a few more shots.
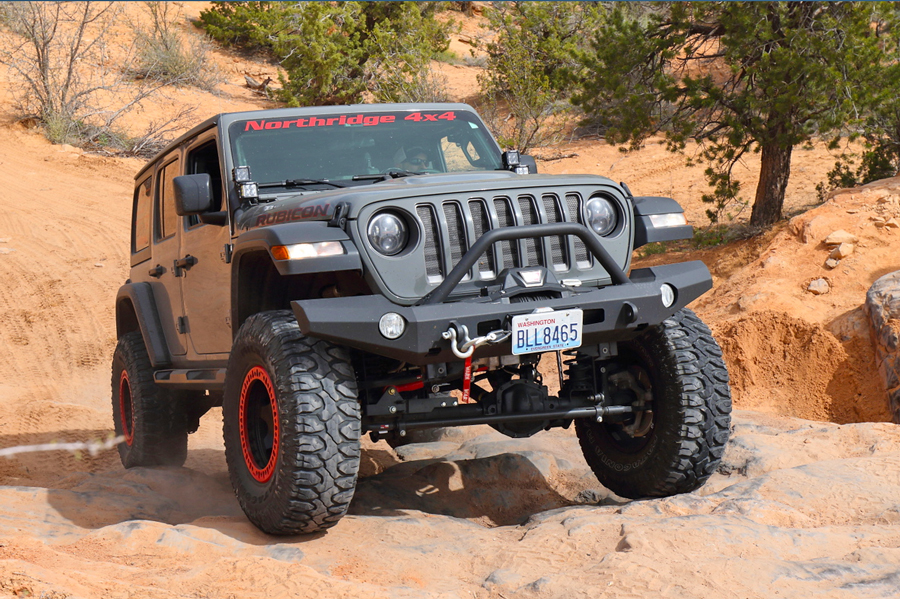
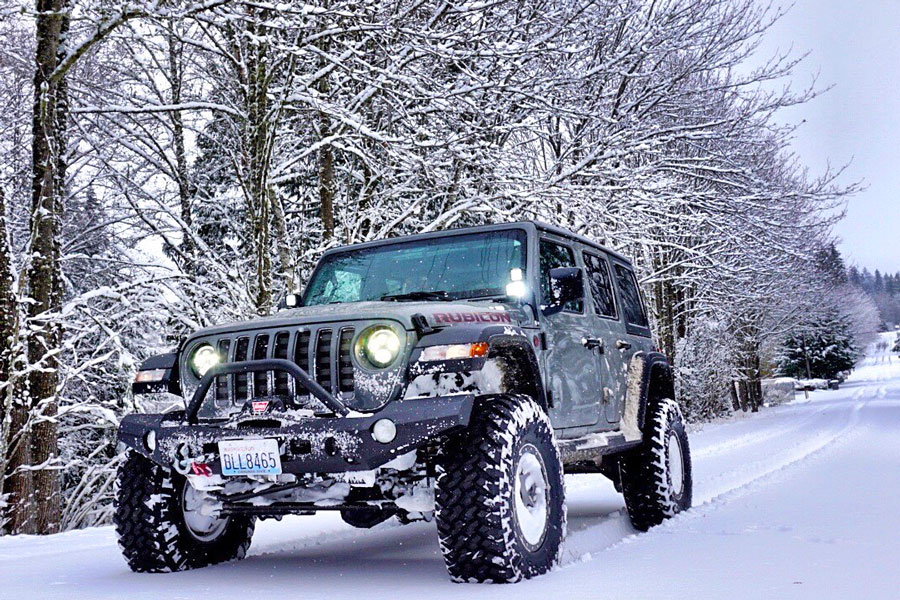
The Warn Elite bumper definitely looks good out on the trail.

