SET YOUR VEHICLE
TALK TO A PARTS EXPERT TODAY!
FREE SHIPPING ON ORDERS OVER $70 in the contiguous US lower 48 states
SPECIALS!
Browse By Category
- Auxiliary Lights
- Light Bars
- Fog/driving Lights
- Underhood/rock Lights
- 3rd Brake Light Solutions
- Back Up Lights
- Other Auxiliary Lighting
- Shop All
X Close Search
Results for
Filters:
Stock
Category
Brand
Rating
Price
Stock
Category
Brand
Rating
Price
OH NO!
We couldn't find any results
We couldn't find any results
Search Tips:
- Use different keywords
- Double check your spelling
- Start with something less specific - you can refine your search results later
- Try changing some of your filters below:
Search term:

Adding a lift and bigger tires to your Jeep can start a flurry of upgrades as each item snowballs into the next needed upgrade. One of those is upgrading the factory steering stabilizer to something designed for the added force from bigger tires.
Original equipment Jeep steering stabilizers are designed for factory sized tires. When you start lifting your Jeep and going to larger than stock tires, you’ll find that the stock stabilizer is quickly overwhelmed and the shock load dampening can feel weak and loose.
TeraFlex offers the Falcon Nexus EF 2.1 and the Falcon Nexus EF 2.2 Fast Adjust steering stabilizers that are a direct bolt-in for the 2019+ JL and JT.
The factory JL stabilizer has bushed eyes on each end that bolt into the tie rod assembly on the RH side and the axle mounted bracket on the other side. Any replacement steering dampener needs to either have two eyes on it or an eye on the RH side and an axle mounting bracket on the LH side, which is what the TeraFlex Falcon JL steering stabilizer has.
Removing the Stock JL Stabilizer:
For both stock and aftermarket tie rods, the first step is to remove the stock stabilizer.
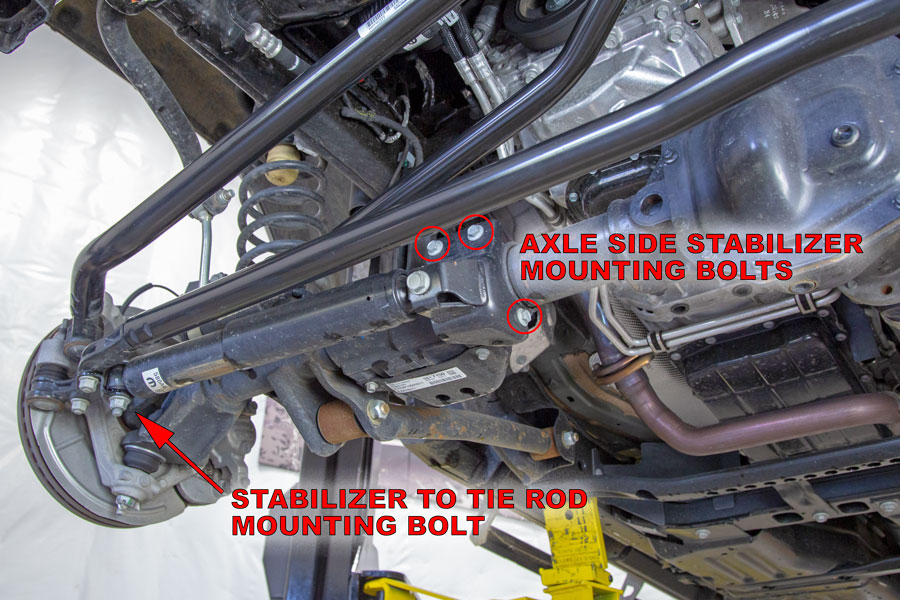
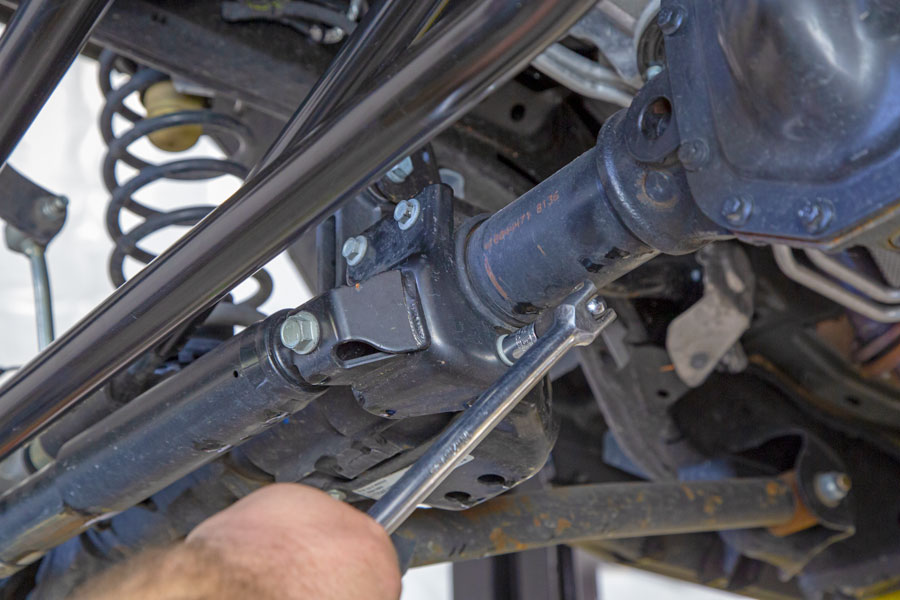
The stock JL stabilizer is held in with four (4) bolts. Three bolts securing it to the axle side and one bolt over on the tie rod assembly.
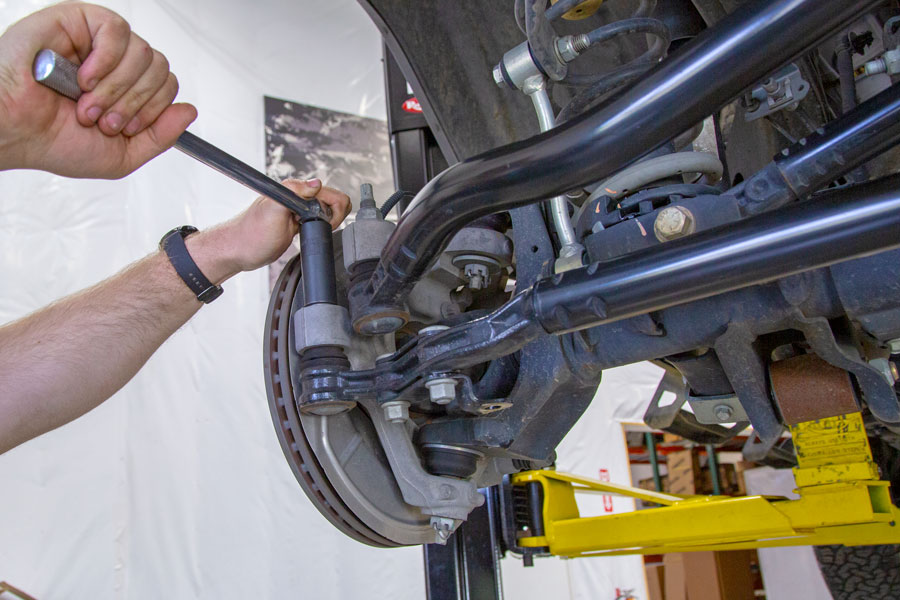
Use an 18mm socket to loosen the nut at the tie rod end of the stabilizer. Then use a 18mm wrench on top to hold the bolt while you ratchet off the nut.
Use a 13mm socket or wrench to remove the three bolts holding the OE stabilizer to the axle housing.
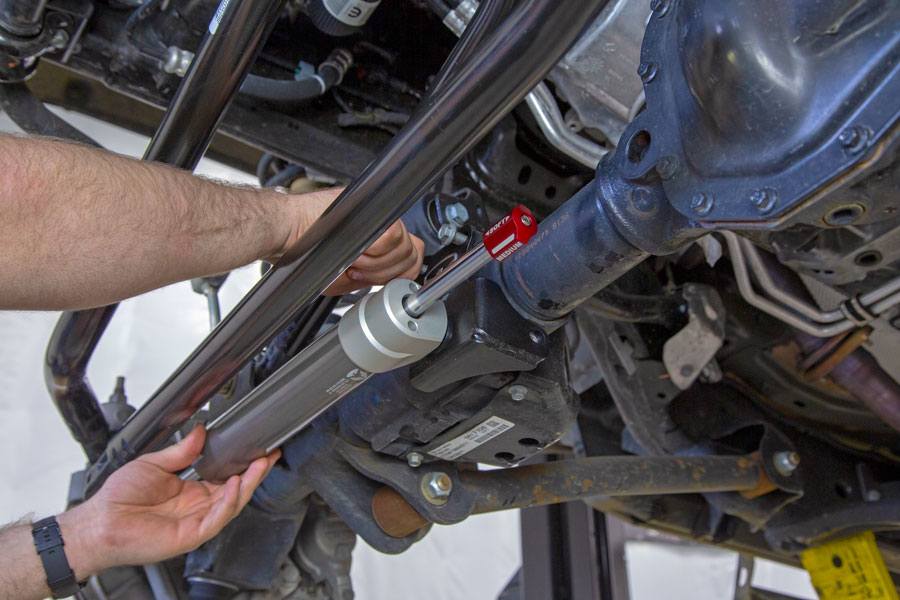
The OE stabilizer drops right out the bottom between the OE tie rod assembly and the axle housing.
Installing an OE Replacement Falcon Stabilizer:
Any OE style replacement stabilizer for the JL needs to have a mounting eye on the rod end and either a mounting eye on the body end or a three bolt mounting bracket like shown below.
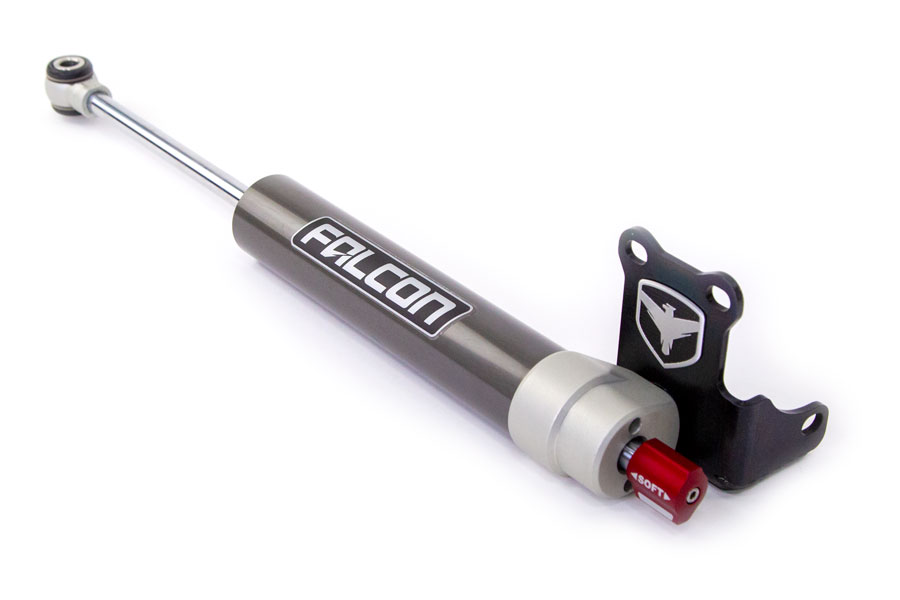
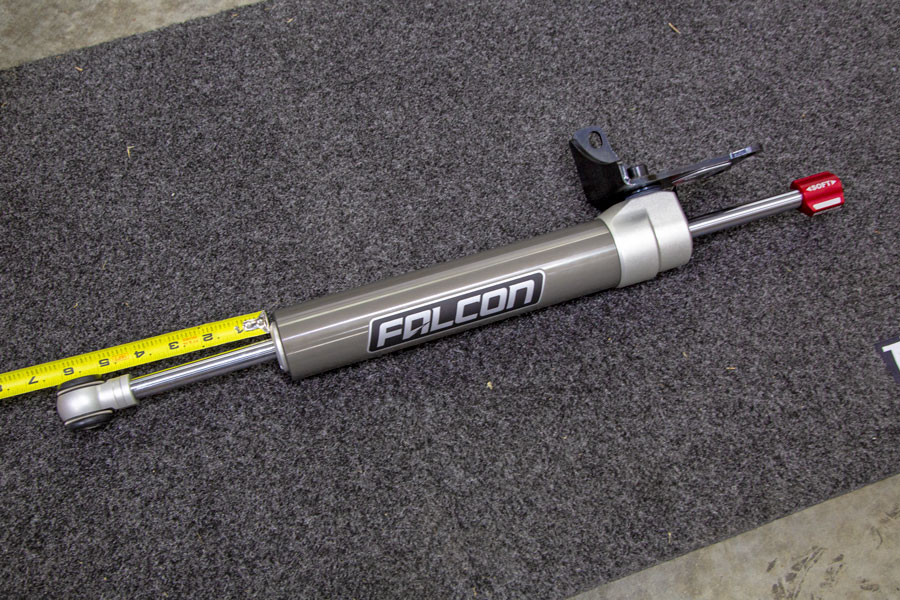
The Nexus EF 2.2 – Fast Adjust steering stabilizer for JL/JTs features OE style stabilizer mounting points. It is easy to identify by the big red adjustment knob on the end of the stabilizer shaft and the black, three hole JL specific mounting bracket.
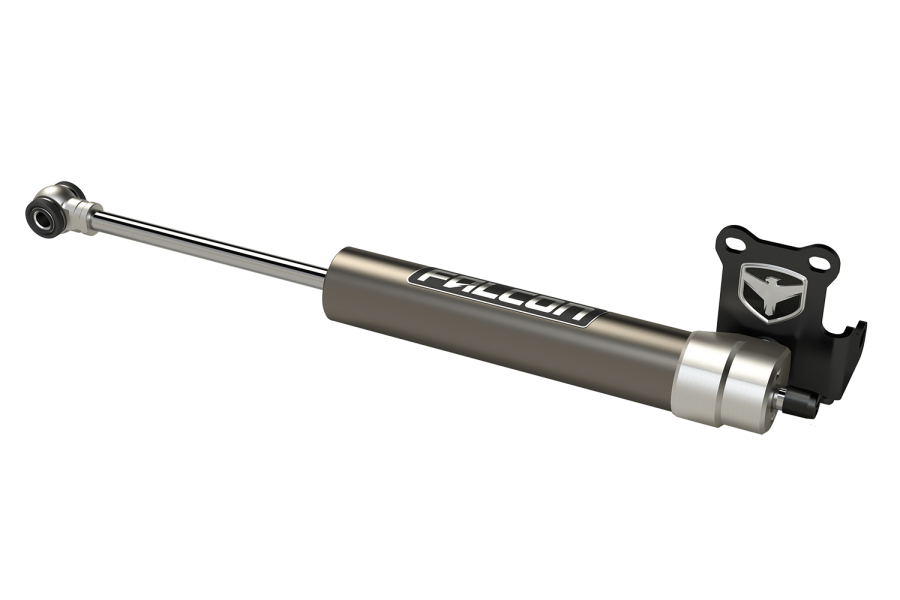
The Falcon EF 2.1 version and is not adjustable. Instead of the large red adjuster handle, the 2.1 has a small black cap at the end of the shaft.
Center up the steering wheel so both front tires are pointed forward. Then center up the stabilizer body on the shaft. Ours came in at 4-1/8″ on each side.
Set the new stabilizer in the OE location and bolt it up. It’s as simple as that to get a high performance Falcon stabilizer in your JL.
Upgrading To Steer Smarts Steering Components:
It gets a little more complicated when you want to run other steering components, like the heavy-duty Yeti tie-rod assembly from Steer Smarts. The help make sure you get the right parts, we are offering a package deal containing the Steer Smarts Tie Rod Assembly and the Falcon Stabilizer.
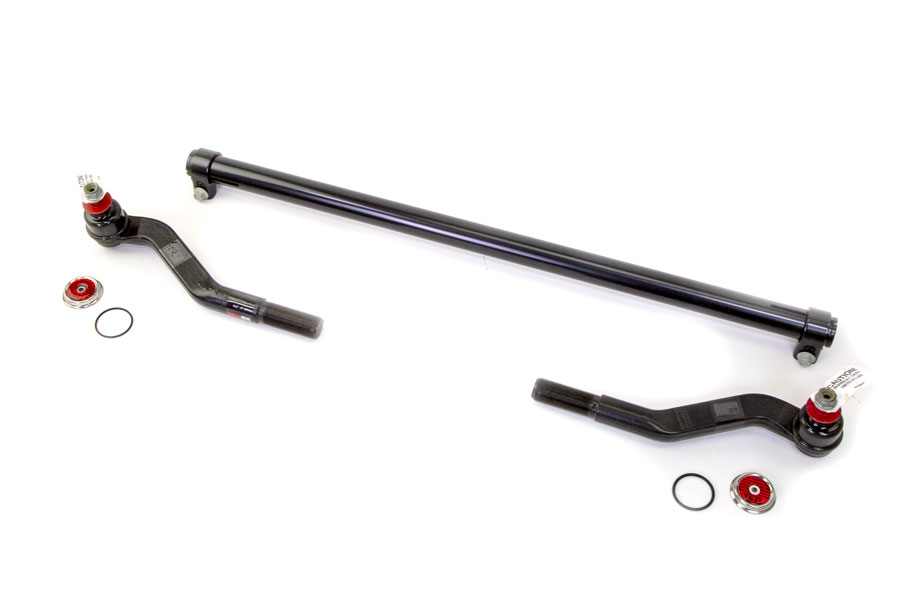
You choose which Steer Smarts Yeti JL/JT Tie Rod you need: Rubicon Only or the Non-Rubicon version.
And which TeraFlex Falcon JL Steering Stabilizer you want: Non-adjustable EF 2.1 or the Fast-Adjust EF 2.2 These specifically work with aftermarket tie rods for your JL/JT and share compatibility with the Jeep JK.
Installing the Yeti Tie Rod and Falcon Stabilizer kit:
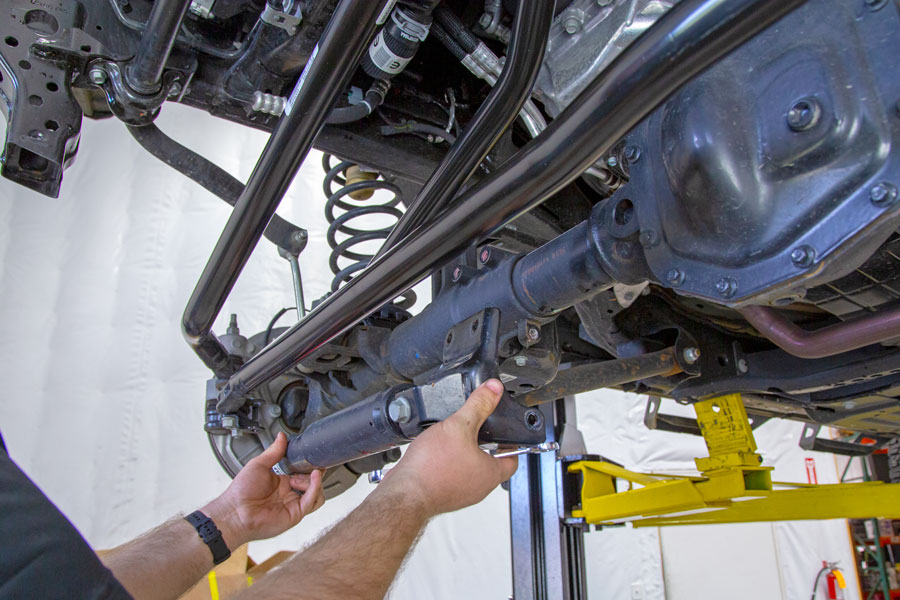
Follow the instructions above to remove the OE steering Stabilizer and then the steps below to remove the OE tie rod assembly.
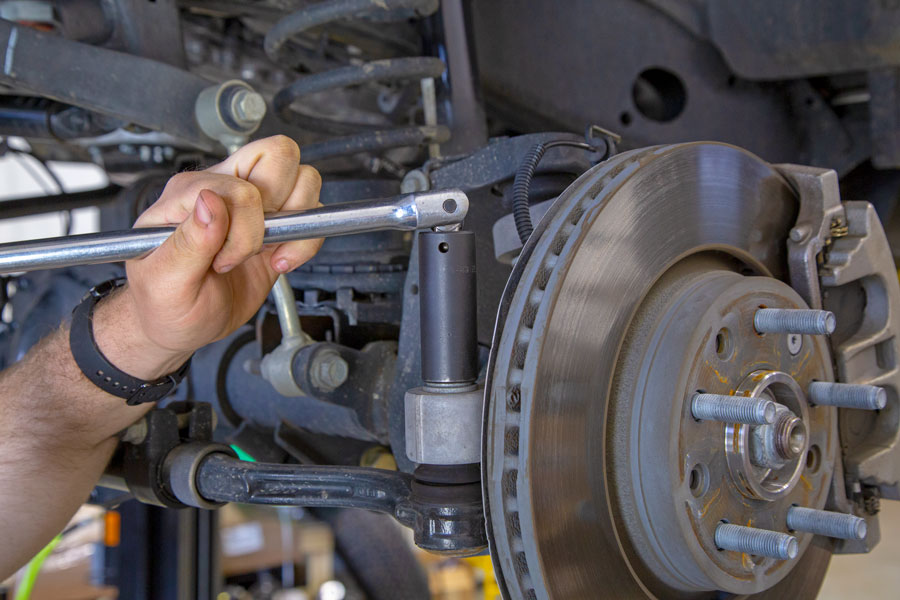
Use an 18mm deep socket and loosen the retaining nut on the RH side OE tie rod. Spin it up until there are just a couple threads holding it on.
Do the same for the LH side tie rod nut.
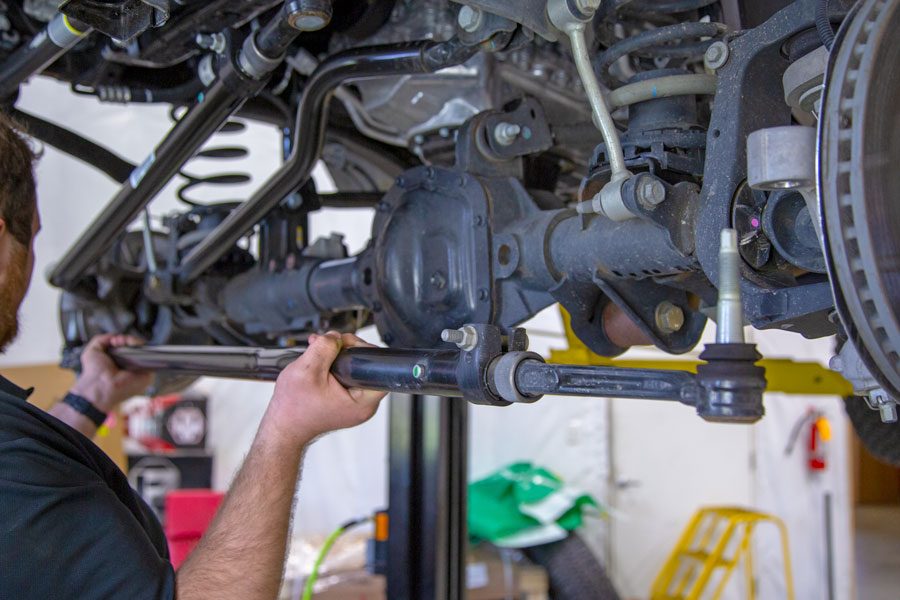
Grab the OE tie rod assembly, unscrew the nuts the rest of the way off and remove the tie rod assembly from the Jeep.
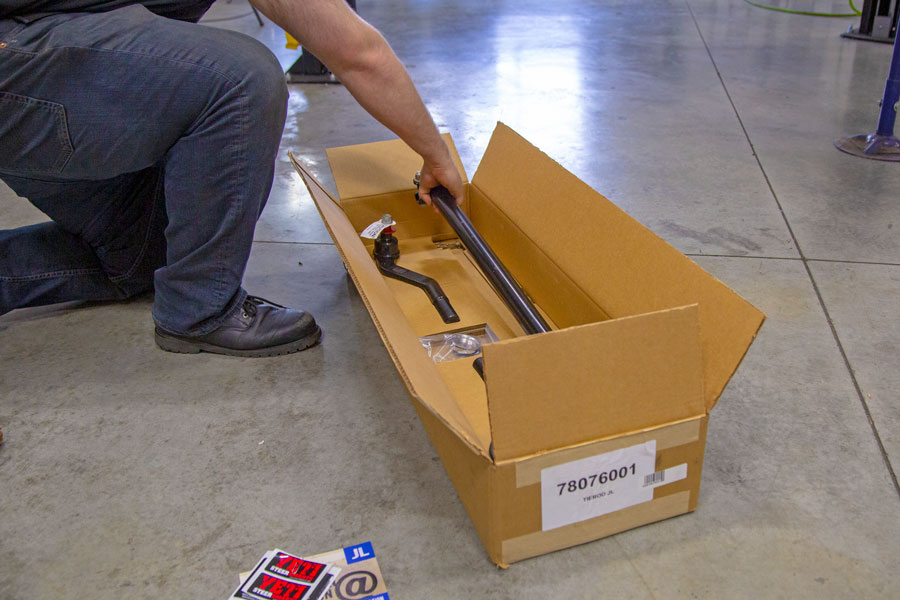
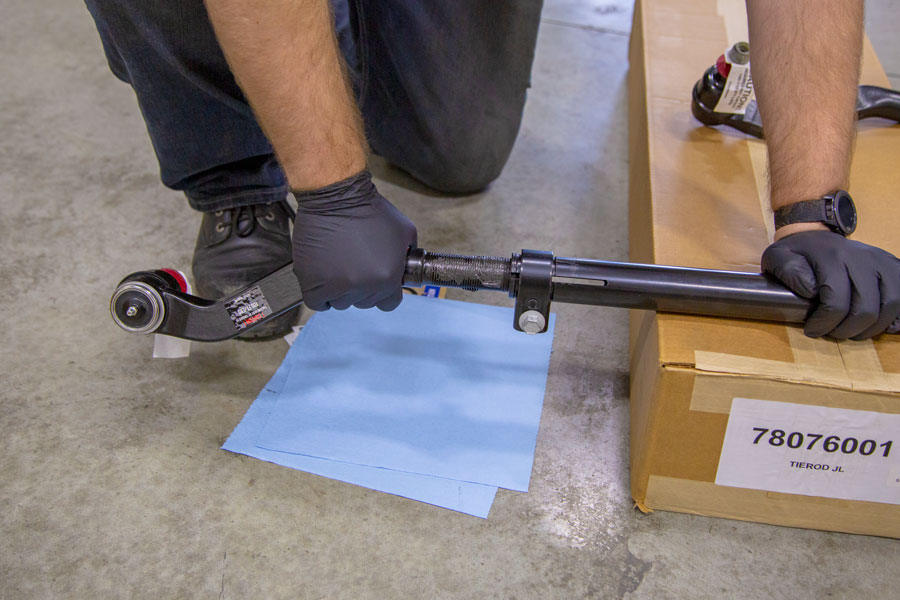
Unbox the Steer Smarts Yeti Tie Rod assembly. We’re working on a Sahara model, so we used the non-Rubicon Tie Rod pn# 78076001. Steer Smarts does a beautiful job packaging their parts, it’s nice to see a company make the extra effort.
Prep the Steer Smarts Parts:
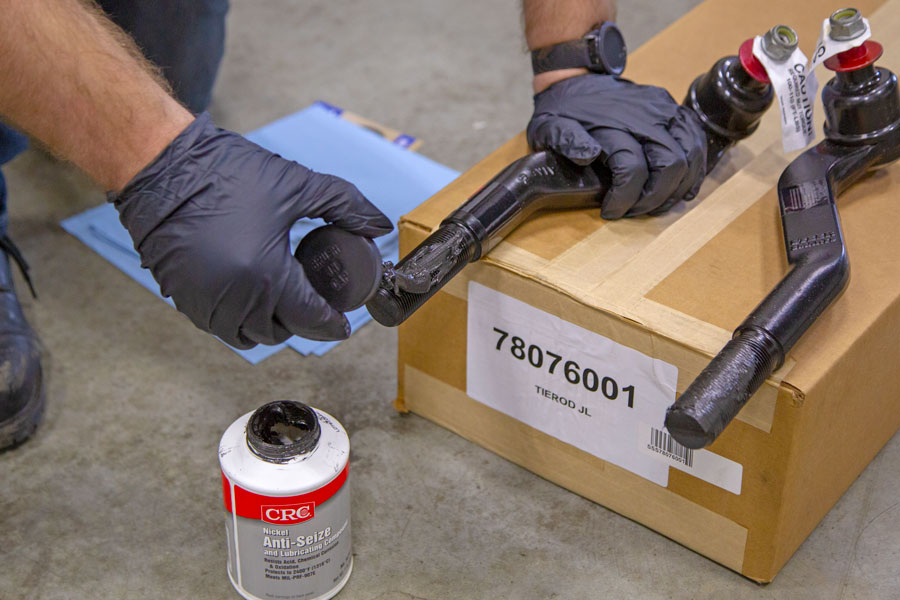
Get some good anti-seize and spread it on the threaded shanks of the new tie rod ends. We’re using nickel anti-seize for this installation, though copper or silver anti-seize would work just fine.
Screw the Yeti tie rod ends into the center link. One side is a typical right hand-clockwise thread, the other side is a left hand-counter-clockwise thread.
***Make sure to thread them in the same amount, leaving the same number of threads showing on each side. We screwed them in until we had about 10 threads exposed on each side***
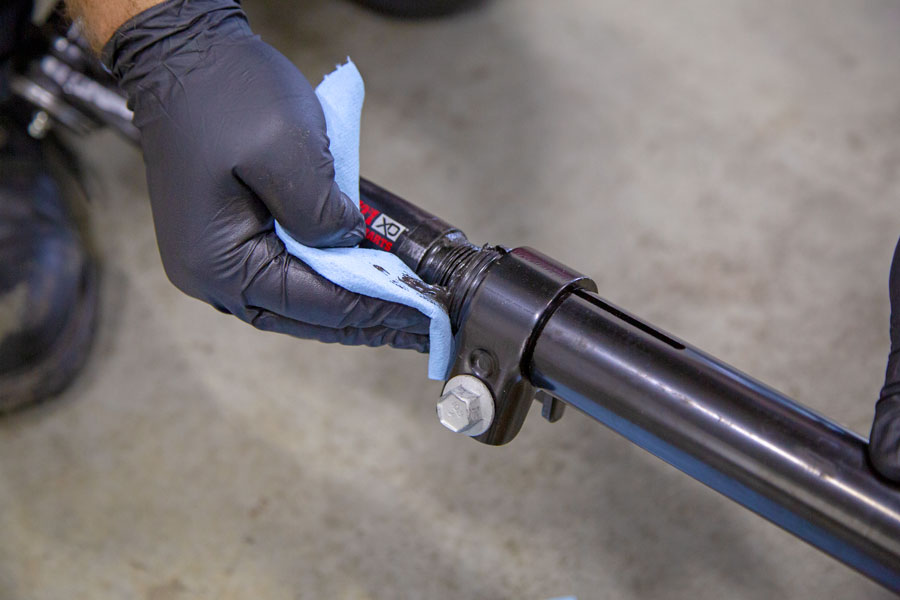
Wipe off any excess anti-seize from the exposed threads. It gets everywhere and makes a big mess, wipe it up now, it’ll save you from a big mess later.
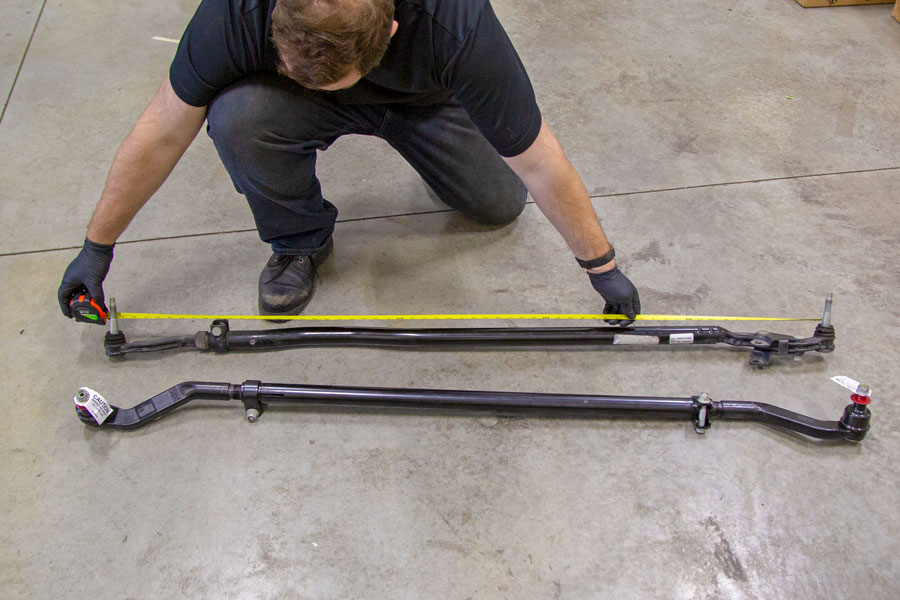
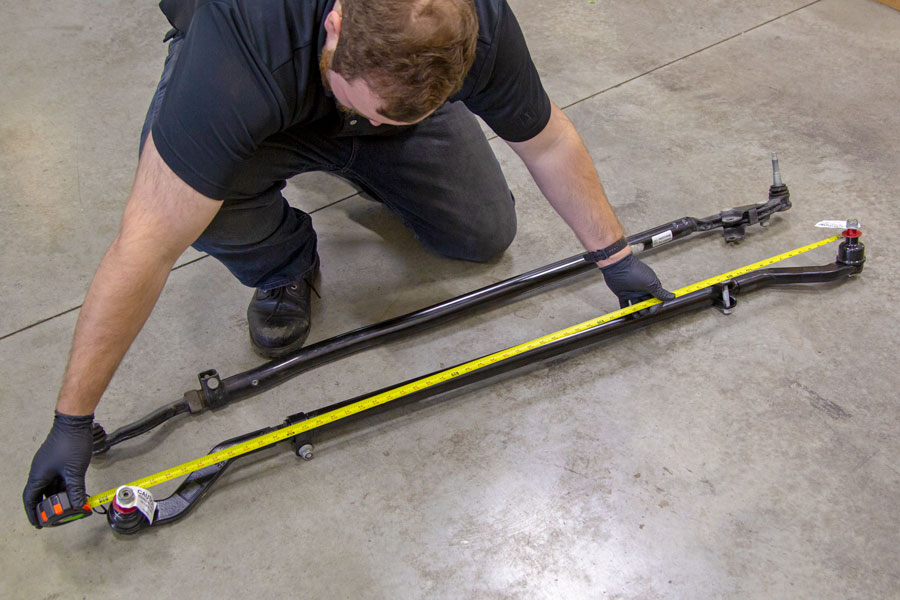
Measure the stock tie rod from center of tie rod shank to center of tie rod shank.
Then match that measurement on the Steer Smarts Yeti Tie Rod Assembly by rotating the center link forward or backwards, whichever way moves the tie rods ends to match your needed measurement. ***Do not tighten the center bar locking clamps at this time.***
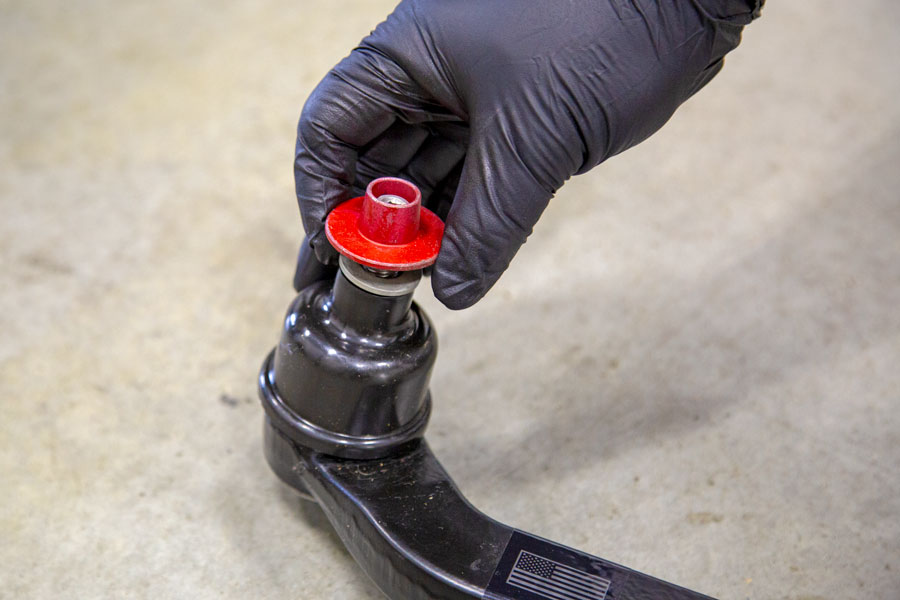
Remove the top nut, the red taper sleeve and the washer underneath.
Then remove the plastic protection boots and toss them. The tie rod assembly is ready for installation.
Installing the JL Steer Smarts Yeti Tie Rod Assembly:
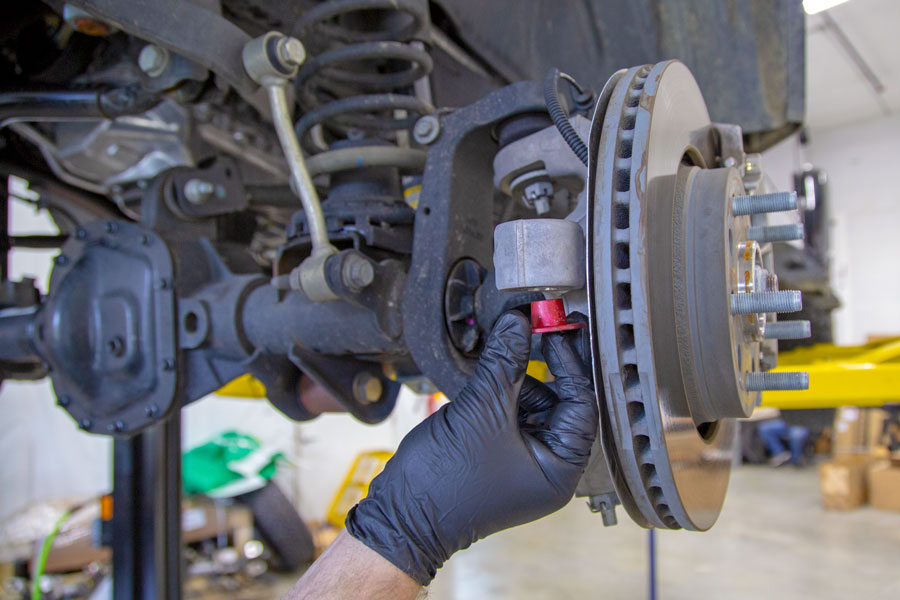
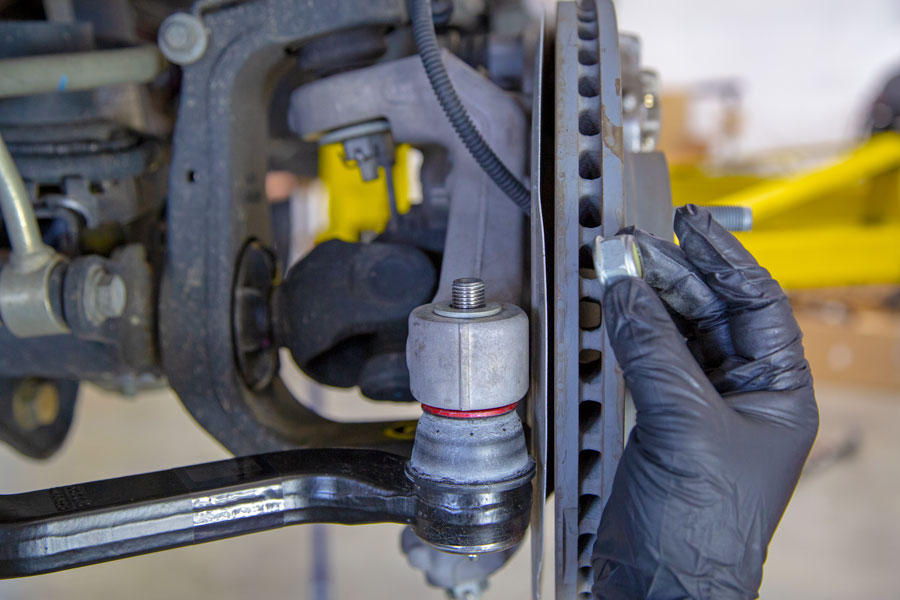
Push the red taper sleeves up into the steering knuckle.
Lift the new tie rod assembly up, sliding the tie rod stud in through the taper sleeve and up into the steering arm. Set the washer on top and screw the nut down hand tight. Repeat on the opposite side. ***An extra set of hands to lift and align the other side at the same time is a big help***
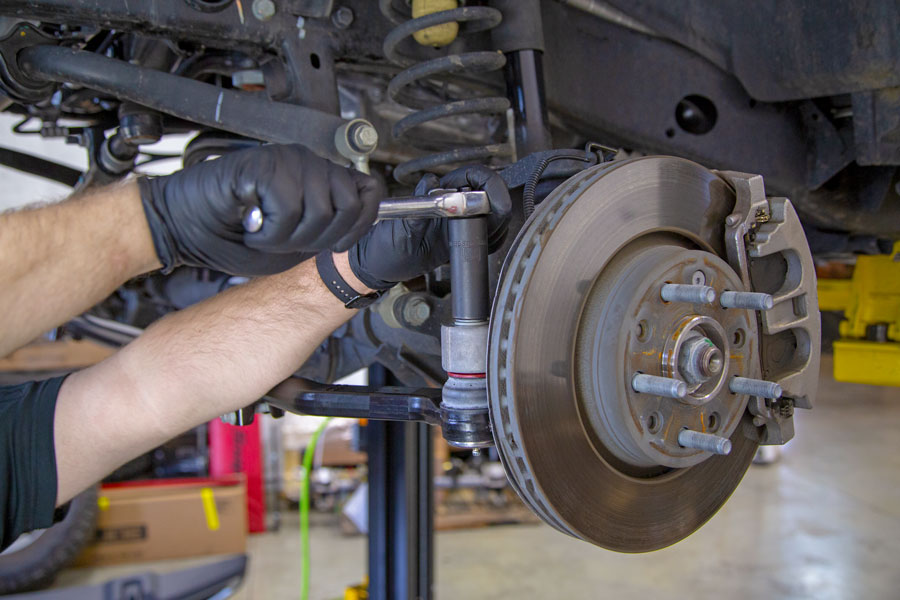
Tighten the nut with a ratchet and deep socket.
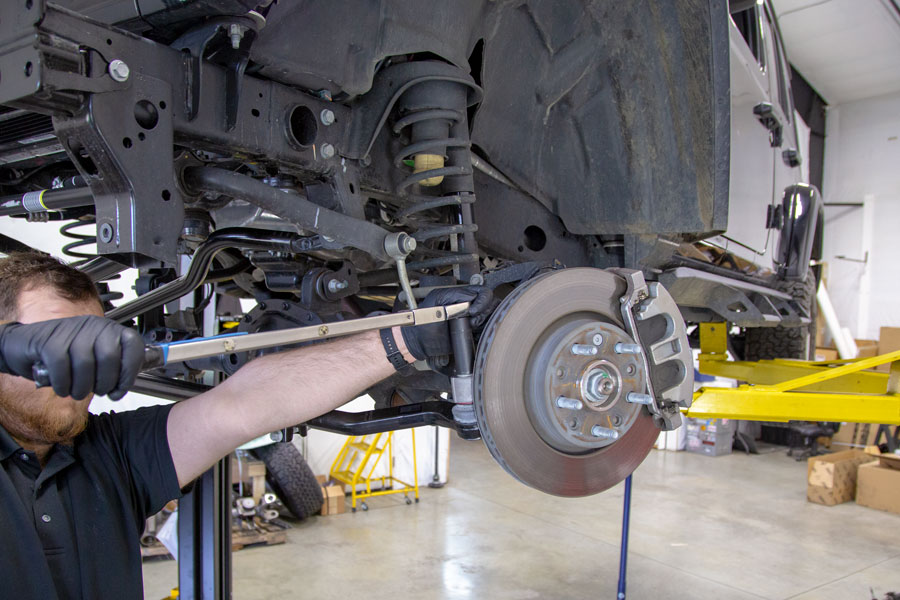
Torque the Steer Smarts tie rod nuts to 110 ft-lbs.
Steer Smarts include a handy Torque Spec sheet with each kit.
Reinstall the tires, torque to 130 ft-lbs., then set the toe measurement.
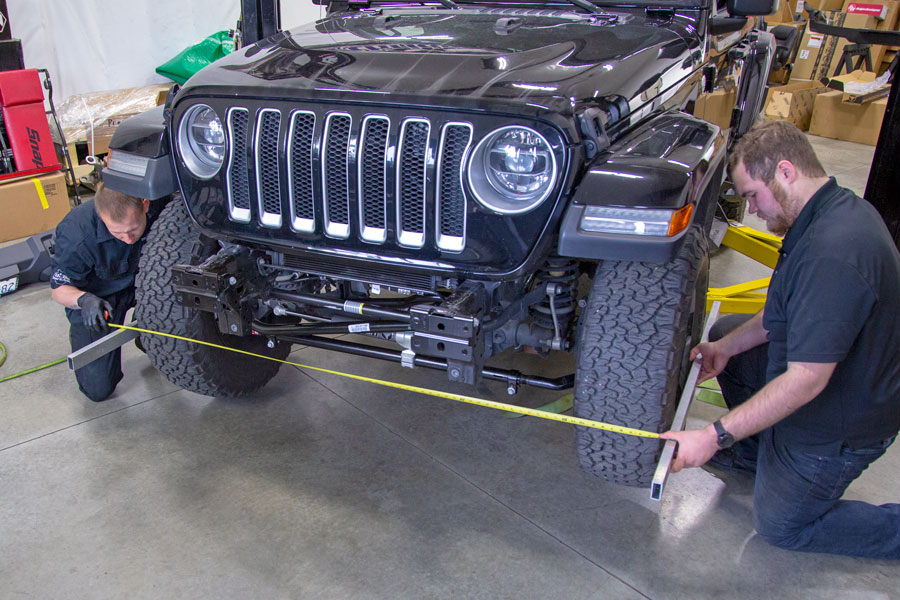
We used two pieces of rectangle aluminum tubing that extends past the ties on each side. Measure the distance between the two tubes in front of the tires and behind the tires. You want the front measurement to be 1/16″ to 3/16″ narrower than the rear.
If you matched the measurement between the old and the new tie rod assembly, the toe measurement should be within that range. If it needs adjustment, turn the tie rod center link forward or backwards to walk the toe in or out to get within the 1/16-3/16″ toe-in range.
*The tires need to be off the ground to adjust the toe*
The amount needed is effected by many different variables, the size of the tire, both height and width. The offset/backspace of the wheel. Even the tread pattern of the tire could dictate needing more or less toe.
**If the toe measurement is not correct, you will see that the steering wheel is crooked and depending on how severe it is off, you may find the ESC warning lights come up on your dash display. You may also experience the dreaded death wobble that all Jeeps tend to see if steering components and/or alignment is off.**
***If you are not comfortable with setting your own alignment, get it close, then take it to your local alignment shop and have it professionally done. Do things right the first time, you’ll be much happier with the results.***
Installing the TeraFlex Falcon Stabilizer:
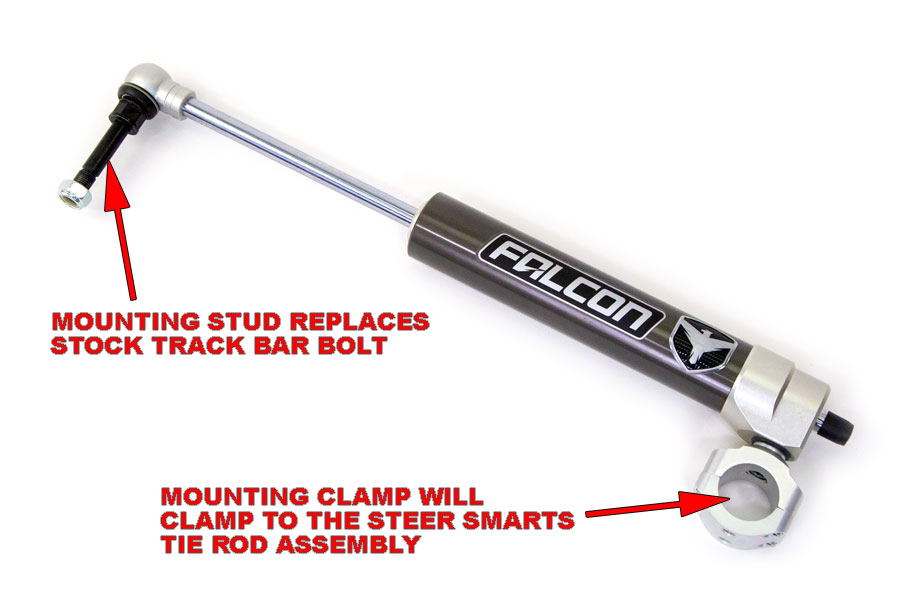
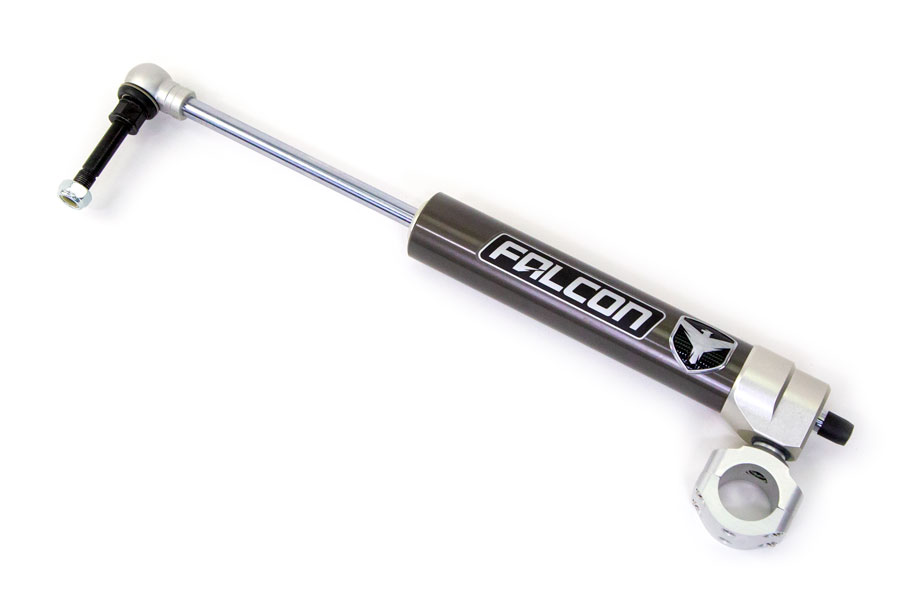
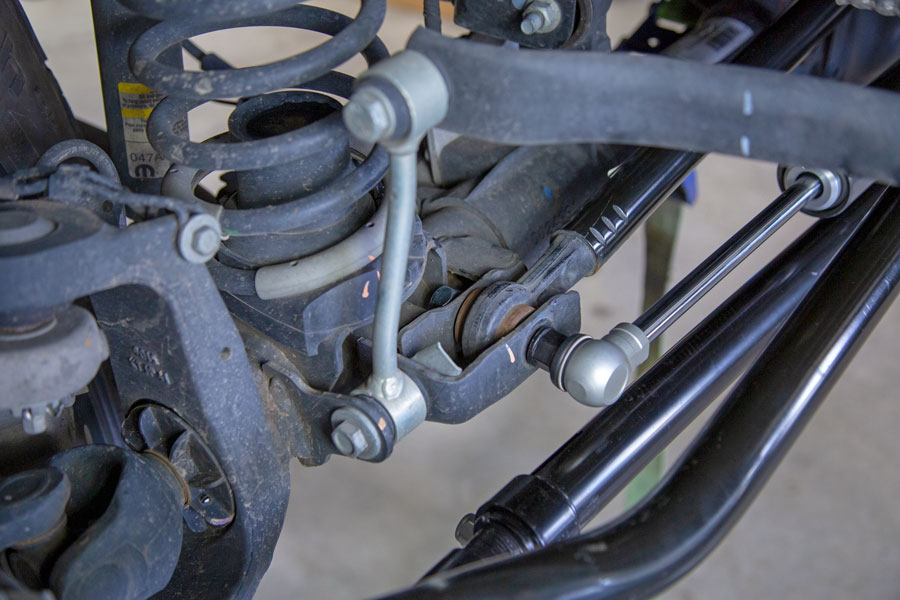
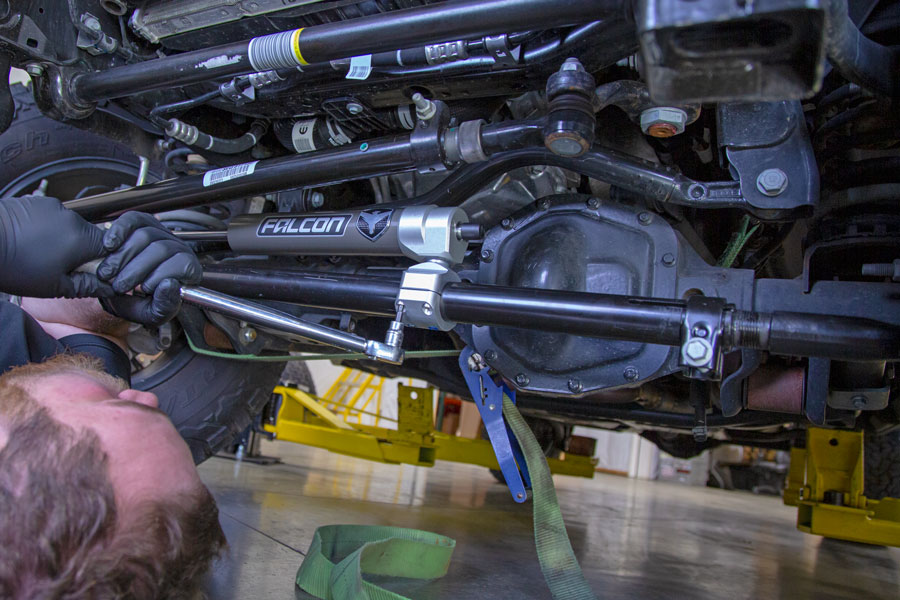
The Falcon JK stabilizer has a stud on one end and a clamp on the other. The stud end will replace the factory track bar bolt. The clamp will clamp onto the Steer Smarts Tie Rod assembly.
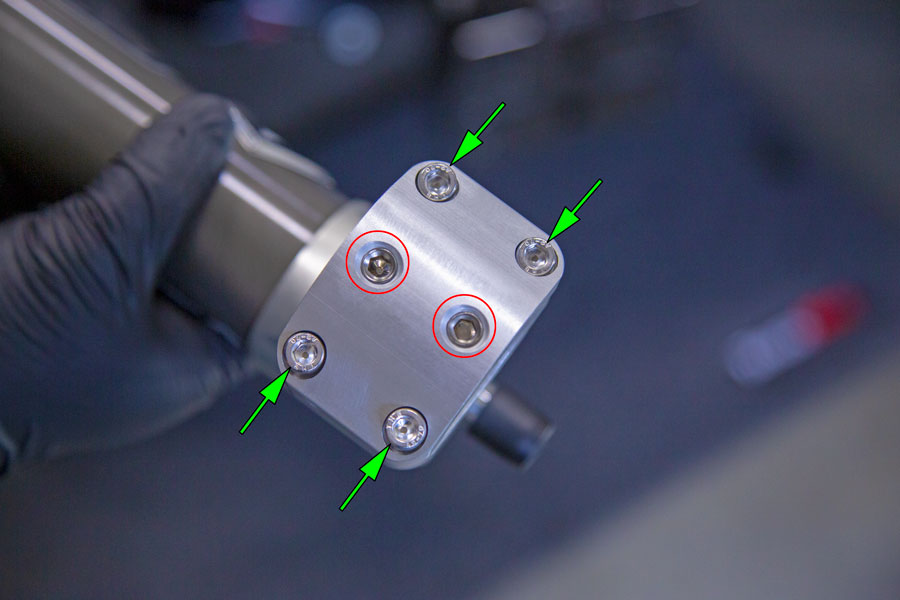
The outer clamp body is held to the clamp base by four M6 bolts (green arrows) and the two center studs (red circles) lock the clamp to the tie rod center bar. Use a 5mm hex bit to back off the center studs and to remove the clamping bolts.
Prep the Falcon Stabilizer:
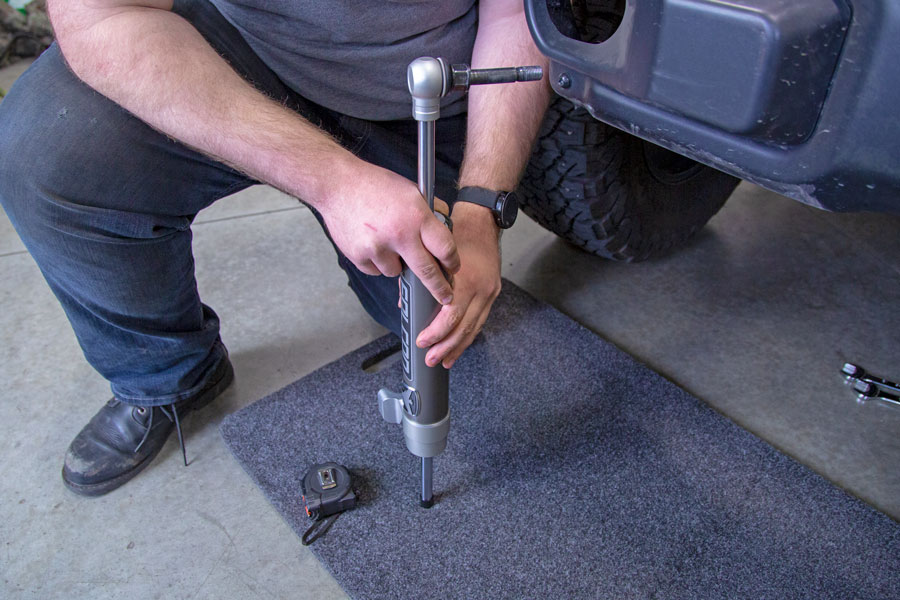
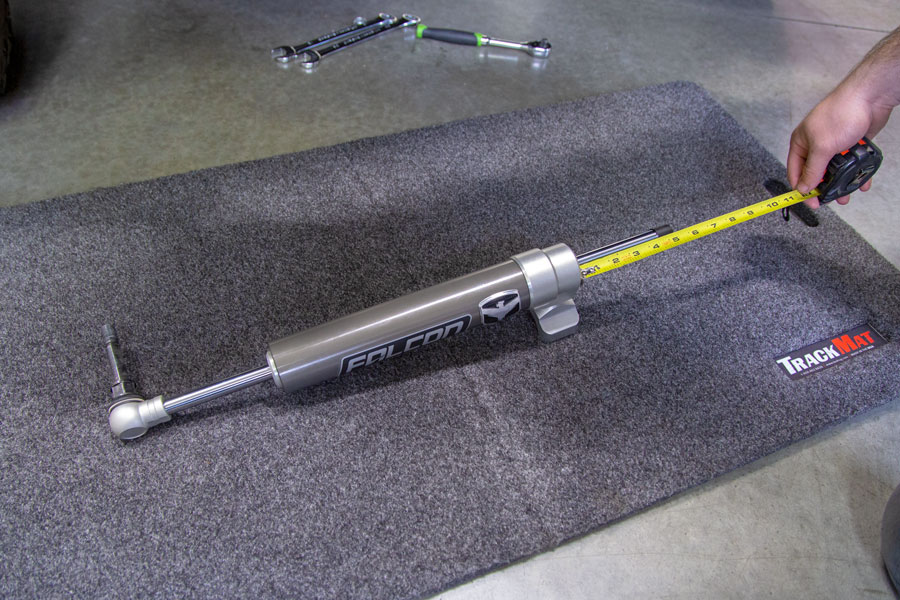
Center the stabilizer body on the the shaft by standing it up on end and pushing down on the stabilizer body.
Measure both side of the shaft to make sure the body is centered. Ours measured out at 4-3/16″ bare shaft on each side.
Installing the Falcon Steering Stabilizer:
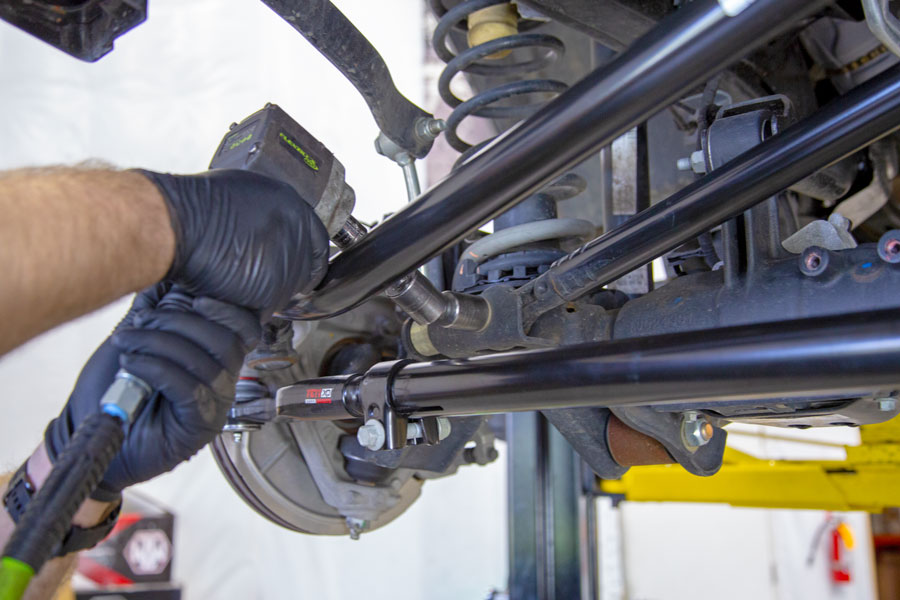
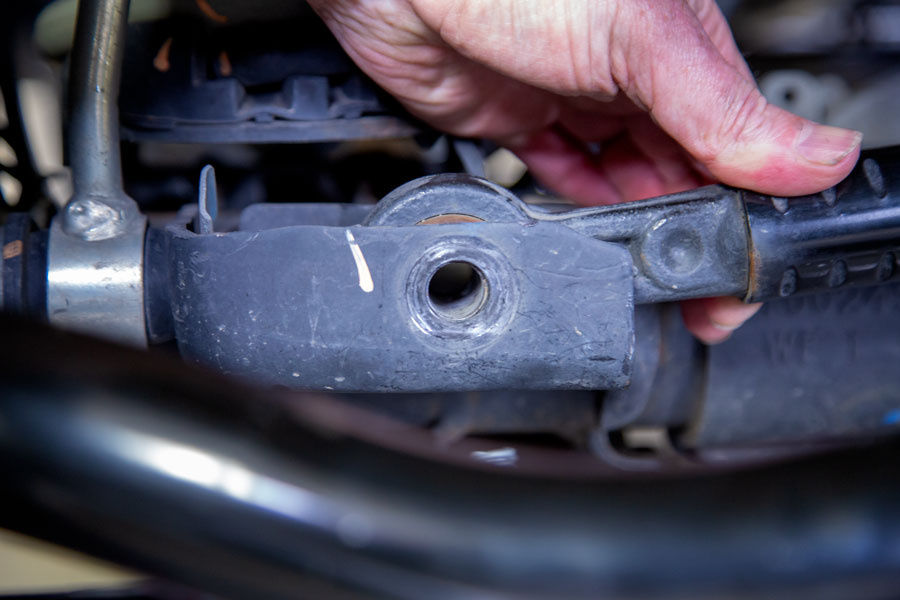
Start with the Jeep sitting on the ground with the tires pointed straight ahead. Then use a 21mm socket and remove the front track bar bolt. A wobbly can help get around the OE draglink.
Take a close look, you will see that once you pull the bolt out, the track bar will often slide back a little causing a misalignment of the holes.
Have a helper turn the steering wheel a little to the right or the left to get the holes to line back up. Be sure to watch your fingers carefully for any potential pinch points!
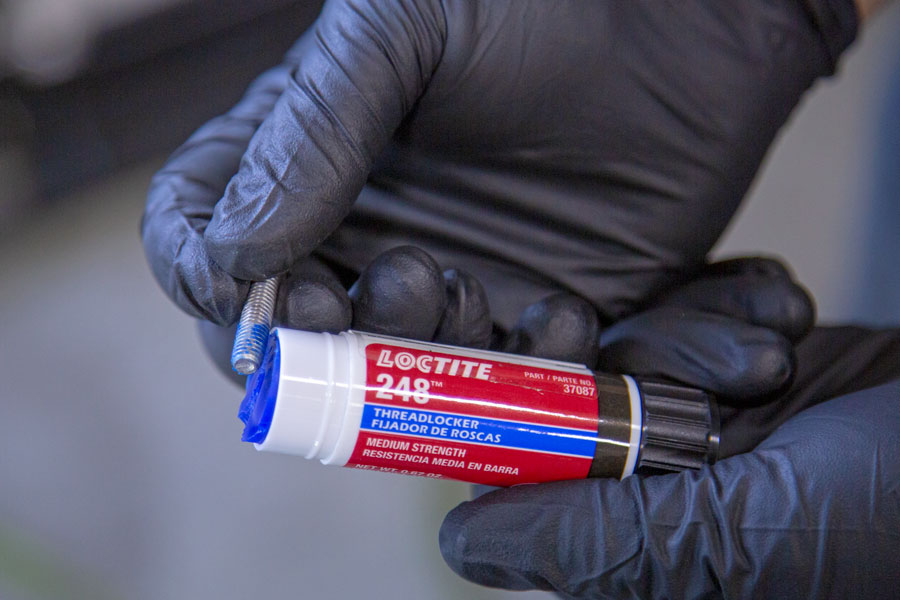
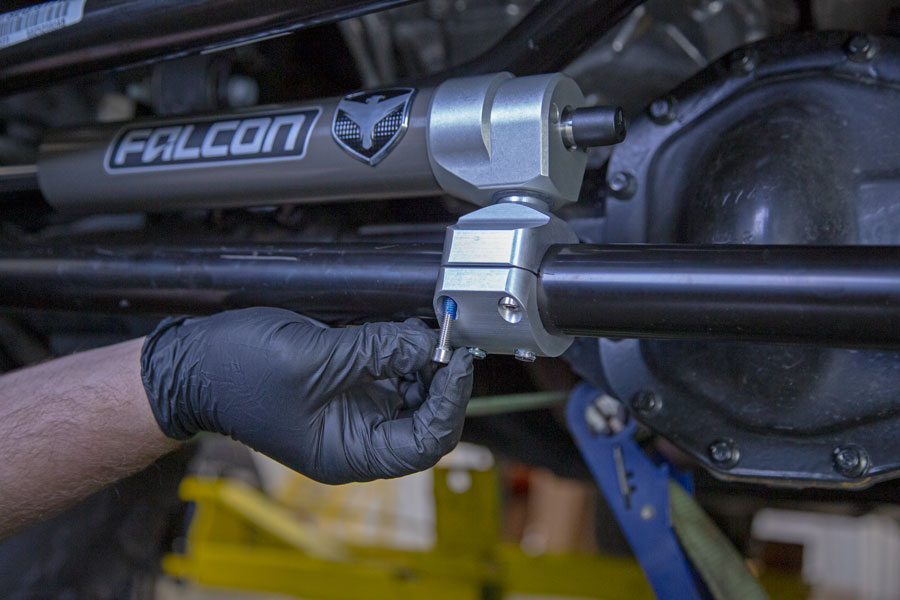
Insert the mounting stud of the Falcon Steering Stabilizer in through the track bar holes. ***Don’t forget a little blue Loctite on the threads of the stud***
Push and wiggle the track bar stud all the way in and screw on the supplied nut. Then set the clamp body up onto the Steer Smarts tie rod assembly.
Use a little blue Loctite on the stabilizer clamp bolts.
Install the bottom clamp and screw the bolts in until they are just barely snug. You want to be able to rotate the clamp on the Steer Smarts tie rod to adjust for clearances.
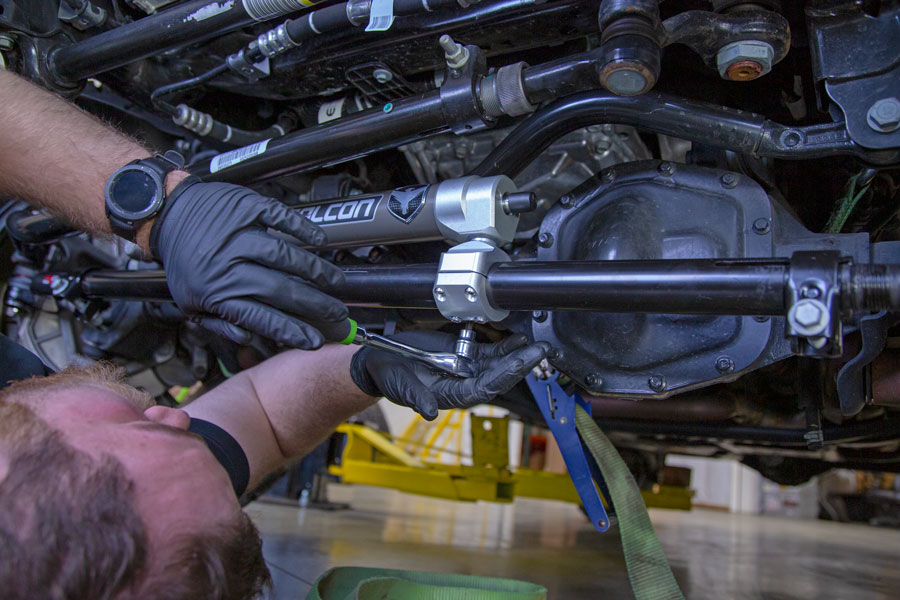
Using a 21mm and a 22mm wrench to tighten the nut onto the stabilizer mounting stud. Use the 22mm wrench from the top to hold the nut and the 21mm to turn the hex shank of the stabilizer stud. Tighten securely.
Set the stabilizer body back at a slight angle to clear the drag link and the track bar, then use a 5mm Hex bit and tighten the clamp bolts. ***Make sure your 5mm hex bit is in good condition or get a new one, we stripped out the hex on one of our bolts due to our bit being a little worn. We picked up a replacement bolt at our local fastener supply house: SS Socket Head Cap Screw – M6-1.0 x 25mm (metric).***
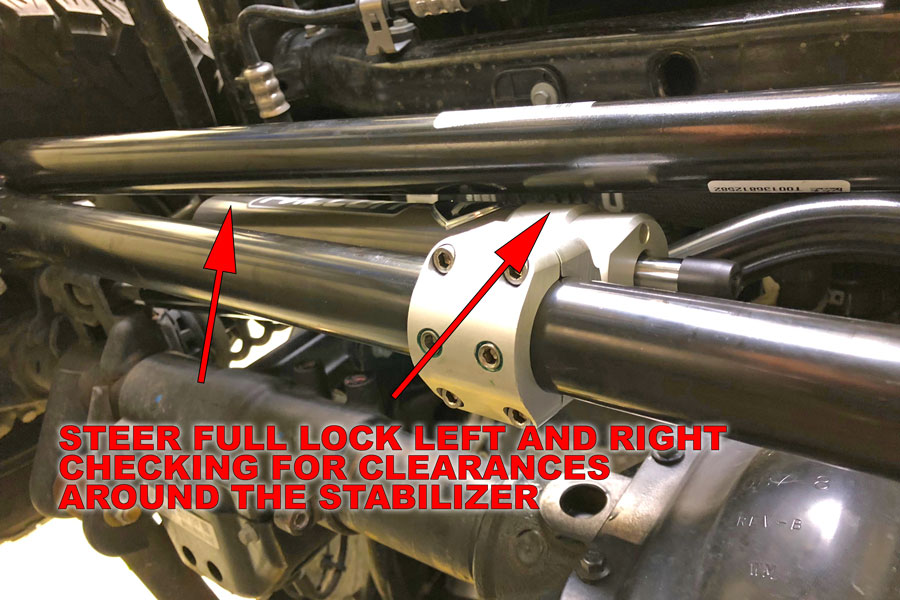
Have a helper steer full lock left and right while you are checking to make sure the stabilizer clears all components. On our installation we found that as we steered full lock right, the drag link would just contact the stabilizer body. We loosened the clamping bolts, rotated the stabilizer body a few more degrees back, retightened the clamp bolts and then checked for clearances again.
Once you are certain the stabilizer is in the perfect position for your Jeep, torque the clamping bolts to 15 ft-lbs. Then add some blue Loctite to the center locking studs, tighten and torque to 15 ft-lbs.
***Now it’s time to go back and turn the Steer Smarts clamps on the tie rod center link so they will not hit anything during steering and suspension articulation and torque to 45 ft-lbs.***
***Check and double check all clearances multiple times, you do not want to find out something is hitting or binding while you are out driving.***

The installation is now finished. Check out your handy work and then go take it for a drive.


